
Sitemaps
Manage Sitemaps
The Manage Sitemaps web page displays all the sitemaps currently setup for the site.
By default, the "Dashboard" sitemap should be the first one created.
Note: It should never be deleted.

To edit the properties of a sitemap, select the pencil icon to the right.

You can update the Description and Demographic fields as desired. The Demographic field represents the expected value for the demographic pointer you are using to make the sitemap dynamic. Typically member type is used. Select the Check to Update and save changes or X to Cancel and disregard the changes.

To edit the details of the sitemap, select the Edit button on the left side.

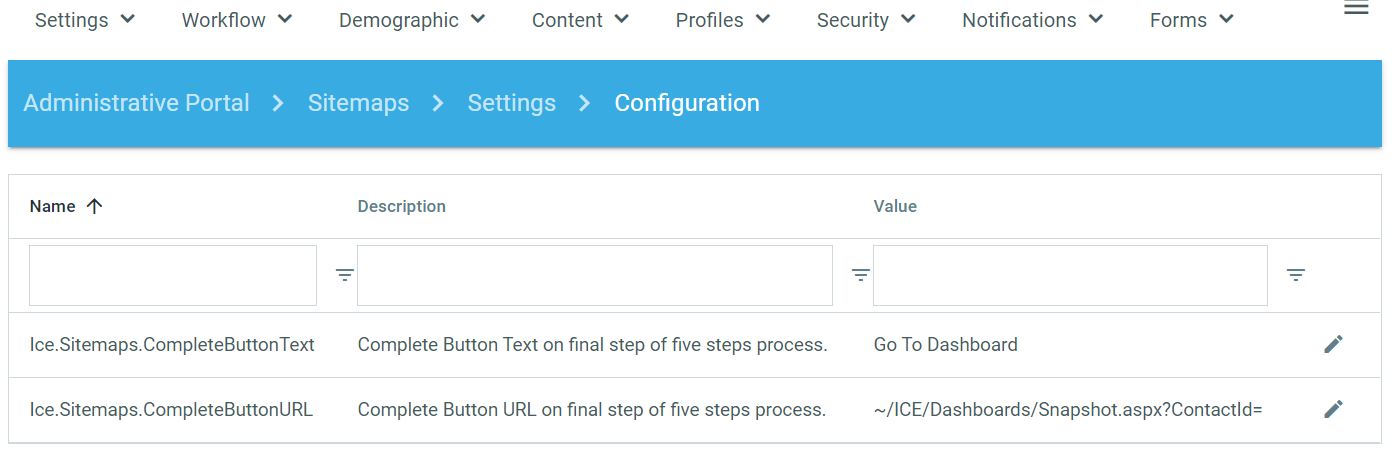
Configurable Go To Task Center Button
This feature allows the ICE Admin to configure the Go To Task Center button text and link that appears on the final step of the 5 step processes in ICE.
Within ICE Admin, select Sitemaps > Settings > Configuration
CompleteButtonText - edit to specify the wording for the button
CompleteButtonURL - edit to specify the page that the user should be sent to once the button is selected (note: it is a partial URL of an ICE page)
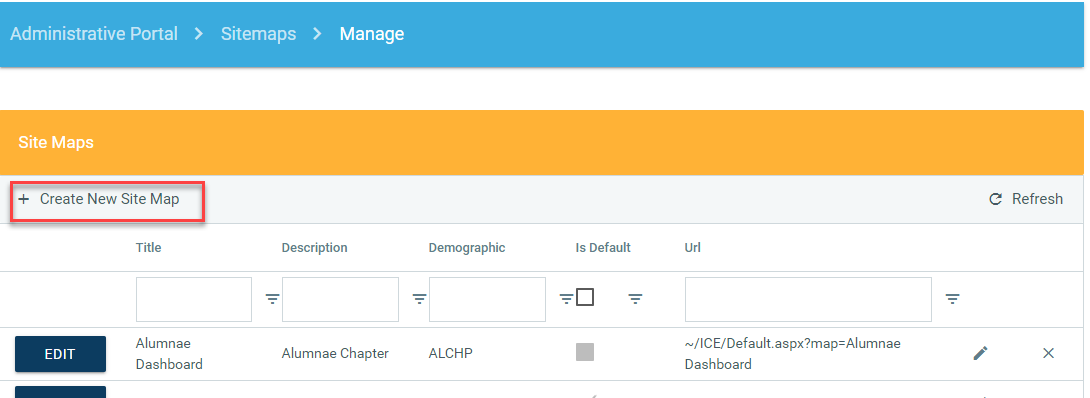
Adding a New Sitemap
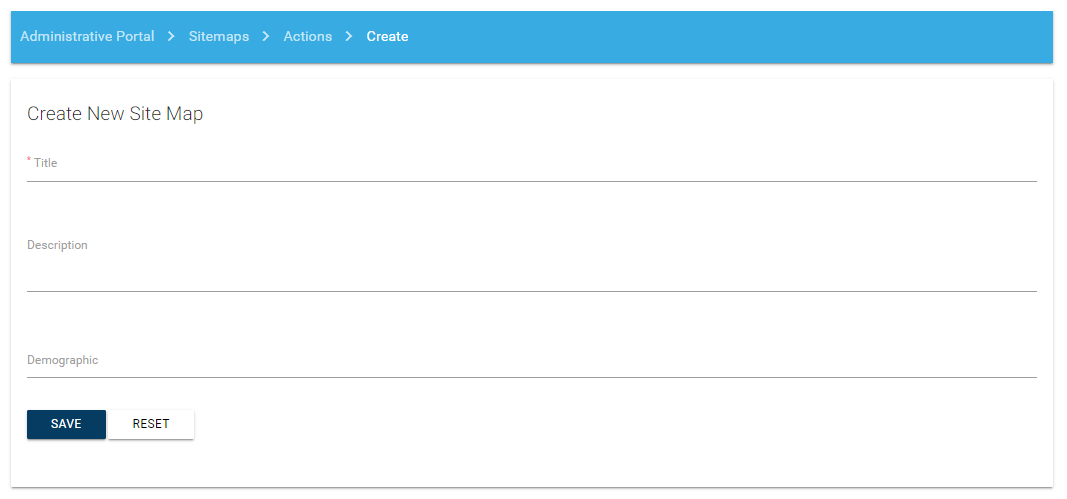
A new sitemap can be created on clicking on Create New Site Map.
The Title field is required when creating a new sitemap.
Description field is optional
The Demographic field represents the expected value for the demographic pointer you are using to make the sitemap dynamic. Typically member type is used.
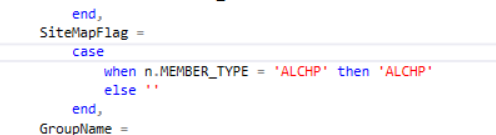
The following setting determines which demographic pointer (aka field) to use when determining which sitemap to display. 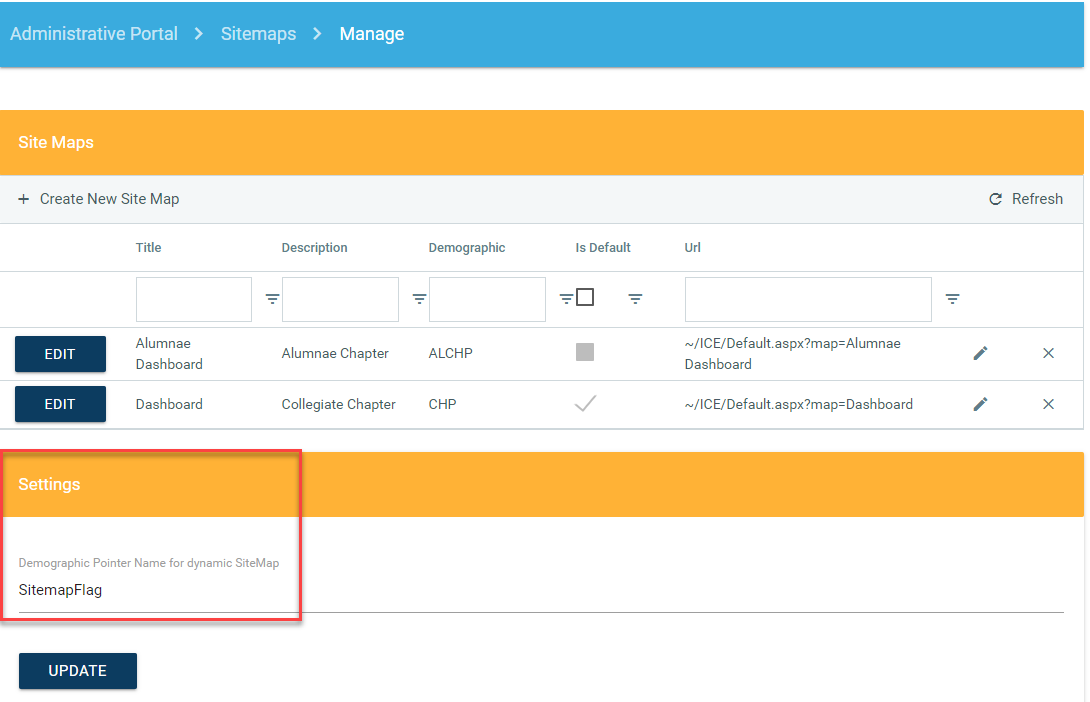
For example: in the above setting, the SitemapFlag demographic pointer is used.
Reviewing the setup of this demographic field under Demographic > Definition, we see that this field comes from the view: vcsi_ICE_DemoCustom. This view comes standard with your ICE installation but will be updated to your specifications. In the view, we have defined this field to provide Name.MEMBER_TYPE to supply the values we have specified in our sitemap properties reference above.
Sitemap Editor
By default, the first "node" of the menu navigation matches with the name of the sitemap. You can certainly edit the label as desired.
Do not delete the node since it is required to add new nodes to the sitemap.
If you have disabled display on hover, make sure any menu items with a sub level does not have a URL defined. When hover is disabled, a click is required to expand the menu to see the sub menu items. If the top level menu item has a URL defined, a user will never be able to select the sub menu.

To add a new node:
Right-click on an existing node from the Tree view panel (the one on the left)
Select Add from the pop-up menu
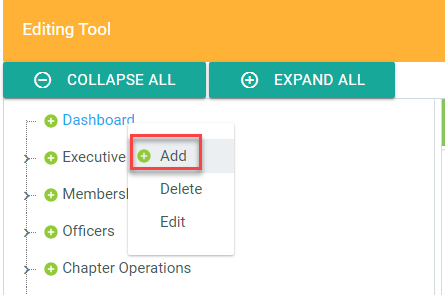
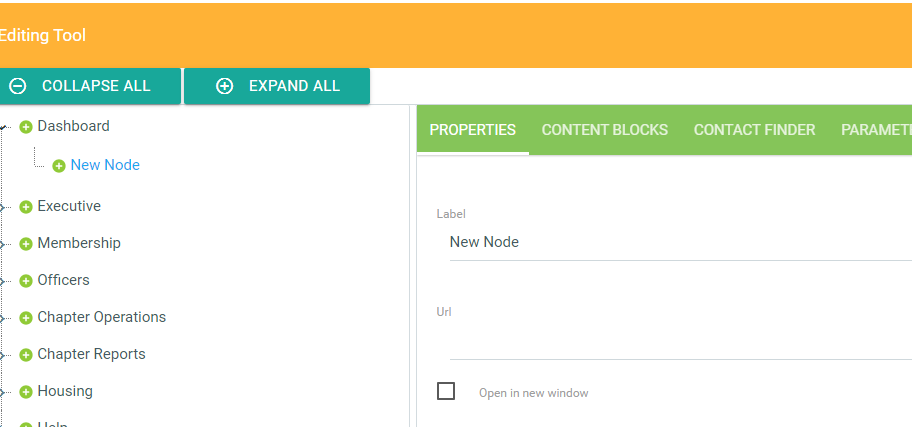
A node will be created underneath the selected parent node. The properties of the new node will then display to the right. Each new node created is given a default label of "New Node"
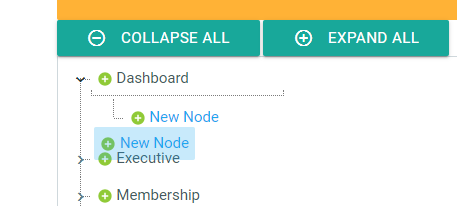
Moving a Node
To move a node:
Left click on the node to be moved
Hold the left click and drag the node to the desired location
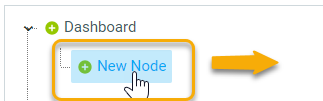
Notice the dotted line when moving a node to help placing the node appropriately.
Properties
The various properties of a node are the following:
Label: Display name of menu item that the user will see
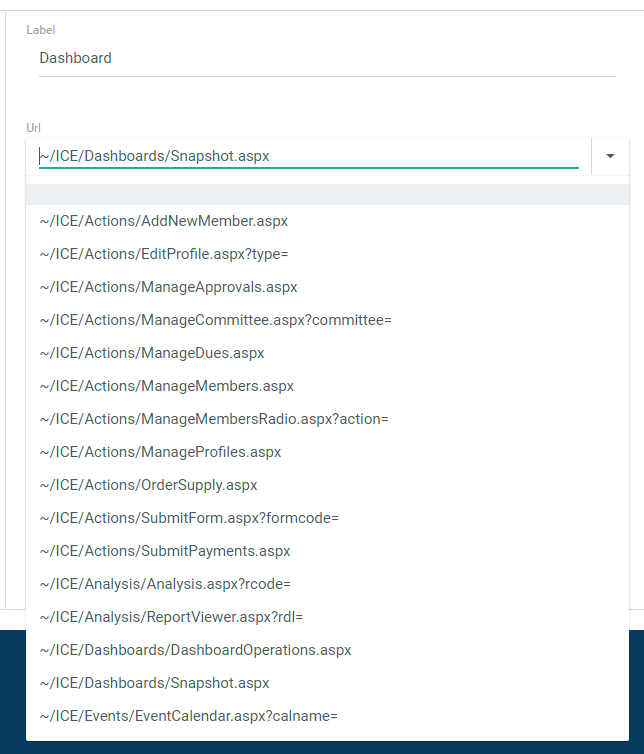
URL: URL for menu item (Note that some URLs require a parameter). A URL from the list does not have to be chosen. A non-ICE URL can be inserted.
Open in a New Window: check if page should open in new web browser tab
Page Title: Title that will appear on page (optional)
Description: Description of menu item for internal purposes (optional)
Icon: Select an icon to appear with label (optional)
Content Block: Select content block to be used on single step page. (see content blocks tab for pages with multiple steps such as manage members)
Security Roles: Select permissions that security groups must have to access menu item. If no roles selected, all ICE users will have access. If more than one security role is selected, a user must have at least one of the selected roles to access the menu item.
Security Visibility: Select visibility option that will comply with security role selected. No Access is selected by default and allows all users to see the menu item but if they don't have the right permissions, they will get the no access message. Hidden only allows those users with the right permissions to see the menu item. Disabled allows you to disable the menu item without deleting it.
Click Save Properties to validate any changes made on the Properties tab.
Each node must have a distinct URL property. Additional parameters may be added to make the same link distinct for different nodes.
Use "?" to add unique value after the standard URL or "&" to add unique value to URL values with parameters.
Examples
~/ICE/Dashboards/Snapshot.aspx?Type=HouseCorp
~/ICE/Actions/ManageProfiles.aspx?Roster=Alumnae
(this will show only members in the Alumnae roster configuration in the edit profile roster)
To make a parameter URL unique, use &
Example:
~/ICE/Actions/ManageMembersRadio.aspx?action=Alumnae&Type=Graduates
Content Blocks
Depending on the URL selected, the Content Blocks tab will display with the applicable content blocks for each step. Click on Edit to modify a content block from the sitemap. 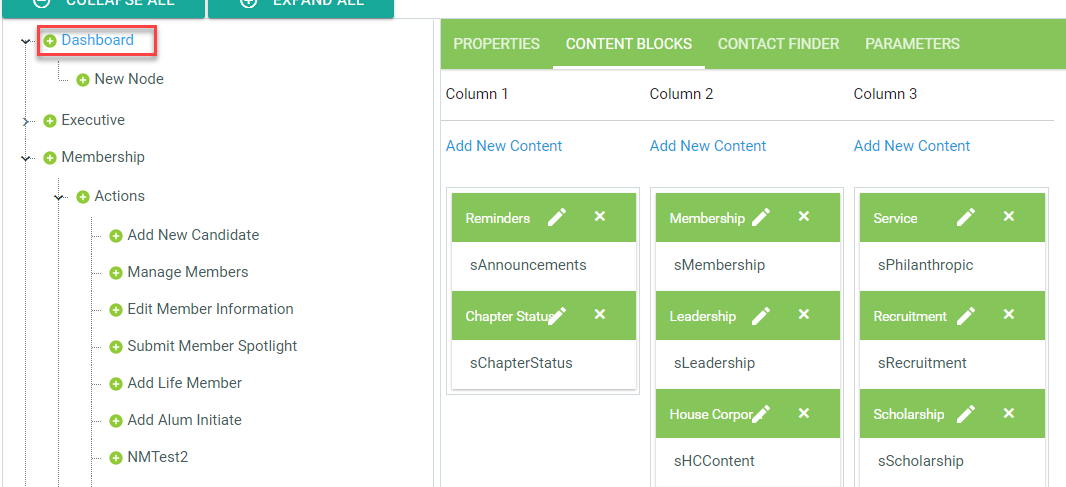
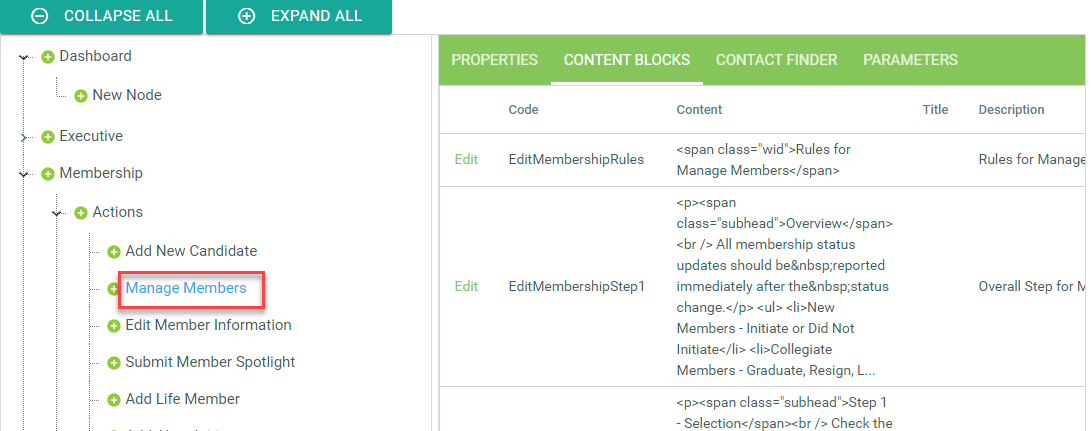
See the ICE Content Block section for further instructions.
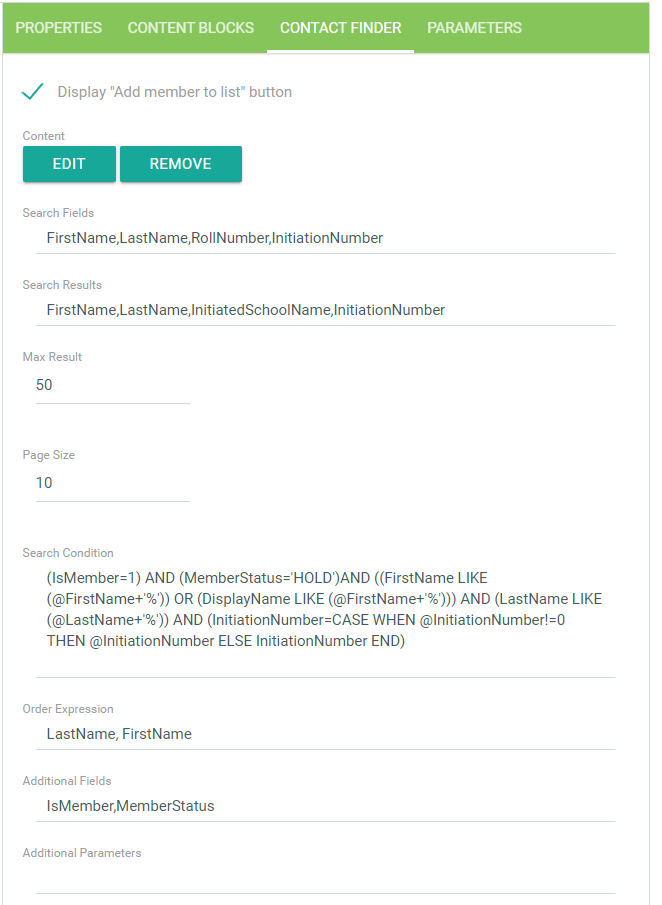
Content Finder
The Contact Finder tab will display when the node URL selected is the Manage Members or Manage Committees web page.
Display "Add member to list" button checkbox - when checked, the Add Member to List button will appear on Step 2 of the Manage Members page. If your manage members page does not have actions that require adding members to the roster, you can uncheck this box to hide the button.
By default the Contact Finder builds the SQL query using LIKE statements (or begin with) based on the search fields criteria unless a Search Condition is setup, in which case that custom SQL statement will then be used instead. The Manage Committee web page will apply additional restriction based on the position selected.
Search Fields, Search Results, and Additional Fields accept a comma separated list of demographic definition fields.
Additional Fields and Additional Parameters are used in conjunction with the Search Condition. The Additional Fields values help the Contact Finder to identify additional demographic definition fields used in the Search Condition that would not appear in the Search Fields or Search Results.
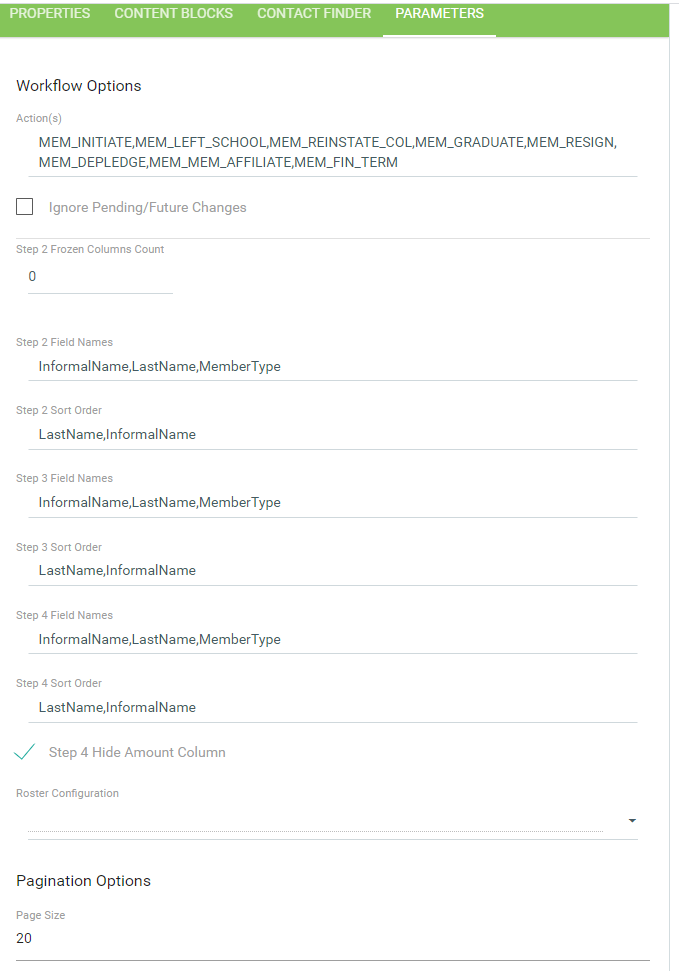
Parameters
Additional parameters for the selected node URL may be available. The following URLs have applicable parameters.
~/ICE/Actions/ManageMembersRadio.aspx?action=
The Actions field is a comma separated list of workflow product codes made available for the node. Up to 12 workflow product codes can be used on one manage members page. It is recommended to not display more than 8 as the page can seem very crowded for the user.
By default, when a member has a pending transaction no further action can be made until it is cleared out. In checking the option "Ignore Pending/Future Changes" the node will allow to overwrite the default behavior; therefore allowing the ICE user to submit an action even if there is a pending transaction for the member. Typically this is used when the page includes workflow actions that would not have an adverse affect on other actions if completed while another action is pending. Reporting of a GPA status is a good example.
You can specify the demographic fields shown on each step or page. It is recommended to minimize the number of demographics shown for a better display for the user. Demographics that are helpful for the user to confirm the selected member is recommended.
(new feature in 5.1!) The Step 4 Hide Amount Column can be selected to hide the reference of Amount if the workflow actions used on the page do not have any applicable charges.
To adjust the member roster that will be used for the manage members page, a new roster query can be created and selected under Roster Configuration. Go to Settings > Rosters Configuration to create a new roster. The default roster query defined under the Settings area will be used in no roster configuration is selected in the sitemap.
(new feature in 5.1!) Pagination Options can be used to specify the number of members shown on a page. This can improved the speed of the page for chapters that have a lot of members on their roster.
~/ICE/Actions/ManageCommittee.aspx?committee=
See Workflow section
ContactID URL Parameter
When a user logs into ICE, the default chapter that appears is based on the user's access. If a user has access to multiple chapters, the default chapter will be distinguished alphabetically. To direct an ICE user to a specific page in ICE, you can utilize a portion of the URL for the user and ICE will pass in the appropriate contactID (chapter ID) based on the user's access.
For example, if we want to send an ICE user to the first step of submitting a service event report, we should copy the URL up until the "&" sign:
Full URL:
http://yourICEURL/ICE/ICE/Actions/SubmitForm.aspx?formcode=FRM_CHP_PHIL&contactid=0028123
URL to send to ICE user:
http://yourICEURL/ICE/ICE/Actions/SubmitForm.aspx?formcode=FRM_CHP_PHIL
The ICE user will log in and default to their chapter's ICE page and the first step of the submit philanthropy event form. 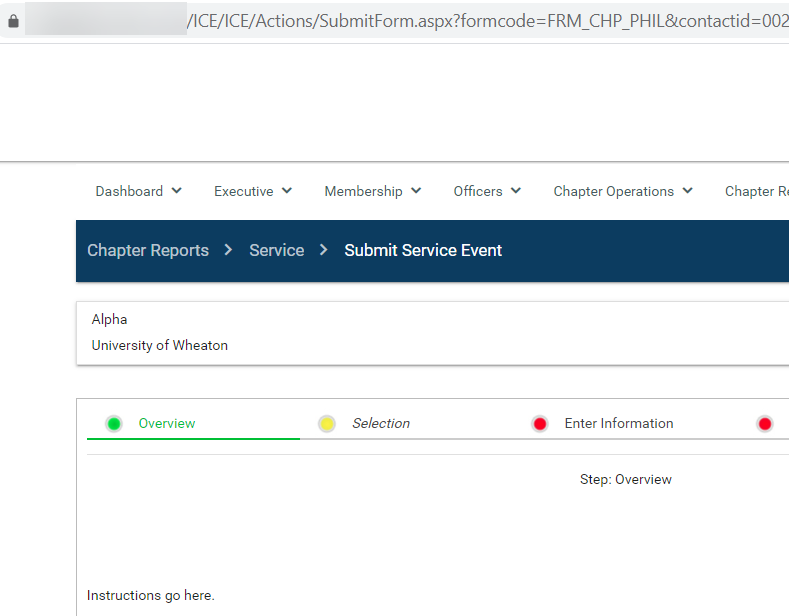
iFrame Option
A new sitemap control option (~/ICE/Actions/ExternalContentPage.aspx) provides the ability to embed an external content page within the ICE portal website.
Parameters Tab Settings
Title - to appear in header
Status URL or stored procedure name
Enter the URL of the content page to render (embed) inside the ICE content page.
Alternatively enter a stored procedure name and check the box “Is Stored Procedure”: executing the script should return the URL expected then.
Demographic parameters - you can specify parameters to be passed to the embedded page
Select Add new record to add a parameter:Select desired ICE demographic pointer
And enter the desired URL parameter name
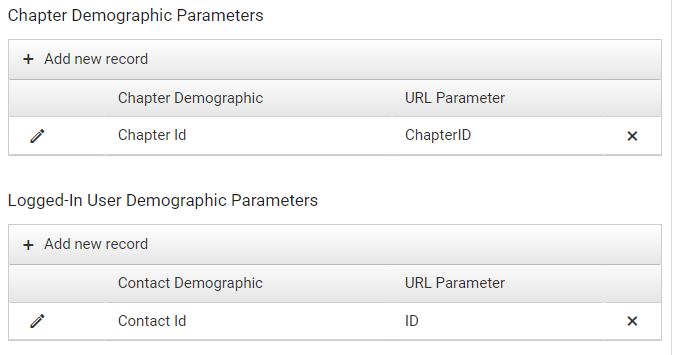
It is possible to select demographic pointers related to the selected chapter record or currently logged in user account.
Add text to the Content Script Block if you need to add text on the page.
Javascript can be used here as well as HTML code.
This is useful if you need to resize the embed content correctly. For example, using:
IFRAME-RESIZER | iframe-resizer
Other Dynamic Parameters
Optionally, enter a stored procedure name to be executed to append its result to the list of URL parameters.