
Rapid Entry
This is a CSiDonate PLUS edition feature.
Overview
The following article outlines how to use the Rapid Entry template mode with CSiDonate.
Use Cases
Rapid Entry allows a staff member or volunteer to enter a known iMIS ID into the Rapid Entry page in order to enter a donation on behalf of that user.
The contact's information is pre-filled into the form so that the only required data (at a minimum, if configured) is the credit card information.
Coupling Rapid Entry with the an EMV Card Reader allows your organization to accept donations in just four easy steps:
Enter the iMIS ID of the donor
(Optional) Select or enter the donation amount
Press the "Card Reader" button and insert or swipe the donor's credit card
Press "Donate"!
Telemarketing
One use case for Rapid Entry mode is for telemarketing. Giving a group of volunteer phone campaigners the Rapid Entry Access Code (described below) along with a list of iMIS IDs and names can allow them to rapidly solicit donations from members.
Conferences and Events
Another use case for Rapid Entry mode is at conferences and events. Providing booth staff with a Rapid Entry Access Code will allow them to enter donations on behalf of attendees easily.
In order for this to work, the booth staff would need to be able to easily look up or know the attendee's iMIS ID. Typically, this is either printed directly onto their badge, or encoded into a scannable code on the badge.
Setup
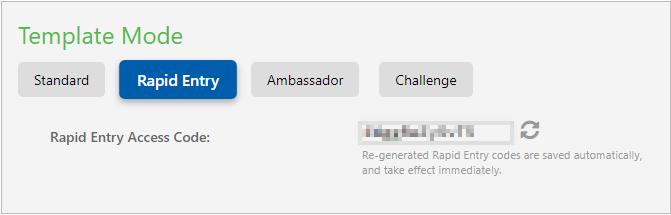
To use Rapid Entry mode, in the Template Manager, change the Template Mode to Rapid Entry. Then, press the refresh button next to the Rapid Entry Access Code field to generate a new access code. Finally, press the Save Template button.
After saving, in the Template URLs section (at the bottom of the General tab), you should see the Rapid Entry Access Code and Rapid Entry URL fields.
Rapid Entry Access Code: This is the security code needed to access the Rapid Entry interface for this template. Do not distribute this access code to anyone except trusted staff or volunteers that need access to the Rapid Entry interface. If you lose or accidentally give out your Access Code, press the Refresh button again to generate a new Access Code.
Rapid Entry URL: This is the Rapid Entry landing page, where users are prompted to enter their rapid entry access code. Entering a valid code will take the user to the iMIS ID search screen.
Using Rapid Entry
To use Rapid Entry, have your Access Code ready and browse to your Rapid Entry URL, which is your CSiDonate domain plus /CSiDonate/RapidEntry.aspx.
Enter your Access code and press Go.
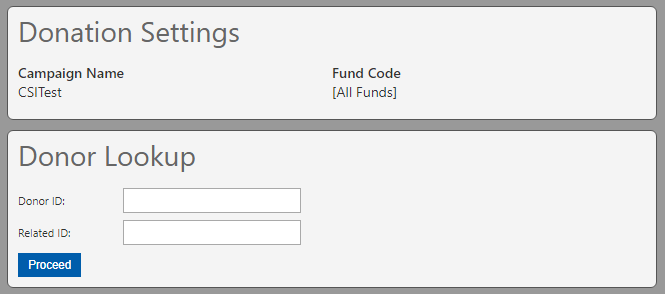
Once on the Rapid Entry screen, you will see some basic template information, and two fields, Donor ID, and Related ID.
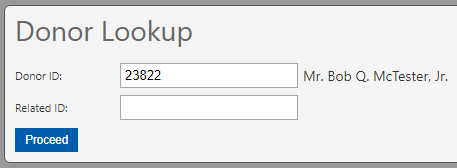
Enter an iMIS ID into the Donor ID field and press Tab. The contact's full name is loaded if the contact is valid:
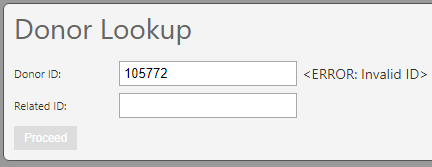
If an invalid iMIS ID is entered, you will get an error and will be unable to proceed:
You can now click Proceed to load the donation form with this user's information pre-filled.
Optional: Verify or Define a Relationship
For cases where verifying a donor's relationship to another individual is part of the campaign process (e.g. a telemarketing campaign targeting parents of collegiate members), you may optionally enter a Related ID to load the relationship status for these two individuals.
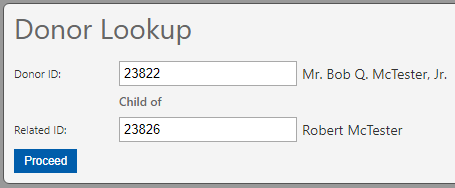
Enter the related iMIS ID and press Tab. The related ID's full name is displayed, along with the current relationship status, if applicable.
If a relationship is already defined, the relationship title will be displayed between the two contacts. The existing relationship cannot be edited on this screen.
If no relationship is defined, a dropdown will appear that, by default, says (Do not create a relationship).
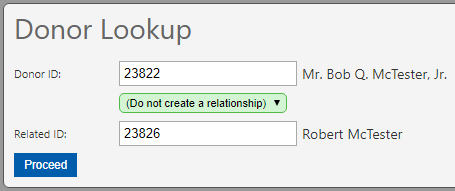
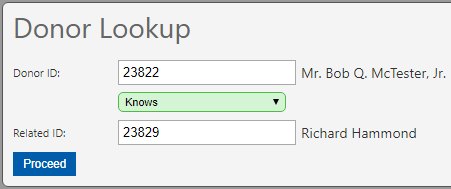
Opening this dropdown reveals all of the possible relationship types defined in iMIS. Selecting one will allow you to create an iMIS relationship between these two people.
Deferred vs. Instant Relationships
If you enter two valid iMIS IDs, and define a new relationship type, the relationship is created instantly when you press the Proceed button.
However, it is possible to enter a known Related ID and leave the Donor ID blank.

In this scenario, if the user Proceeds with this donation, the relationship is not created until the donation is processed on the next page. If a contact is matched in the donation process, the matched contact and the Related ID will have a relationship created. However, if no match was found and a new contact is created, the new contact and the Related ID will have a relationship created.
If the matched contact already has a relationship with the Related ID, no new relationship is created.
Returning to Rapid Entry
Once you have made a donation on behalf of the selected contact, on the receipt page, the Make Another Contribution button is replaced with a Return to Rapid Entry button.
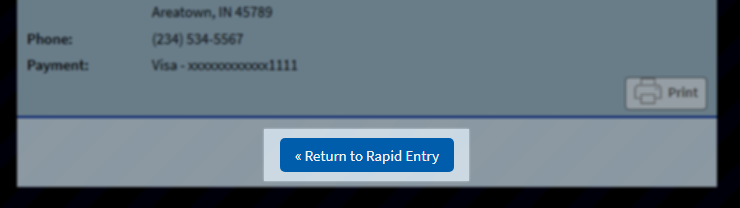
This button will take the user back to the Rapid Entry screen where they can proceed to enter the next iMIS ID.