
[Legacy] Inbound Webhooks
Warning: This documentation is for the legacy iTransfer webhooks functionality. For the newer webhooks functionality inside of iWorkflow, please refer to the iHook documentation.
Overview
This page outlines how to create and manage your Inbound Webhooks.
Calling a Webhook
The webhook URL is open, there are no authentication headers or cookies required.
Simply execute a POST request with the correct body.
Full technical details:
Parameter | Value |
|---|---|
HTTP Method |
|
Content-Type |
|
Request Body | JSON Payload matching registered schema |
Response
The DataStation may respond with the following status codes:
Response Code | Body | Reason |
|---|---|---|
200 OK | { "success": true | The webhook action was executed successfully. |
400 Bad Request | { "success": false, | The JSON body failed validation against the registered schema. |
404 Not Found | { "success": false | The webhook endpoint was not found. |
500 Internal Server Error | { "success": false, | The webhook action failed. The target system may be offline or unavailable, or there may be a business logic violation. |
Creating an Inbound Webhook
To create an inbound webhook, navigate to the Inbound Transfers tab, and select Add Inbound Transfer.
1. Add General Information
Fill out the general information for the webhook. Specifically, just give the webhook a friendly name.
2. JSON Schema
Next, you'll need to paste in a JSON Schema document. This is not a "sample" of the data, this is a JSON object that must contain specific fields which represent your object.
A SQL analogy which applies here: A JSON Object document is like DML (an INSERT statement), whereas a JSON Schema document is like DDL (a CREATE TABLE statement).
Schema Validation
Every time the webhook endpoint is called, the incoming payload is validated against this schema.
If the schema does not match (e.g. a field marked as required is omitted, or a data type is incorrect), the caller will receive a 400 Bad Request response, and the body will contain the reason for the error.
Sample
Below is a sample JSON Schema document. You can modify this one to suit your needs.
There are also a number of online utilities that will generate JSON Schema documents from sample objects which you can find by searching for JSON Schema Generator online.
{
    "$schema": "http://json-schema.org/draft-07/schema#",
    "type": "object",
    "properties": {
        "firstName": {
            "type": "string"
        },
        "lastName": {
            "type": "string"
        },
        "date": {
            "type": "string",
            "format": "date"
        },
        "dateTime": {
            "type": "string",
            "format": "date-time"
        },
        "count": {
            "type": "integer"
        },
        "amount": {
            "type": "number"
        }
    },
    "required": [
        "firstName",
        "lastName",
        "date",
        "dateTime"
    ]
}
Once you have pasted in your JSON Schema document, press Next Step.
Troubleshooting Tip
If you receive an error on this page, you will need to check to make sure your JSON Schema document is valid using a JSON Schema parser tool.
No Nested Objects
At this time, the DataStation does not support nested arrays or objects. (All top-level properties must be primitive types such as string, integer, number, boolean, etc.)
The third party wishing to call a DataStation webhook must be able to send a flat list of properties without any nested objects or arrays.
3. Perform an Action
Once you have validated your JSON Schema document, you will see a dropdown with a list of actions. Select the action you'd like to perform when the webhook is called.
Action Ideas
Got an idea for a webhook action? Please e-mail our support team with your suggestion – we'd love to hear about it!
Insert Activity Records OR Multi-instance Standalone Panel Records (EMS only)
This action type will allow you to insert an activity record into iMIS OR if you are on EMS you can insert either Activity or Panel records.
Field Mapping
You will see a list of Activity or Panel fields on the left, as well as the list of properties which were part of your JSON Schema document from the previous step.
To complete the field mapping, you may enter the following items into the Value field:
Static text
A JSON property
A combination of static text and JSON properties
To enter a static value, simply type into the Value field. To insert a JSON property, click on the blue variable identifier to have it inserted automatically, or manually type $$propertyName$$.
You may combine static text and property names. For example:
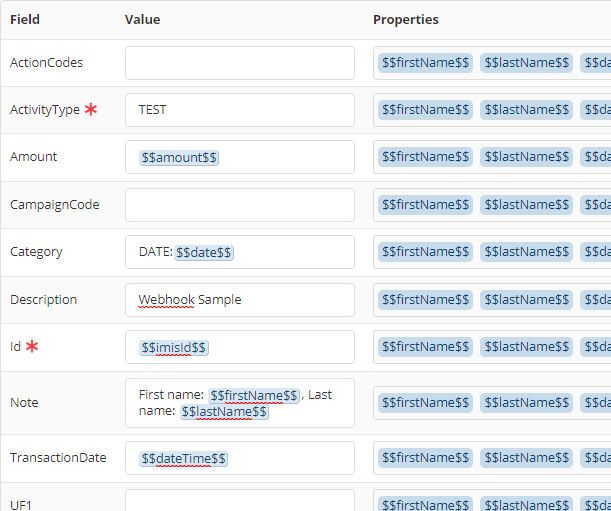
In the example above the Activity Type has been statically set to "TEST", so that the third party does not need to send it each time.
The Category has been prefixed with "DATE:", followed by the date passed in from the webhook body.
Example: DATE:2021-05-26
The Note has been templated so that it will insert as: "First name: _____, Last name: _____", with the appropriate values being inserted dynamically.
Example: First name: Homer, Last name: Simpson
The TransactionDate has been set to the date/time from the webhook body.
Activity Required Fields
Activity insertions require the following fields at a minimum:
Activity Type
ID
TransactionDate (If not passed in, will default to the current date/time.)
Panel Required Fields
None
If the activity/panel insertion fails for any reason, the webhook caller will receive a 500 Internal Server Error response.
4. Save the Webhook
Once finished, press Save to save the webhook definition.
You'll be returned to the webhook listing screen, and the DataStation will generate your webhook URL/endpoint in the listing table.
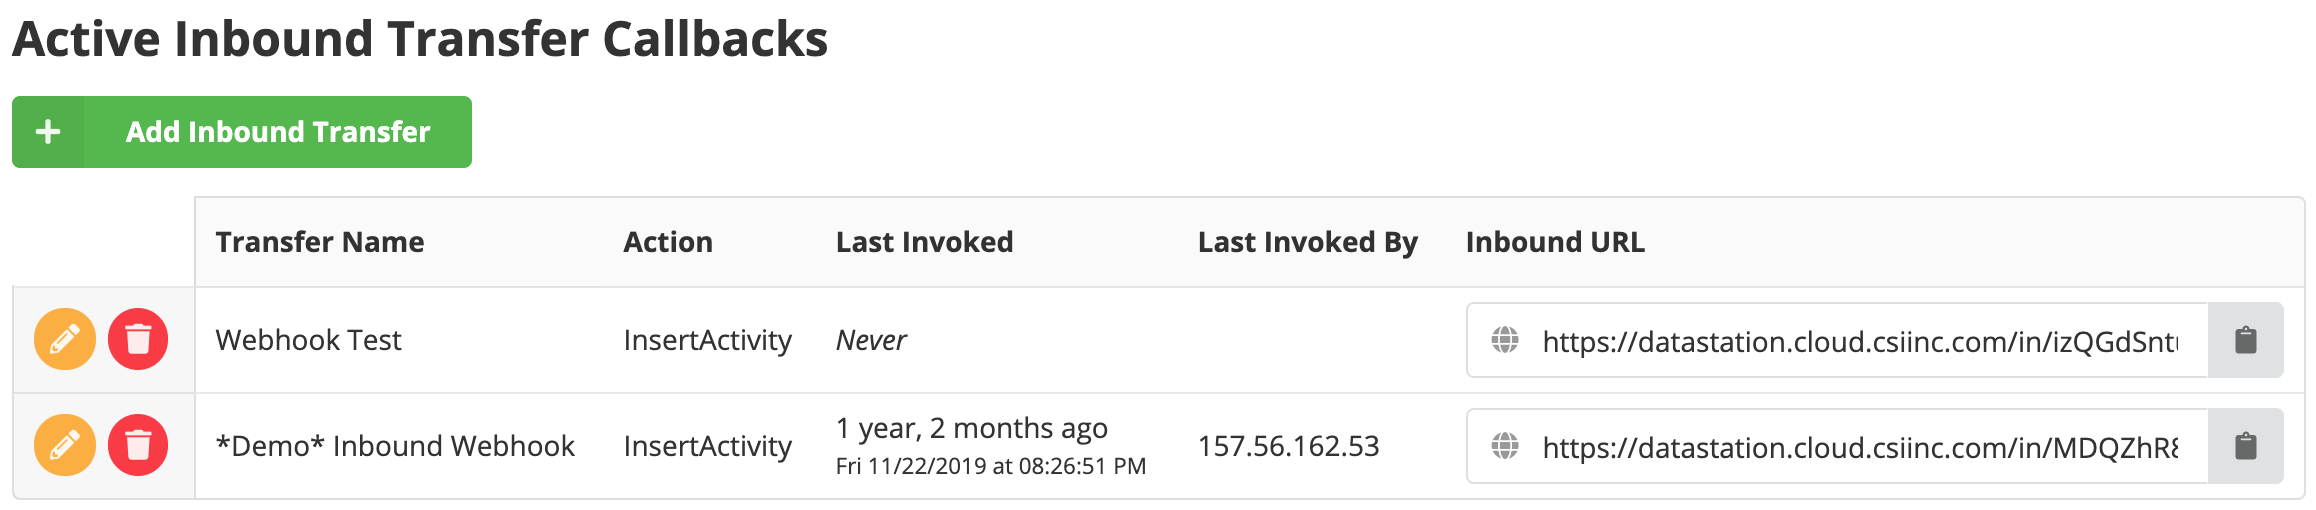
You can press the clipboard icon to copy the webhook URL.
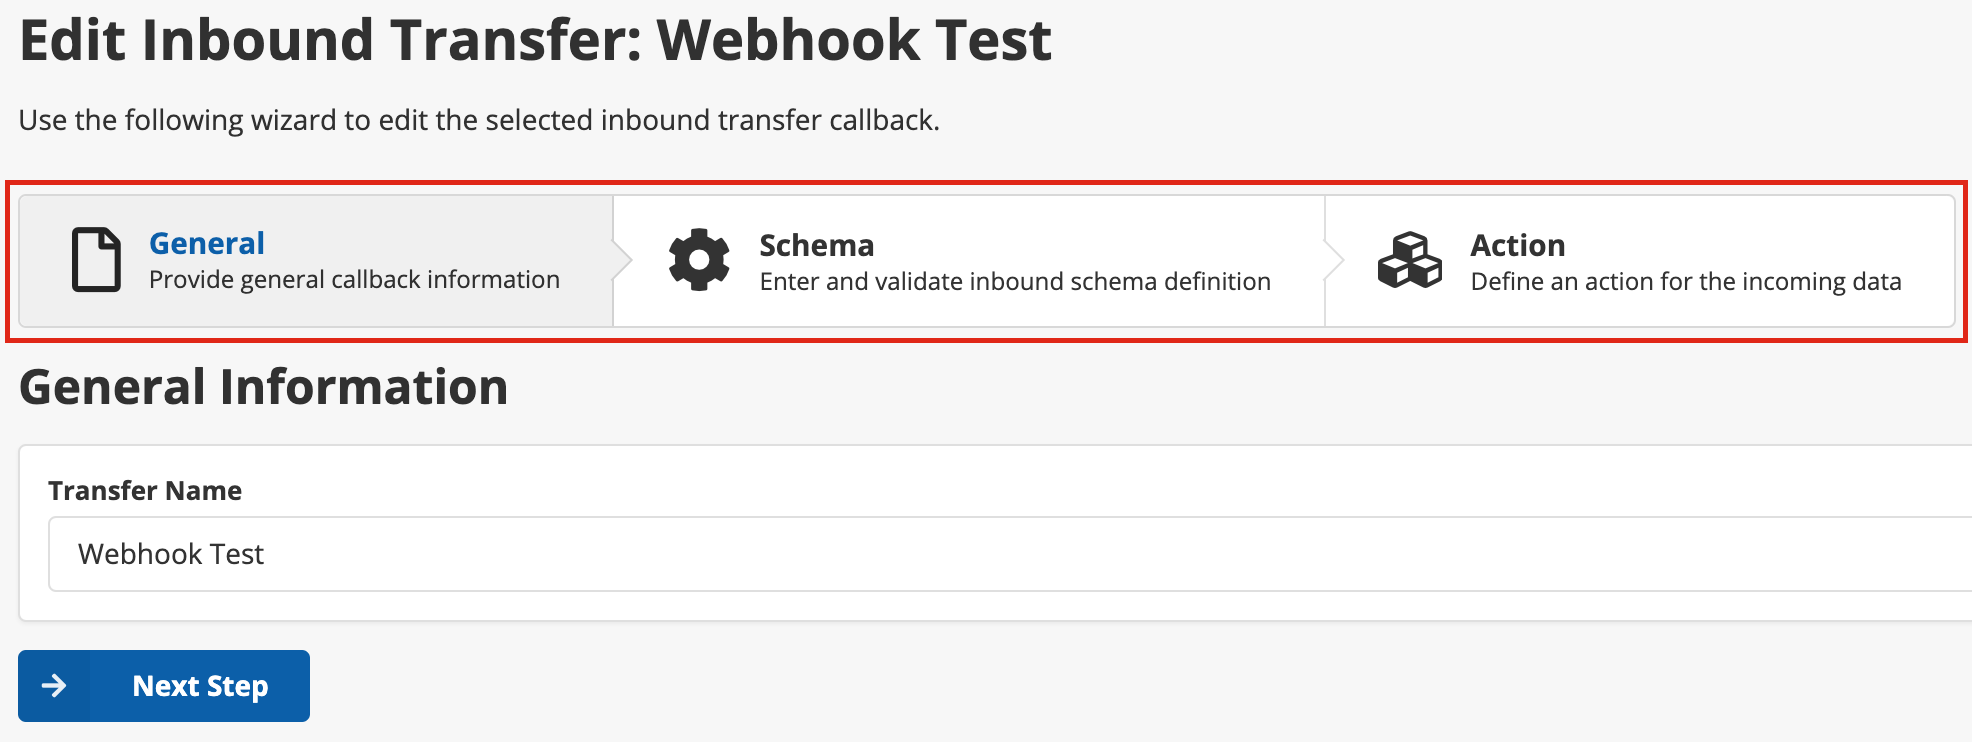
Editing an Inbound Webhook
To edit an inbound webhook, press the edit pencil icon on a webhook record.
Once on the Edit screen, you can navigate to the different sections by clicking on each of the section headers. You can also press Next Step to simply advance through the wizard.
Deleting an Inbound Webhook
On the webhook list view, press the delete icon.