
System Settings
On this page, within the Single Sign On menu, view information about the overall system settings for the Cloud SSO app.
OpenID / OAuth2 Settings
Signing Key Algorithm
Select the desired signing key type for JWT tokens generated from OpenID Connect sign-ins.
RS256 is the required (and preferred) key type according to the OpenID Connect standard. Others are compatible but not required by the OIDC spec.
Algorithm | Key Size | Hash Strength | Notes |
|---|---|---|---|
HS512 | 512-bit Alphanumeric Symmetric Key (HMAC signed) | SHA-512 | Symmetric key mode. Each Client App has its own independent JWT signing key. |
RS256 | 2048-bit RSA Key | SHA-256 | Asymmetric key mode. A public and private keypair are generated and shared amongst all client apps within your SSO domain / account. |
RS512 | 4096-bit RSA Key | SHA-512 | Asymmetric key mode. A public and private keypair are generated and shared amongst all client apps within your SSO domain / account. |
Changing your signing key setting will immediately regenerate your public and private keys and update your JWKS endpoint. There is no way to recover previous keys at this time.
X.509 Public Key and RSA Private Key
These keys are generated automatically whenever the Signing Key Algorithm setting changes.
If you choose HS512 as your signing key type, these fields will be blank, as public/private keypairs are not used for symmetric (HMAC) key types.
Do not share your private key with anyone. Third-party apps and vendors DO NOT need your private key in order to complete SSO flows.
If you accidentally share or make your private key public, you can regenerate a new keypair by switching the signing algorithm setting to a different value, saving the page, and then changing the setting back, saving one more time.
Allow Implicit Auth Flow
Implicit auth flow is typically used when implementing a connected SSO app via JavaScript. Implicit flow has certain security considerations, so do not enable this feature unless requested to by a third party you are integrating with. Confirm with the third party that they are not able to utilize code flow, which is preferred over implcit flow.
Allow Alternate Profile Auth
Allows the OAuth2 access token to be passed via the query string to the userinfo endpoint (e.g. /openid/userinfo?access_token=xxxxxxxxxx). Only required by certain third parties. Leave off unless your third party provides documentation that requires this to be on.
Send SSO Domain As Issuer
Certain SP's will check the issuer property to verify that it matches your SSO base domain.
For backwards compatibility, when this setting is disabled (the default), the issuer is always sent as:
https://www.csiinc.com/
If this setting is enabled, then the issuer will be set to your own custom domain, e.g.:
https://sso.example.org/
Reauthorization Grace Period
Reauthorization, or re-consent, occurs after a period of time in which the user is prompted to allow the third party application to access their profile information.
You may set a value, in months, from 2 to 120.
Certain websites don't prompt users to reauthorize connected apps, such as Facebook. Others do after a period of time.
If you would like to have users re-consent with the third party, a recommended value is between 6-12 months.
If you would like to disable re-consent, set this value to 120.
Maintenance and Access
Maintenance Mode
This setting allows the SSO site to be brought down for maintenance. This setting takes effect immediately.
ALL SSO integrations (Client Apps) will stop working if maintenance mode is enabled. Use with caution.
If enabled, all endpoints will return error code HTTP 503 Maintenance. For API calls, a JSON error message is returned. For user-facing pages, a message is displayed to the user.
You may customize the HTML on the maintenance page by using the Maintenance Mode HTML Content field. This field optionally supports HTML. The content inside this field is automatically centered on the page, and the text is centered inside its parent <div> . If using HTML, ensure HTML tags are correct and error-free.
No Access Page Content
If you would like to customize the out-of-the-box "No Access" page, in the lower-right corner of the Branding section, there are two fields for this, No Access Header and No Access HTML Body.
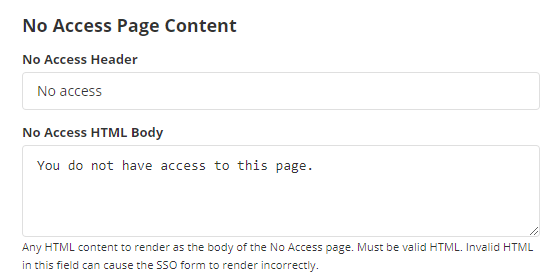
The header must be plain text, but the body can contain limited HTML formatting.
The No Access body is wrapped in a <div> automatically, so you do not need to include any block-level elements such as a div or p tag if you don't want to.
The No Access page is rendered like this by default:
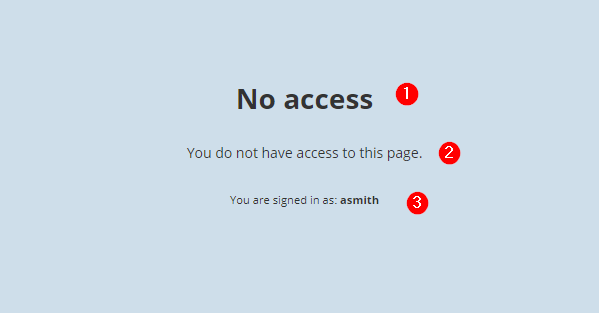
The No Access Header is printed here.
The No Access HTML Body is printed here (wrapped in a
<div>).The current user's username is added to the page, so if the user takes a screenshot of this page and sends it in for support, their username is visible.
iMIS Identity Settings
Select one of the following iMIS identity setting tabs.
Select iMIS EMS / 2017 if you are on iMIS 2017, iMIS 20/20 Advance, iMIS EMS, or iMIS Professional ("100").
Select Legacy (Forms Auth) if you are on iMIS 2017 and are self-hosted or have full control over your environment (i.e. you are able to work with Forms Auth and Machine Key settings for iMIS).
Identity Mode: iMIS EMS / 2017
Separate Settings
There are two sections on the iMIS Cloud tab, one for OpenID Application and one for SAML Application.
If you are only using one SSO protocol, please only fill out the appropriate section. For example, if you are only using SAML, you will need to enter your iMIS client application settings into the SAML Application section. You may leave the OpenID Application section blank.
If you are using both SSO protocols at the same time, you will need to set up two separate iMIS client application records, one for SAML and one for OpenID. The Endpoint Info page contains the correct callback URL for each technology.
iMIS Client Application
Select the configured client application from the dropdown.
iMIS Client Secret
Enter the client secret that was also entered into the RiSE configuration for this client application.
If you forgot your client secret, you can reset it to a new value from within RiSE, and then enter the same value here.
SSO Page URL
Enter the fully qualified path to the RiSE page where the SSO iPart was configured for this client application.
Note that the RiSE page must be publicly visible, and restricted to "Authenticated Users", e.g. place it behind the login page so users must log in first before accessing it.
Identity Mode: Legacy (Forms Auth)
Legacy Deprecation Warning
These settings are intended for existing customers, for legacy purposes only.
New customers should not use this configuration. Instead, configure Cloud SSO using the newer RiSE / iMIS EMS mode above.
Cookie / Forms Authentication Settings
Cookie Name
Specify the name of your iMIS Forms Authentication cookie. Note that this value should match what is in the iMIS web.config file.
Cookie Domain
Specify the domain that the cookie is enabled for. This value is typically .example.org (including the leading . character). Note that this value should match what is in the iMIS web.config file.
Cookie Path
Specify the cookie path of your iMIS Forms Authentication cookie. This value is almost always /. Note that this value should match what is in the iMIS web.config file.
Machine Validation Key
Specify the validationKey value from the <machineKey> element in your iMIS web.config file.
Machine Decryption Key
Specify the decryptionKey value from the <machineKey> element in your iMIS web.config file.
Compatibility Warning
If you have the app setting aspnet:UseLegacyFormsAuthenticationTicketCompatibility enabled in your iMIS web.config file, you will need to first disable it before using the Cloud SSO app.
Account Links
These items are optional.
Create Account URL
Optional. If a fully-qualified URL is specified, a "Create Account" link will be added to the sign-in page.
Forgot Password URL
Optional. If a fully-qualified URL is specified, a "Forgot Password" link will be added to the sign-in page.
Branding and Styling
In iMIS Cloud mode, even though users do not see the branded sign-in page, these settings are still used to display a branded OAuth2 Consent screen to each user. Please fill out this section regardless of the iMIS Identity mode chosen above.
The following items are customizable on the sign-in page that is presented to your users:
Logo (96x96, 8 KB or less, PNG or JPG)
General Text Color
Page Background Color
Text Box Text Color
Text Box Background Color
Text Box Border Color
Button Text Color
Button Background Color
A preview of the sign-in screen will render to the right of the branding section. As color values are updated on the left, the preview will reflect these changes instantaneously.