Roster Manager - Using the iPart
Prerequisites
We recommend creating a mapping for the workflow you want to use Roster Manager for. A mapping could contain:
Definition of the workflow
Example: Removing members from a roster
Requirements for the members that can be selected
Example: Members of the company roster (of the profile being viewed) that have an active status and member type of Member
Information that should be collected
Example: Effective date of removal and reason for removal
Updates that should happen after member is selected
Example: Status should be changed to inactive and member type to Non-Member
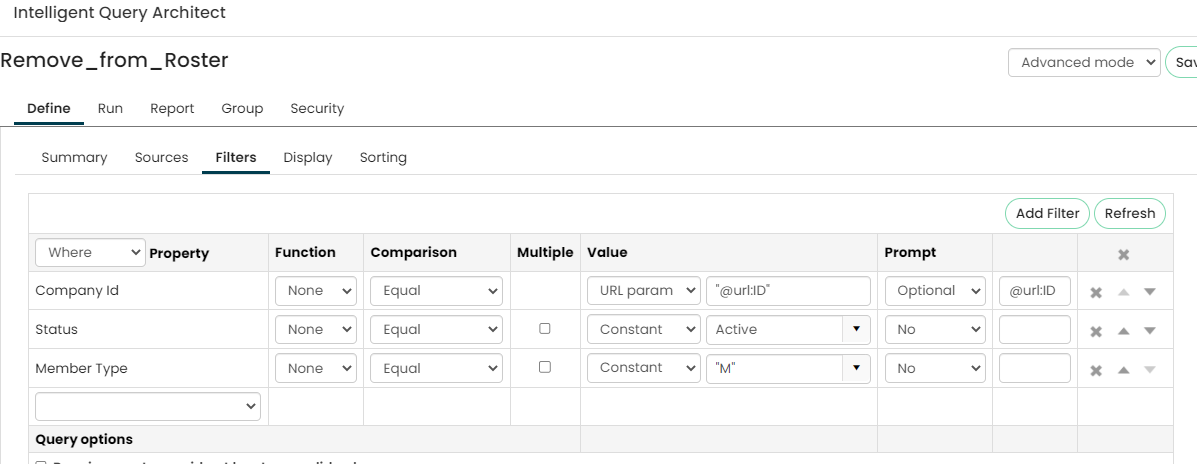
Create the IQA that will be used to display the roster of members based on your requirements defined above. Your IQA should define any optional filters to be displayed (if applicable) to the user as well as the result fields to be displayed to the user.
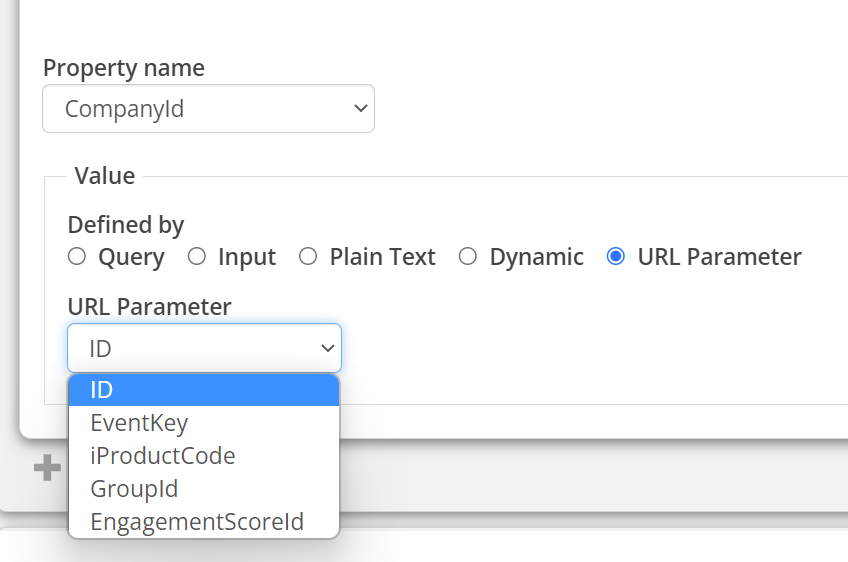
The IQA can contain dynamic filters if needed. The iPart requires using the URL parameter option. Example below:
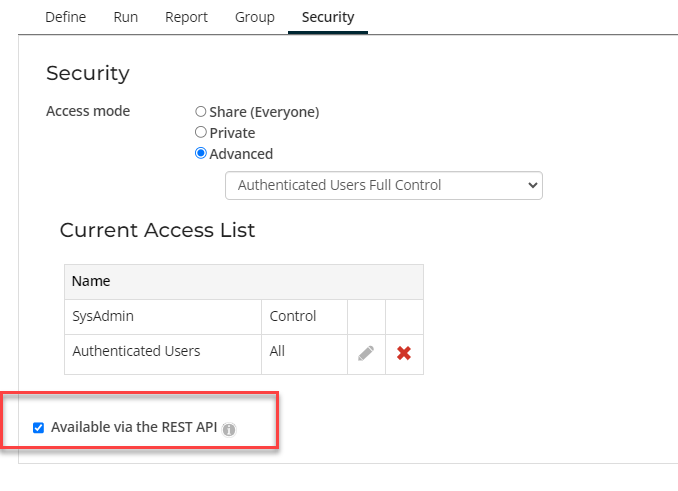
Make sure to check the box to make the IQA available to the REST API
Configure iPart
Content Page
The iPart can be added to any content page but can only be added to a single content page at a time. Other content can be added (instructions) to the content page as needed. Make sure the access settings are accurate to the users that will require access to the page.
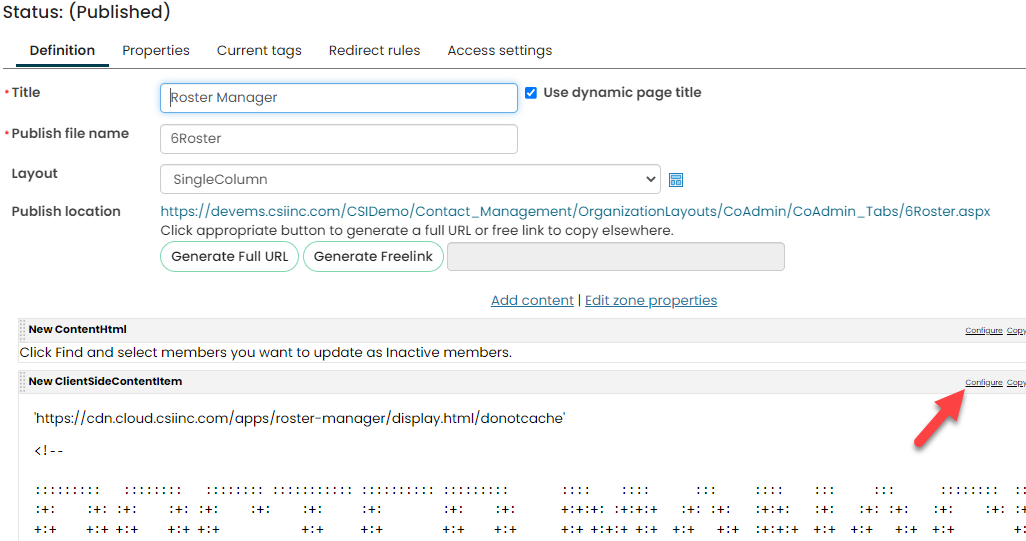
Add the Roster Manager iPart to the content page where it will be used.
Select to Edit the content page
Select Add Content
Select the Roster Manager iPart in the Custom folder.
Select Configure to add your specifications to the Roster Manager iPart that will be used on this page.
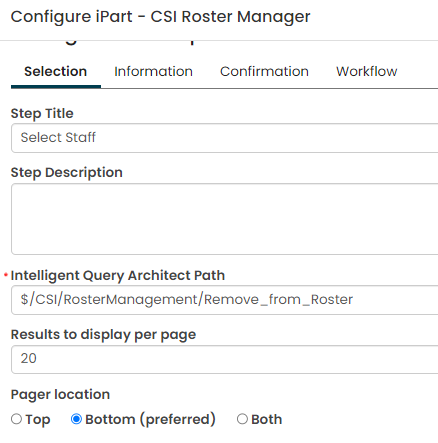
Selection
Step Title - This is the label of the tab that will be displayed to the user. Recommend this be instructional to let the user know the action they should take. Note you can add and HTML iPart to the content page as well to add additional instructions.
Step Description - Additional instructions that can be shown to the user.
Intelligent Query Architect Path - browse for the IQA that should be used for this page to show the records that are available for update. Once selected, a preview of the IQA will appear below.
Results to display per page - you can specify how many records from the IQA that should be displayed per page.
Pager location - you can specify the location of the page selection option.
Information
Step Title - This is the label of the tab that will be displayed to the user. Recommend this be instructional to let the user know the action they should take. Note you can add and HTML iPart to the content page as well to add additional instructions.
Step Description - Additional instructions that can be shown to the user.
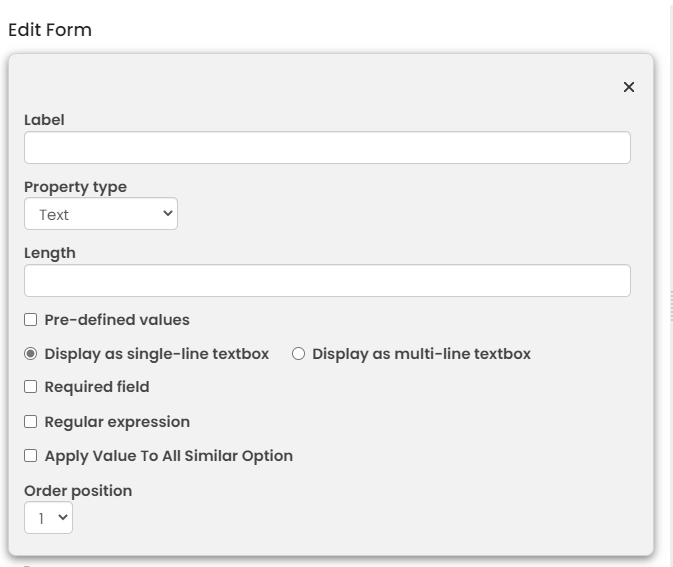
Edit form
You can add "additional information" questions here to collect additional data for each record that was selected on the previous step. This data will be stored in iMIS and can be utilized on the workflow step.
Multiple field types available.
IQAs can be used for validation lists.
Apply Value to All Similar Option - when enabled, it will allow the user to insert the same data for all selected members. For example, if enabled for Inactivation Date, the user could select Apply to All and that would insert the same Inactivation Date for all members they selected.
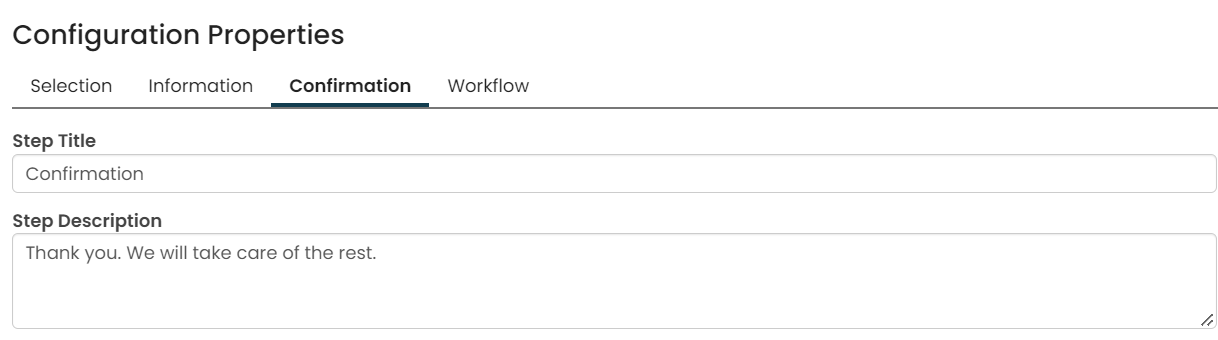
Confirmation
Step Title - This is the label of the tab that will be displayed to the user. Recommend this be instructional to let the user know the action they should take. Note you can add and HTML iPart to the content page as well to add additional instructions.
Step Description - Additional instructions that can be shown to the user.
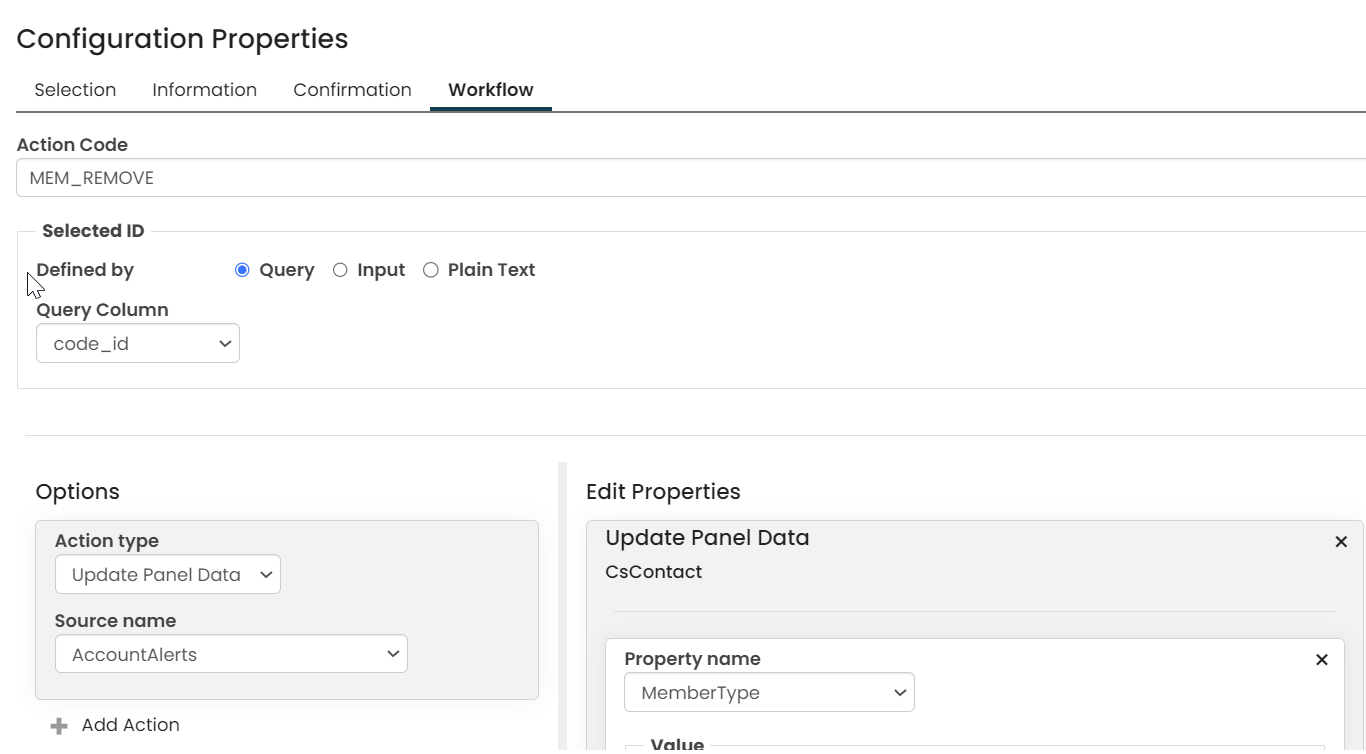
Workflow
Action Code - You can define a value here that will be stored in the Roster Manager log to identify the action performed using this iPart.
Selected ID - To identify what record should be updated post completion, you should define the iMIS ID of the record to be updated. You can select a field from your IQA that is in use or input a hard coded value.
Options - You can define the various updates you want to be done post completion. Consider how you will use this data post completion such as for reporting and/or showing history of changes on a member record. This may include:
Update single panel source or update/insert multi-instance panel source
Select Update Panel Data as Action type under Options
Select the Panel Source from the Source Name dropdown list
Select Add Action
Under Edit Properties
Select Add Property under the panel source you just selected.
For each panel source or activity, you must specify the ID property to be used. This defines the record that should be affected by this update specific to the panel source or activity you have selected. Typically the ID is defined in your IQA.
Select the ID field from the panel source selected
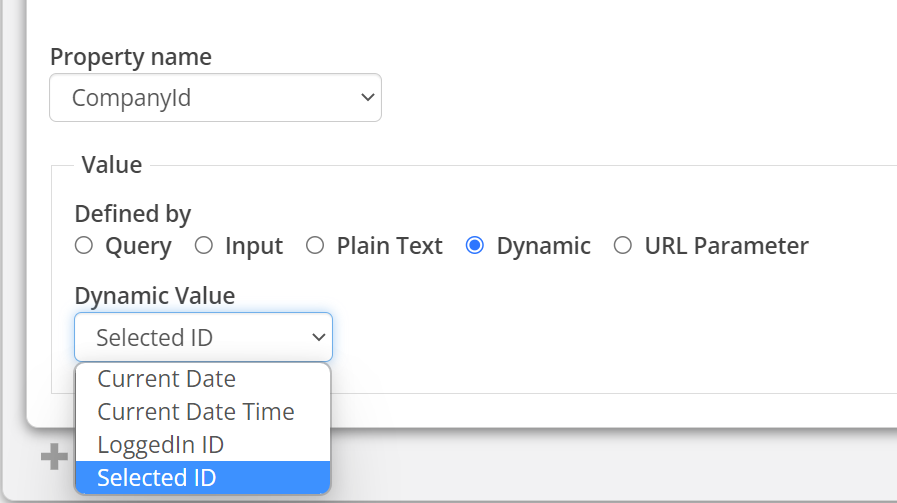
Selected the Defined By value
If defined by your IQA, select the corresponding ID field from your IQA
If defined by input, select the corresponding additional information question
If defined by plain text, type in the value you want to be stored.
Dynamic values are available for mapping.
Current Date will populate today's date when the transaction occurred.
Current Date Time is the same as Current Date but will also include time.
LoggedIn ID will populate the iMIS ID of the user logged in performing the actions.
Selected ID will populate the iMIS ID of the record that was selected. Typically this ID appears in the URL.
URL parameter values are available for mapping. The available options are typical parameters used within RiSE URLs.
Continue these steps for each property to be updated/stored.
If updating a multi-instance source, you must define an additional value to "match on" to identify what data should be updated, ex: SEQN, Ordinal, etc.
Insert a new activity
Select Create Activity Data as Action type under Options
Select Add Action
Under Edit Properties
Select Add Properties to define the activity fields you want to use, i.e. Activity Type, Effective Date, Transaction Date, etc.