
iAdd2Cart iPart
Overview
The iAdd2Cart iPart provides a way to configure what invoices appear and can be selected to add to the cart. The iPart can use an IQA to define the invoices and information to be displayed and allows the user to select invoices and send them to the iMIS cart page. The iPart does NOT control what happens to the invoice once added to the cart and processed.
Requirements
The iAdd2Cart iPart works only for iMIS EMS versions.
Initial Deployment Steps
Deploy Client-Based iPart in iMIS
In iMIS Staff Site, go to RiSE > Maintenance > Content Types
Select the Custom folder
Select New > Content Type
Select Client-based (preferred)
Name of Content Type = CSI iAdd2Cart
Description of Content Type = CSI iAdd2Cart - iPart
URL to the html file that is used to display items of this type at runtime = https://cdn.cloud.csiinc.com/apps/iadd2cart/display.html
URL to the html file that is used to configure content items of this type = https://cdn.cloud.csiinc.com/apps/iadd2cart/configure.html
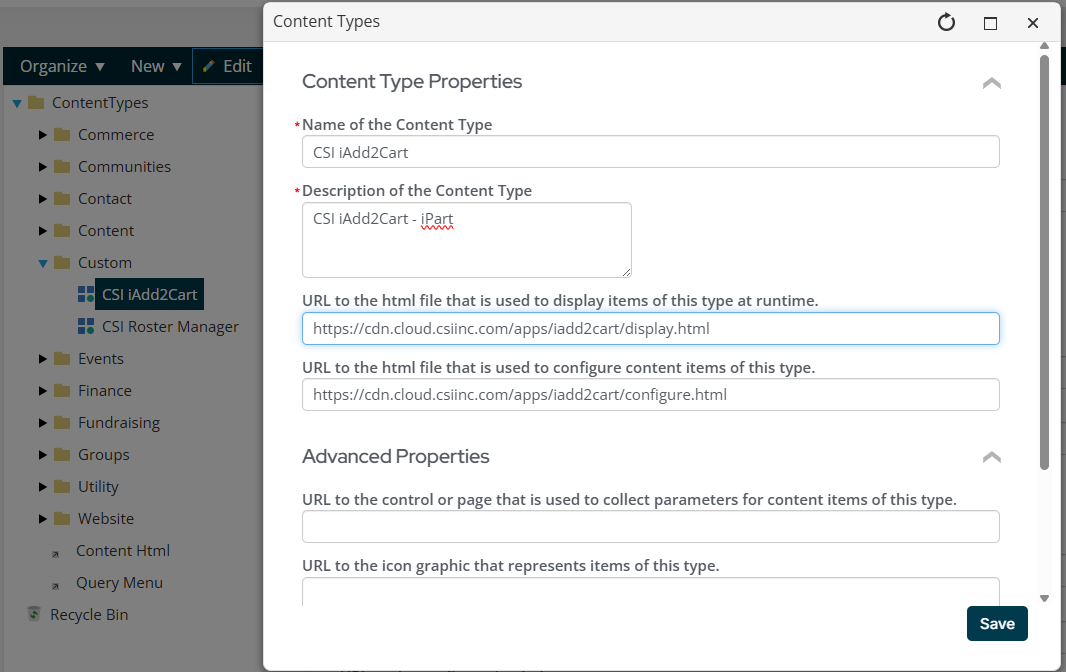
Select Save
Create IQA
Create the IQA you would like to use that will include the invoice requirements you would like to display. A property of “Invoice ID” is required.
Example:
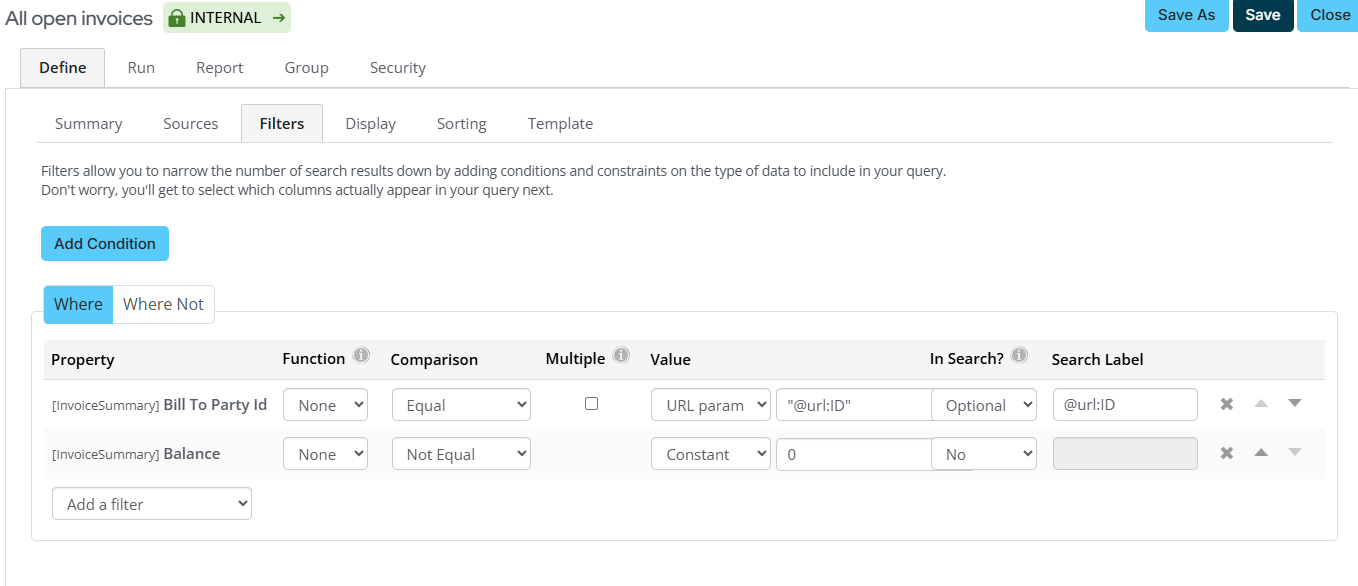
Make a copy of the following core IQA: $/Accounting/DefaultSystem/Queries/Invoices/All open invoices
Remove all filters to add the filters you prefer. In this example, we added a balance filter of not equal to zero so that invoices with a positive balance or negative balance (credits) will appear. We also added a filter for a URL parameter as we are adding this iPart to a Organization profile page.
When using a URL parameter such as ID, the value should be formatted as “@url:ID”. The search option should be set to Optional and the search label should be formatted as @url:ID.
Update your Display tab as desired. Invoice ID must be a display property but can be hidden using the “code_” prefix.
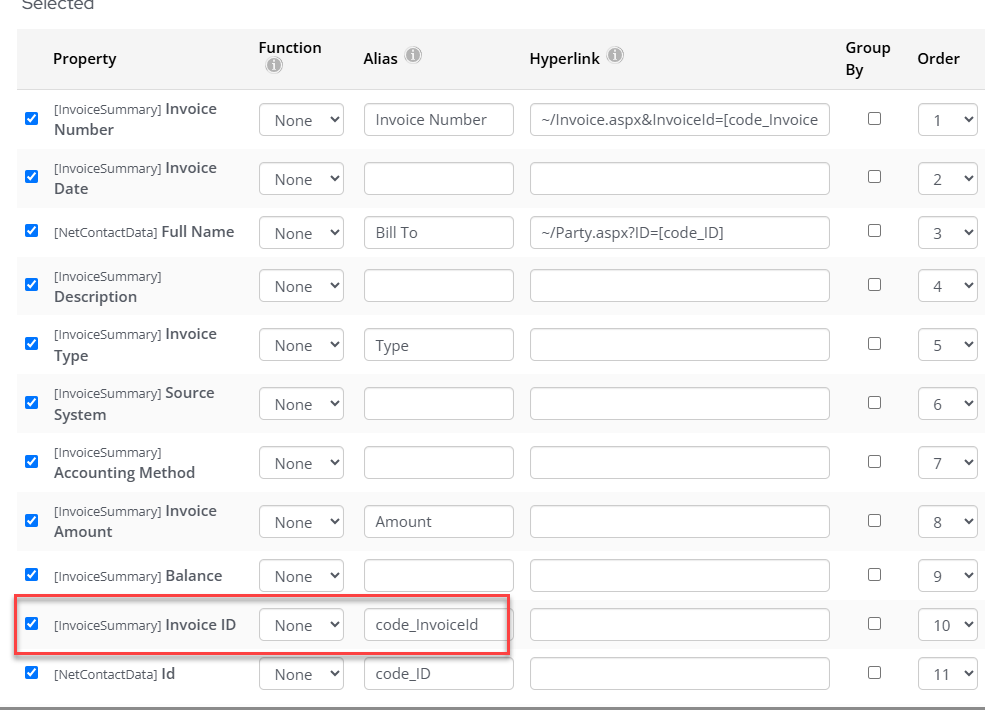
Make a copy of your IQA path as you will need it for the iPart configuration. @url:ID
Configuration of the iPart
Once you have an IQA, you can add the iPart to a content page for use.
Select to Edit the Content Page you would like to add the iPart to.
Select Add Content
Select the Custom folder
Select the CSI iAdd2Cart iPart
Select OK
Paste in your IQA path into the “Open Invoices Query Path” field
Tab out or click out of this field so that a preview of the IQA will appear to confirm the correct path.
Adjust the results per page or pager location as desired.
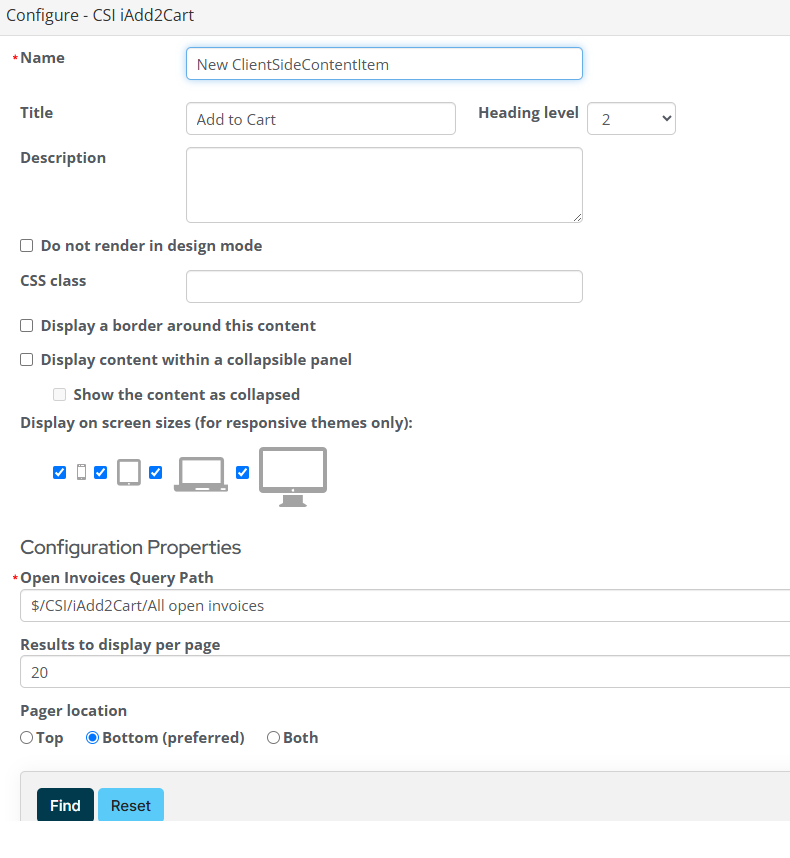
Select Ok
Save and publish your content page.
Navigate to the content page for an applicable record to confirm display.
Using the iPart
The user will select the invoice items. (one or more)
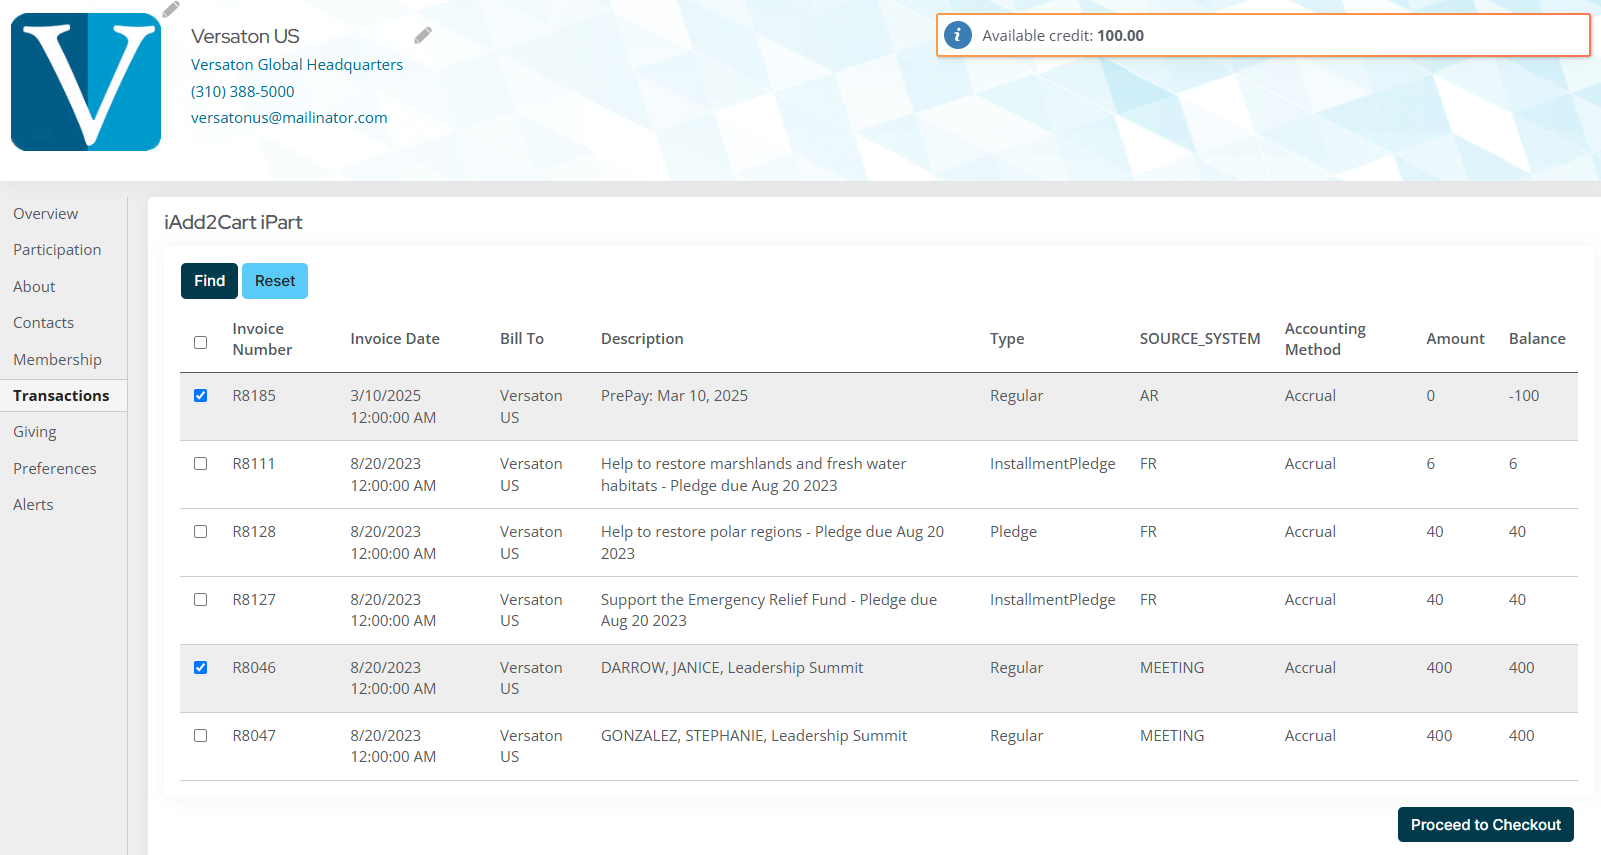
The user will select Proceed to Checkout which will direct them to the applicable cart page defined for the website currently in use.
If credits are selected, they will appear in the credits applied section of the cart.
