
Reversing and Refunding a Dues Payment
In the event that an end user wants to undo a Dues Payment (change of mind, change of chapter, etc.) and wants their money back, follow the steps below.
Issuing a refund via a credit card when using PayFlow Pro/PayPal
Note: You will need the credit card number.
1. Create a new credit card batch.
2. From Billing, enter a negative payment, reversing the item.
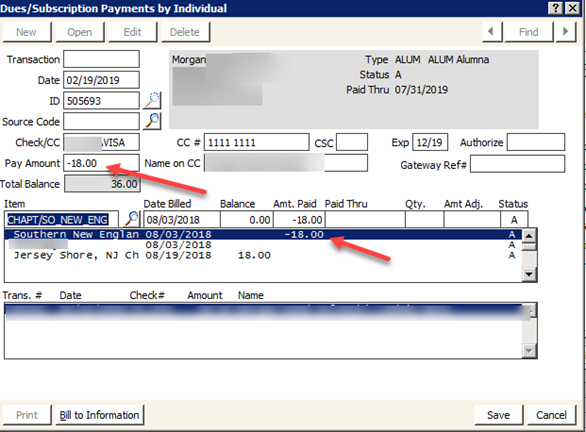
Enter the pay amount as a negative and select the line you wish to reverse and enter the negative amount there as well.
3. Click OK and the credit card will be refunded.
The Dues item is still marked paid!
4. Go to the Billing Tab in iMIS and double click the item you just reversed > click Edit and blank out the four fields shown below.
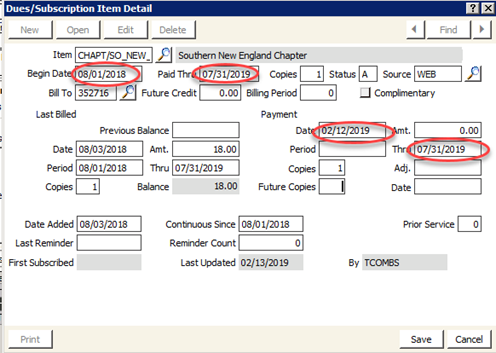
5. It should look like this when you are done > click Save.

6. Depending on your system setup, if you have reversed the Primary Dues item, you will also want to erase the Paid Thru Date on the Profile or Status screen in iMIS. For Chapter payments, this would be rare.
Issuing a Refund that will either occur via check or become a credit balance for future charges
1. Start a cash batch.
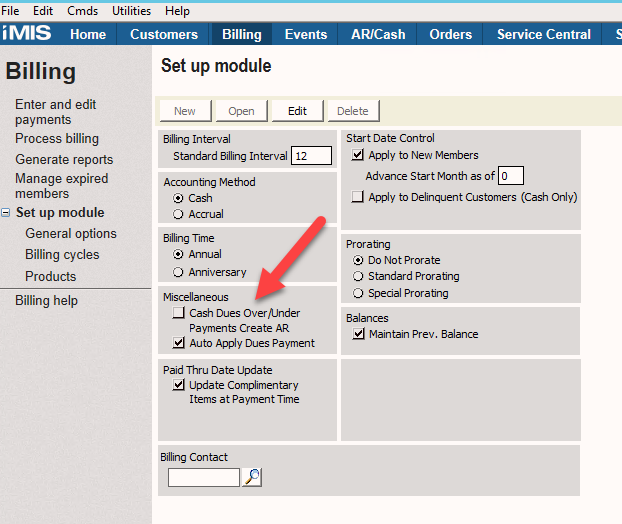
2. Confirm the 'Cash Dues Over/Under Payments Create AR' setting is enabled. Locate this setting under Billing > Set up module > Miscellaneous. If this is not enabled, you will not be able to create a new billing entry with a negative amount.
3. From Billing, enter a ZERO DOLLAR Pay Amount and enter a NEGATIVE Amt Paid.
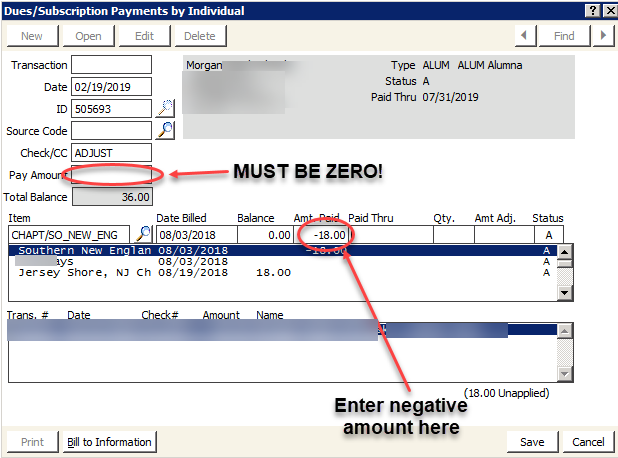
The Pay Amount is ZERO and you enter a negative amount on the line you are reversing
4. Click OK > iMIS will warn you that you are creating a negative AR.
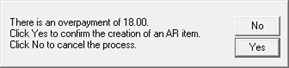
The Dues item is still marked paid!
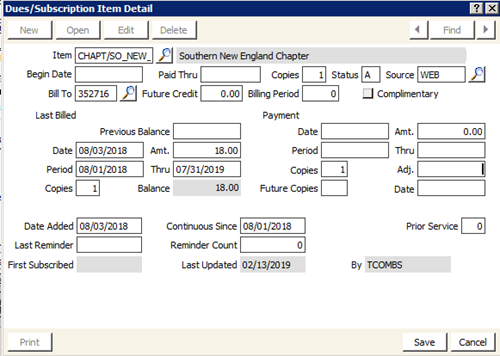
5. Go to the Billing Tab in iMIS and double click the item you just reversed > click Edit and blank out the four fields shown below.

6. It should look like this when you are done > click Save.
7. Depending on your system setup, if you have reversed the Primary Dues item, you will also want to erase the Paid Thru Date on the Profile or Status screen in iMIS. For Chapter payments, this would be rare.
8. You may now use the credit for payment towards another open pledge or gift OR, if you wish to refund the money:
Go to AR/Cash > Process Month End Procedures > Credit Invoices.
Select the record you wish to refund click Mark/Unmark and then issue refunds.
This will remove the open credit in iMIS and create a debit balance in your Accounts Payable account which should be used when issuing the check from your accounting system.
Payments made by credit card when you use BluePay
1. Go to RefundXpress from the Staff site.
2. Confirm the Dues/Subscription Item detail has been corrected. If not, follow steps 5 and 6 above.
Adjusting a Company or Chapter Payment that covered multiple people.
When a Company or Chapter has paid for multiple individuals using Service Central, and one of the individuals is incorrect, follow these steps to remove the payment from the incorrect person and apply to the correct one.
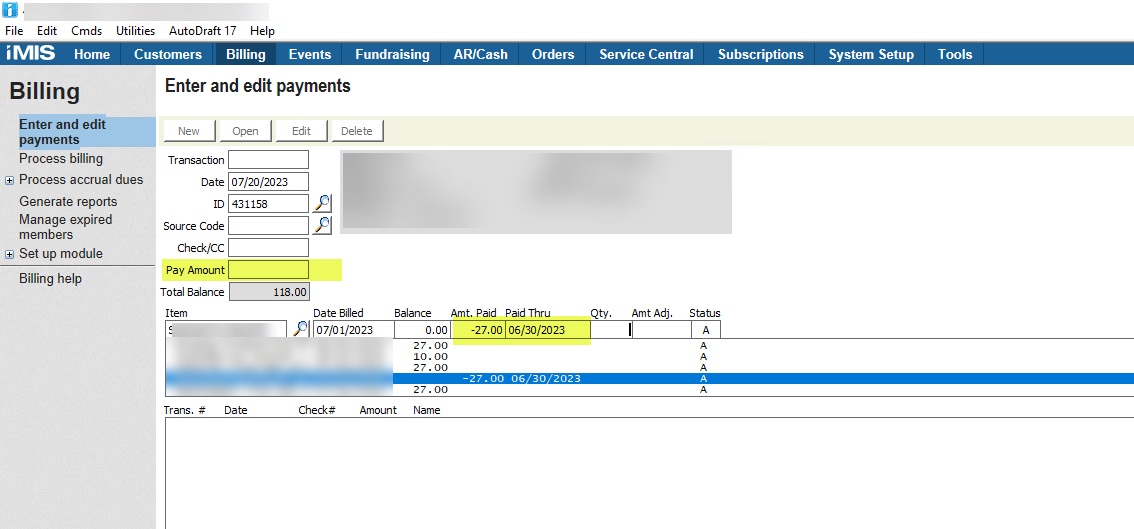
1. Enter a reverse of the payment in Billing - Enter and edit payments (in this example we are reversing a $27 payment accidentally made to this member. Note we are on the Member's record, not the Company/Chapter). Pay close attention to the highlighted fields. It is critical that the Pay Amount is zero.
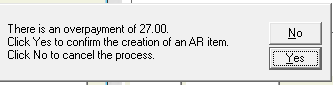
2. A message will appear in the lower left corner of the screen, answer Yes here
3. Highlight the subscription record under Billing and Edit the Paid Thru and Payment Date (set the Paid Thru to the old Paid Thru and erase the Payment Date)
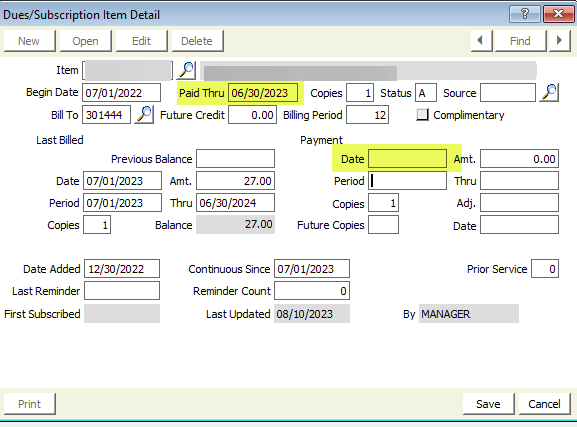
Click Save when done
4. Go to Service Central, Click Enter and edit Payments, New - Enter the Company/Chapter ID
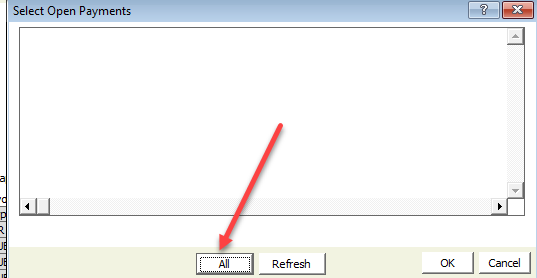
5. In the Check/CC field, enter * and press Tab (we are going to move the credit from the individual to the chapter)
6. Click the All button to show all available credits in the system
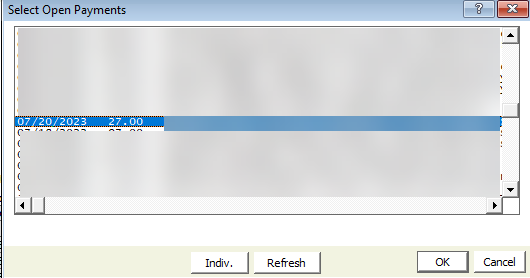
If there are numerous credits in the system, you can find the credit you are looking for by clicking on the top row, pressing *, and then typing the name of the individual who has the credit. Pressing + will go to the next match and - to the previous match.
7. Click on the appropriate credit and hit OK
8. Scroll to find the individual who should have been paid and click the Pay button. Click Save
