
Settings
Overview
This page contains reference information for each of the settings fields inside of iMIS QuickPay.
To access the application’s settings area, click on Settings in the top navigation bar.
Settings
Organization Display Name
This can contain anything you’d like. It will show up on the invoice screen underneath your uploaded logo. It should be the name of your company or organization so that payors know who they are paying.
Organization Logo
Upload your organization’s logo. Transparent PNG images are preferred. Maximum file size is 2 MB.
The height of the logo will be restricted to 150px on the invoice.
Organization Support Email
This is the email address where payors can send a message to request support.
This email is only displayed if there is a failure paying off the invoice in iMIS. Payors who do not experience any errors will not see this email.
Payment Method
Select a payment method from iMIS to be used when payors make a payment on an invoice.
The dropdown will only show payment methods registered in iMIS where the payment type is “Credit Card” AND the payment gateway is “iMIS Pay”. Other payment methods cannot be used at this time.
At this time, only one payment method is supported for all invoices.
At a later date, support for individual payment methods (or payment method overrides on a per-invoice basis) may be added to the product.
This dropdown shows all payment methods registered in iMIS. Best practice is to have a QuickPay specific payment method. The payment method must have the gateway as IMISPAY.

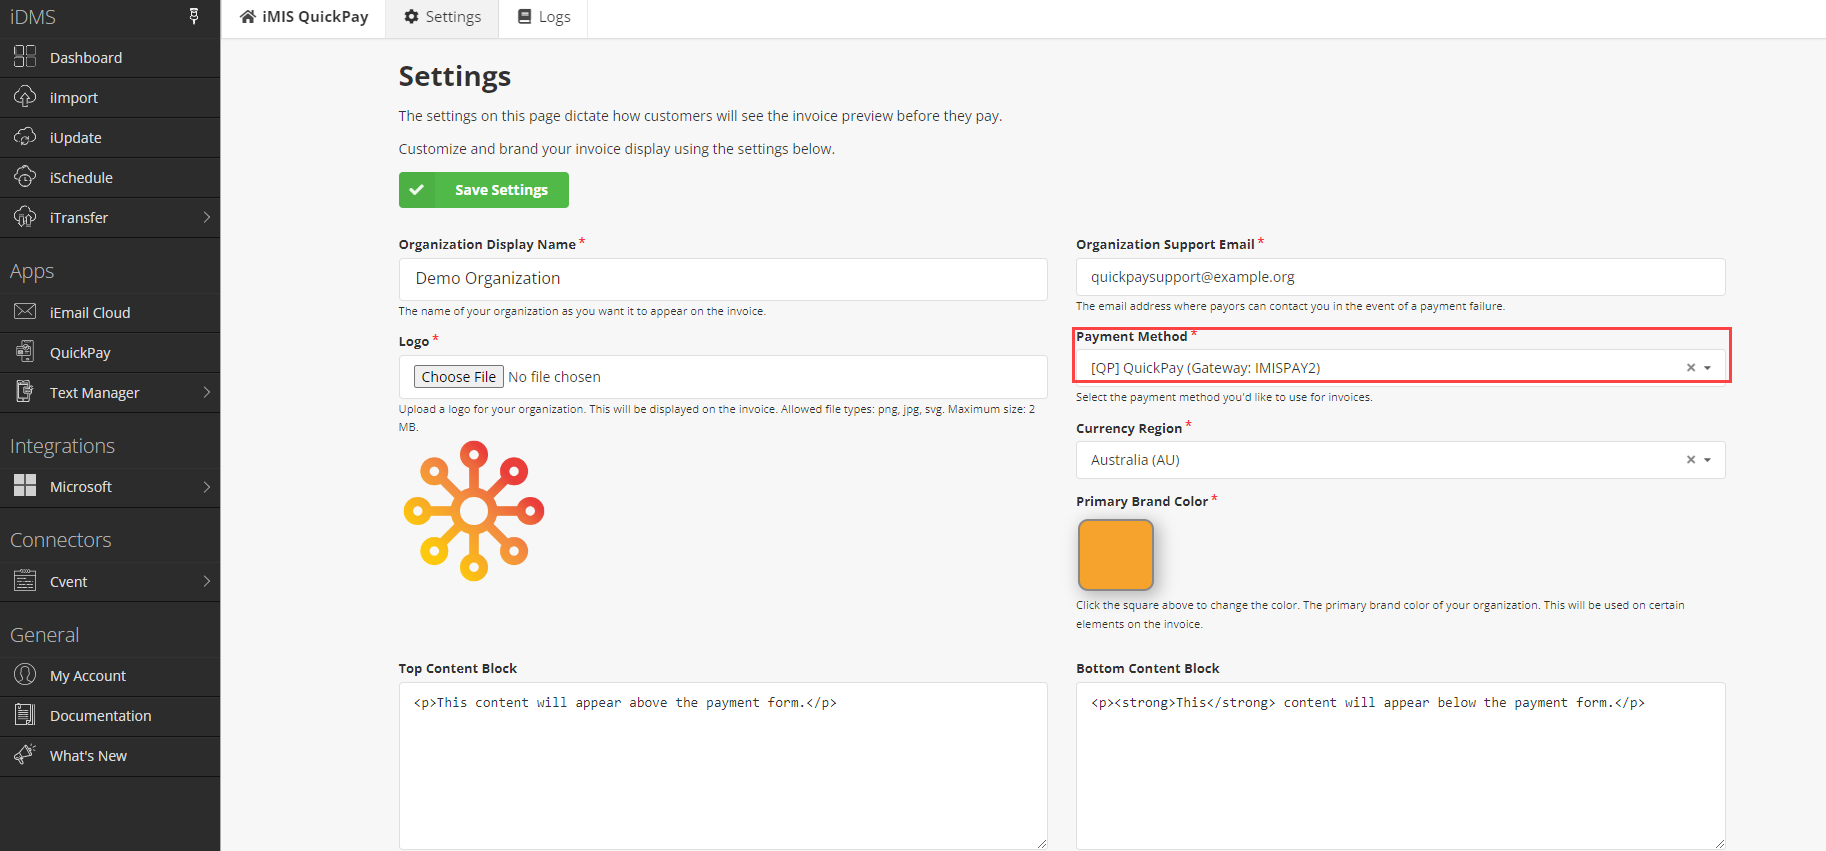
Currency Region
Select the currency region that matches the one you specified in Settings > Finance > General.
These two values must match, otherwise all payment attempts will result in an error.
In rare cases, it is possible to set a currency code on a payment method specifically, rather than at the iMIS system level. If this applies to you, select the currency code that matches the payment method you are using for iMIS QuickPay.
Primary Brand Color
Set this value to your organization’s primary brand color. Elements on the invoice payment page will utilize this color where applicable.
To input a Hexadecimal color code (e.g. #A1B2C3), open the color picker, and click on the bottom bar to cycle between color modes until you see “HEX”. Then paste your color code into the box and press Enter.
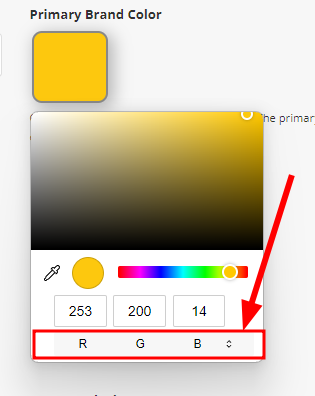
Click here to cycle through color modes until you see “HEX”.
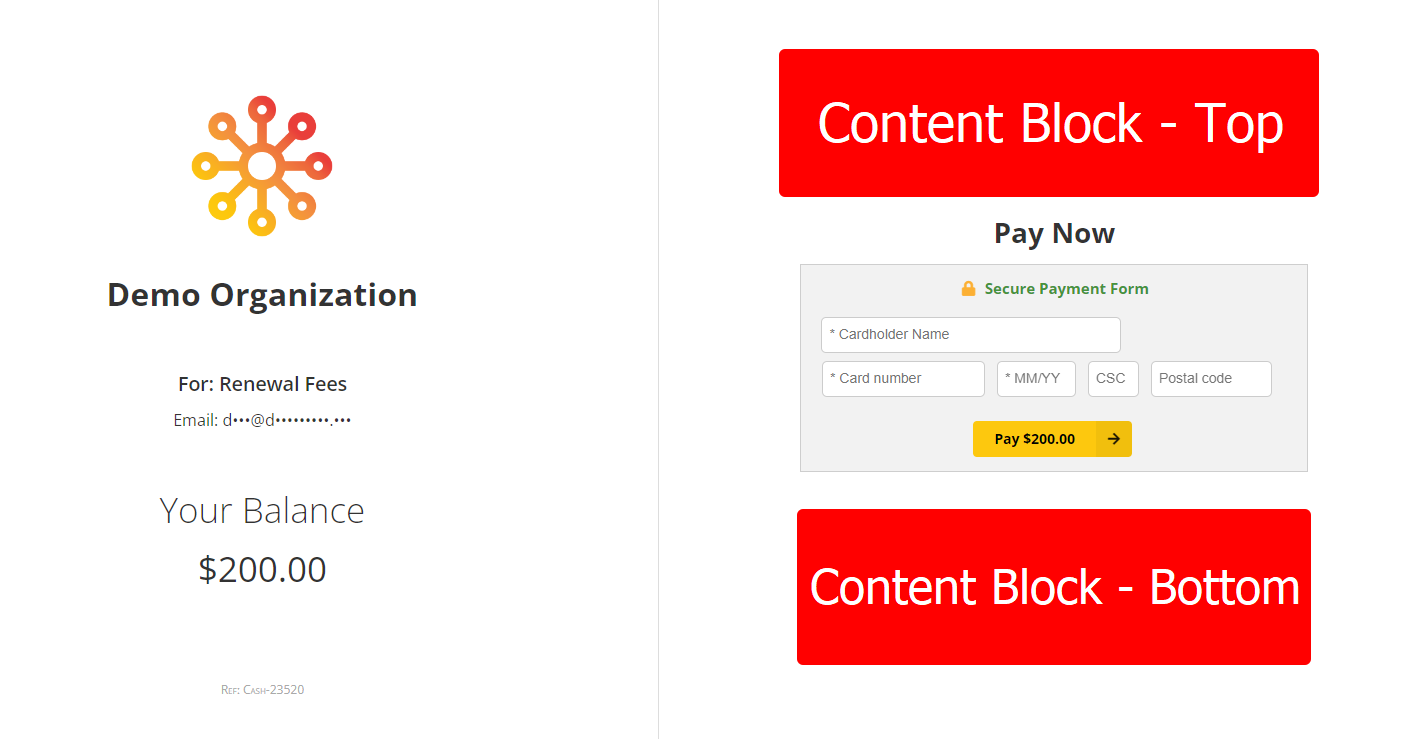
Content Blocks
The content blocks allow you to insert HTML content above and/or below the payment form on the invoice payment screen. Provide legal text or help/support information to payors using these fields.
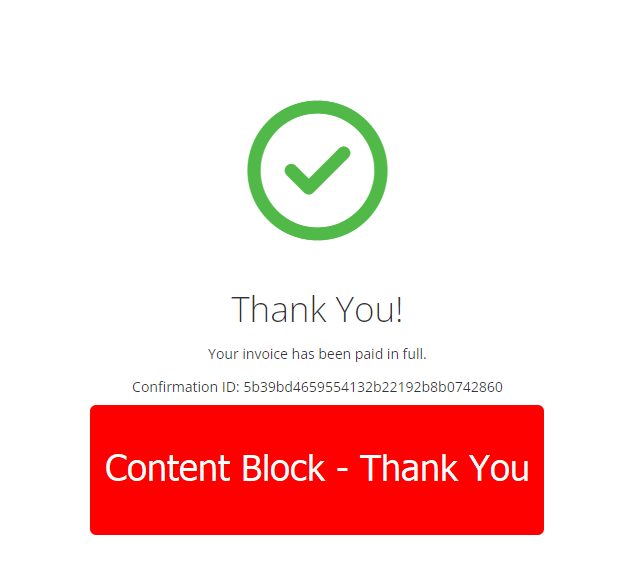
If not set, the Thank You content block defaults to the message: “You may now close this window.”
<script> Tags
JavaScript tags are not supported inside content blocks at this time, as this can cause the credit card payment widget to stop working. Please refrain from entering any <script> tags into the content block fields.