iEmail Cloud Options
Navigate to the Options Screen
First, log into iEmail Cloud as a user with the SysAdmin role such as Manager.
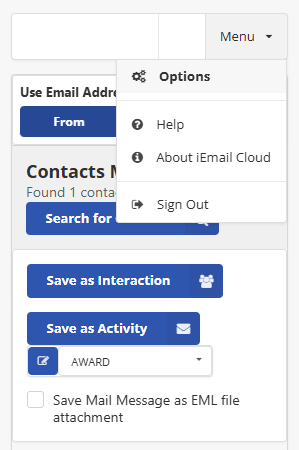
Once logged in click the "Menu" button near the top right.
A drop-down menu will appear, click "Options".
This will take you to the Options Screen where you can change the iEmail Cloud's settings.
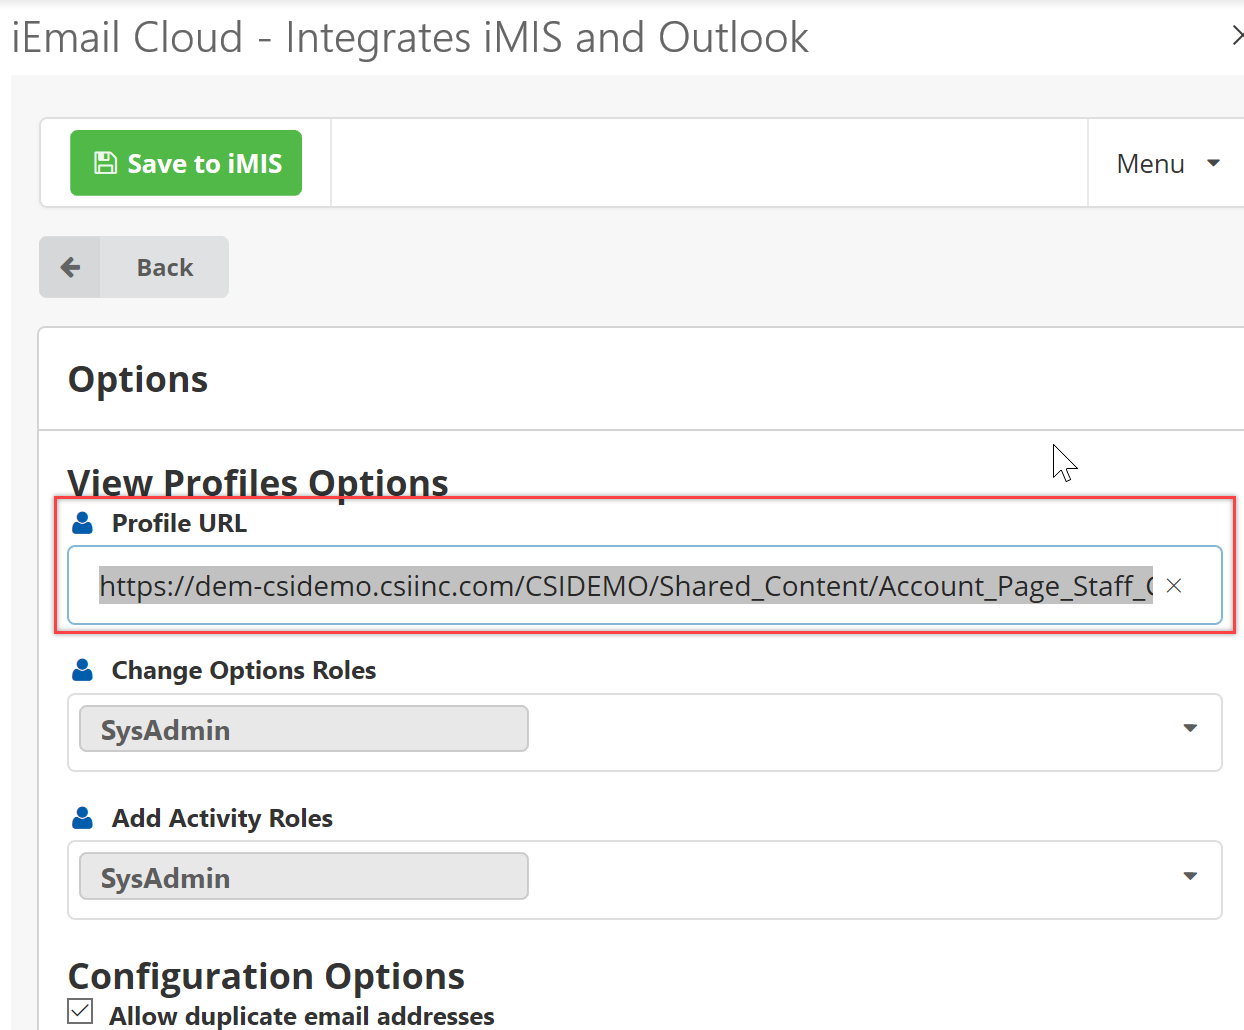
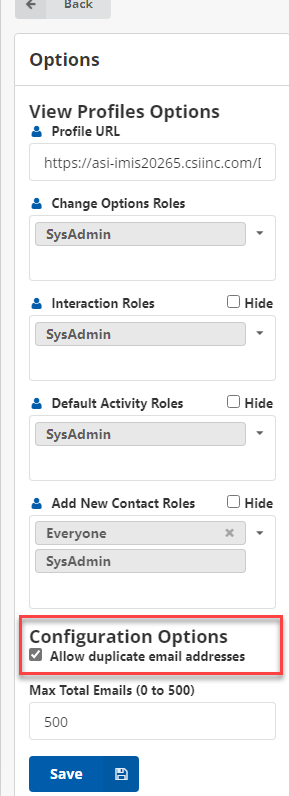
Profile URL
In the profile URL field, enter the URL that points to your iMIS Staff page. This URL allow users of iEmail Cloud to view iMIS member profiles.
An example of the URL might be:
https://staff.myorganization.org/Account_Page_Staff
To find the correct Profile URL to use, follow these steps:
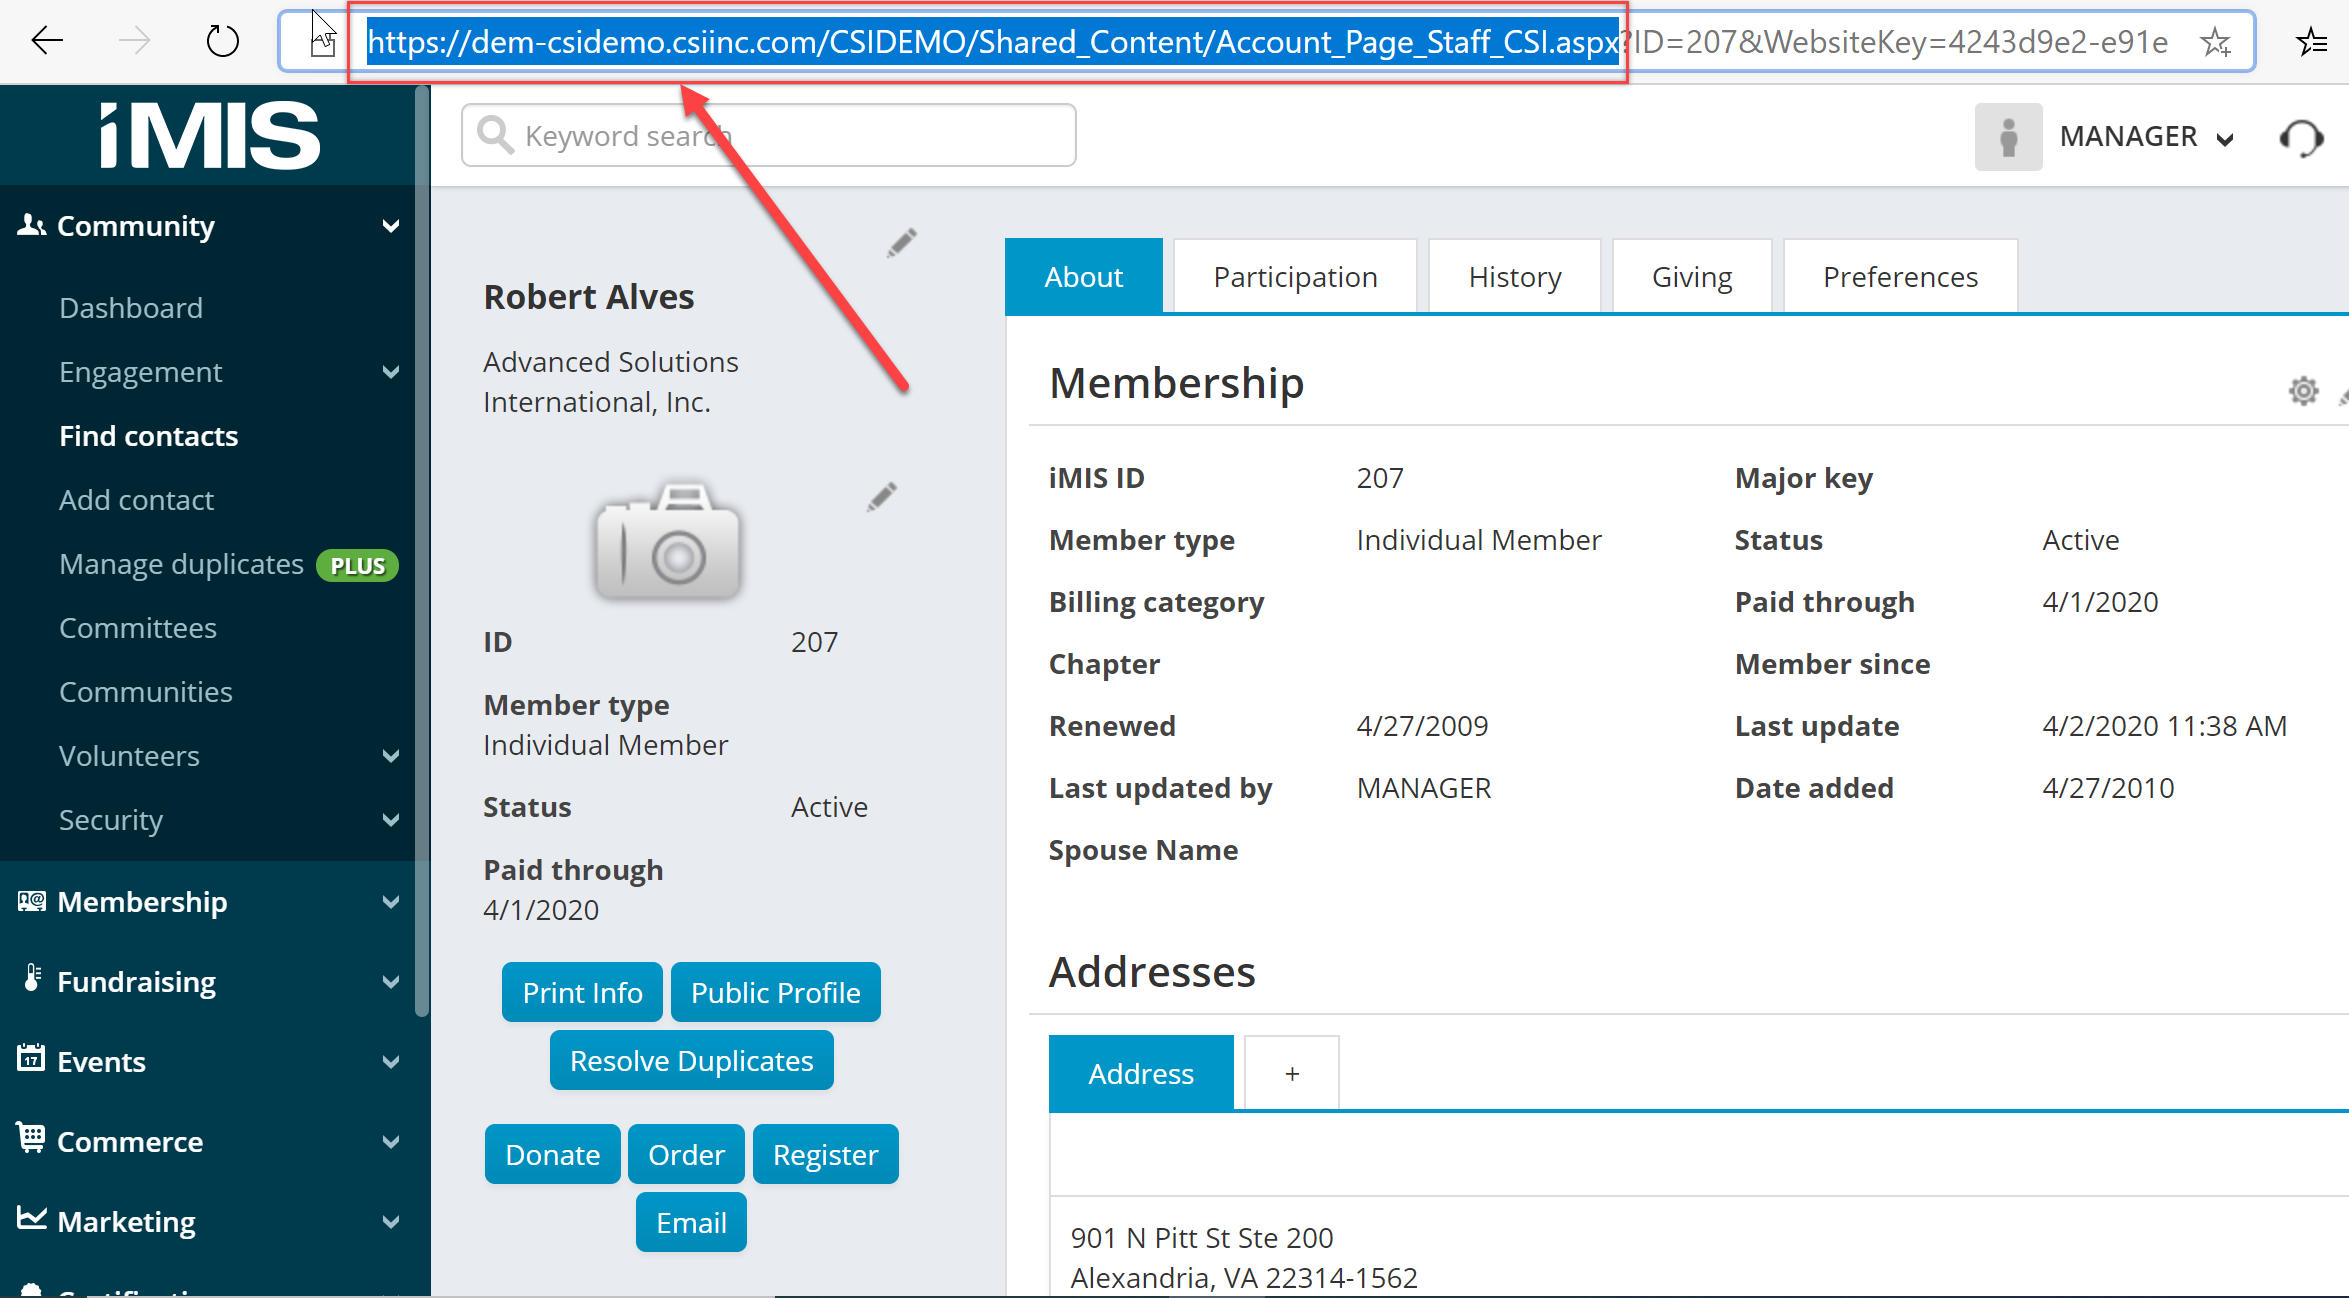
Navigate to your Staff Site and Find a Contact
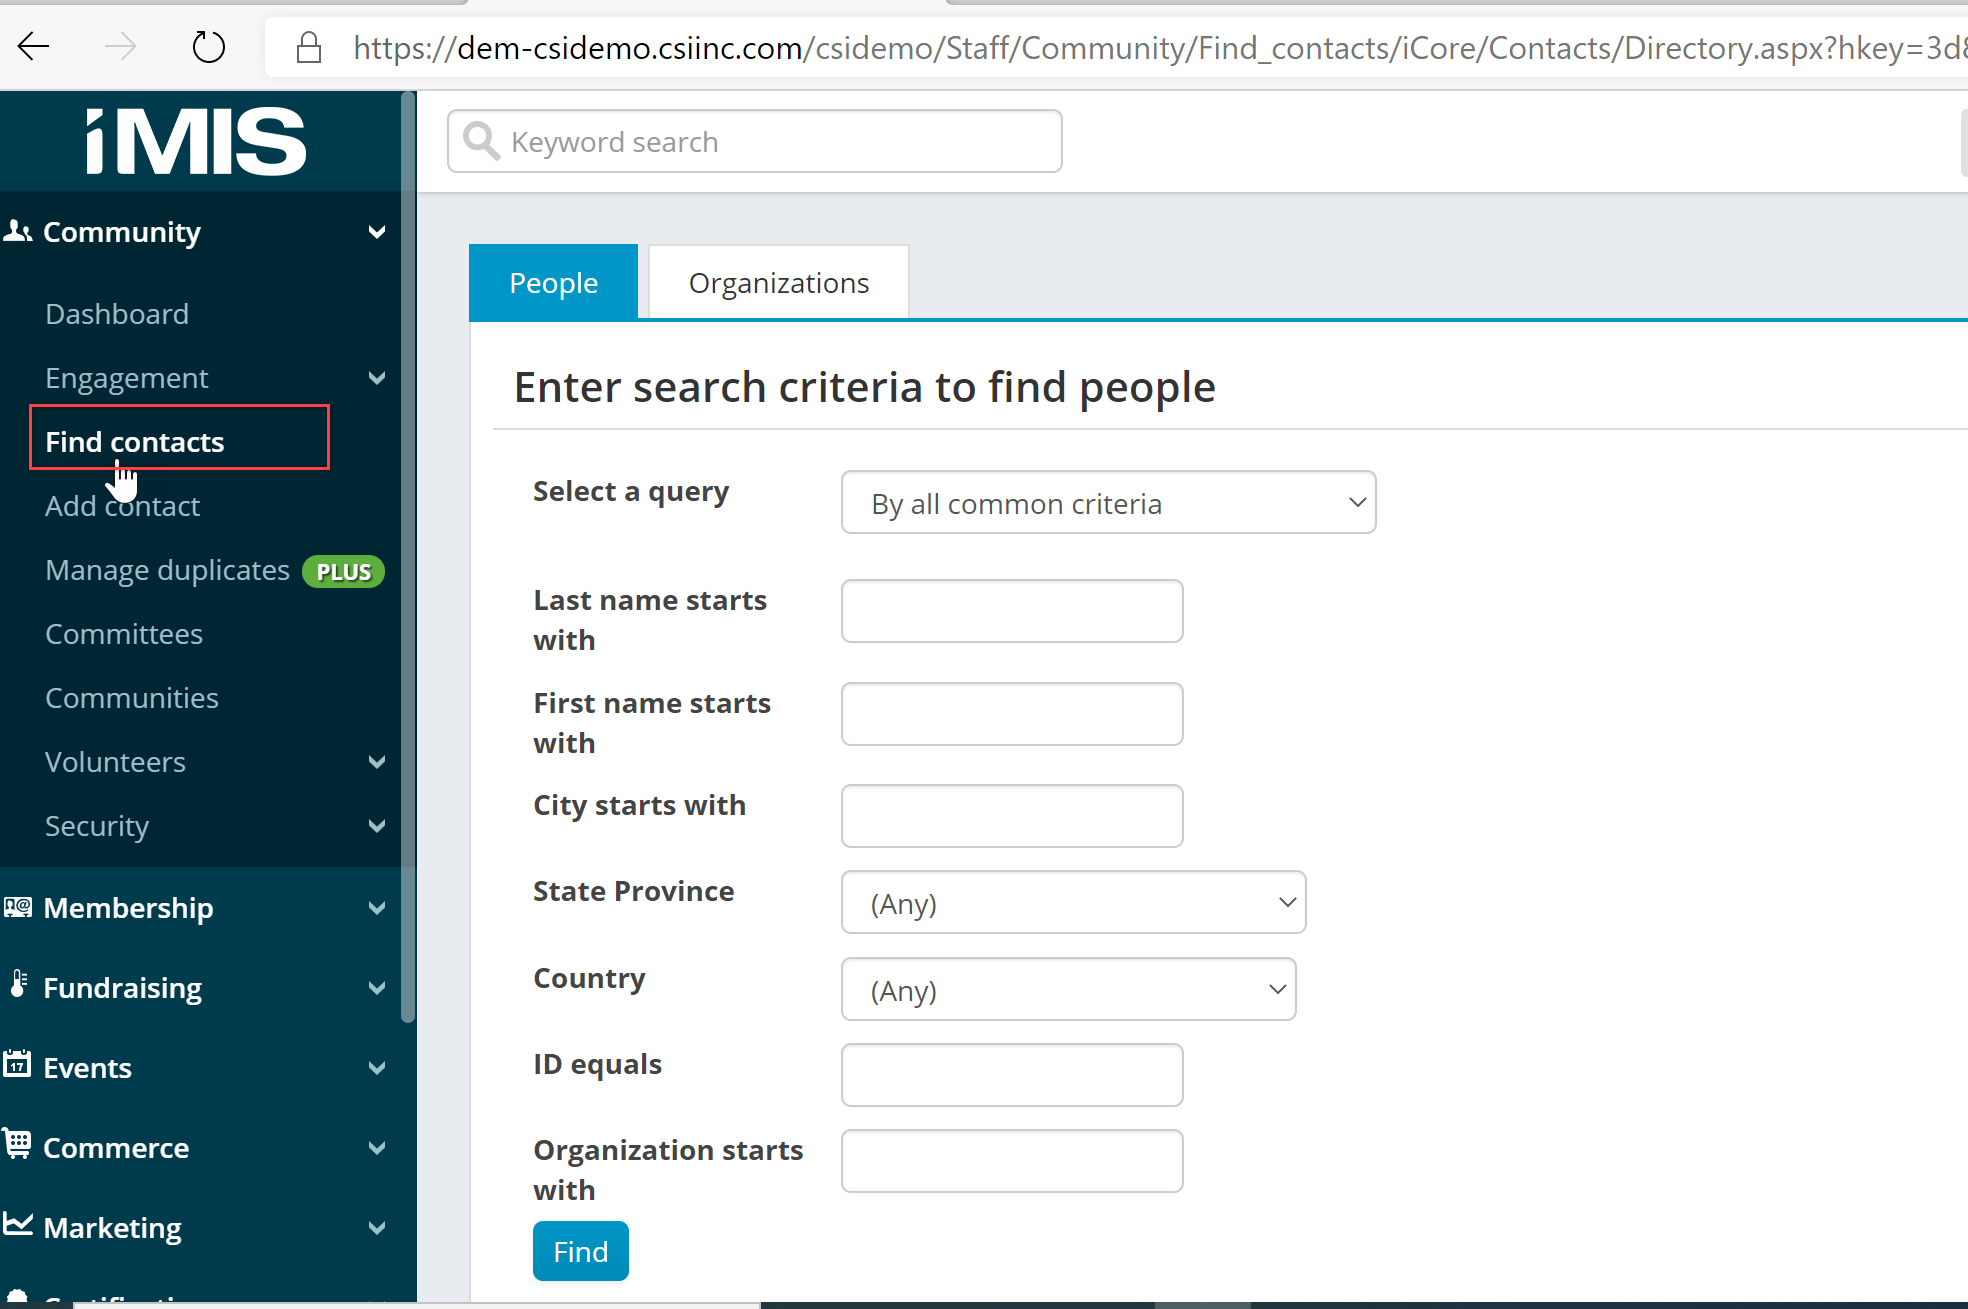
2.Find any contact to visit their profile. Copy everything to the left up until the .aspx in the URL and paste that into your iEmail Cloud Profile URL setting
iEmail Cloud Plug-In:
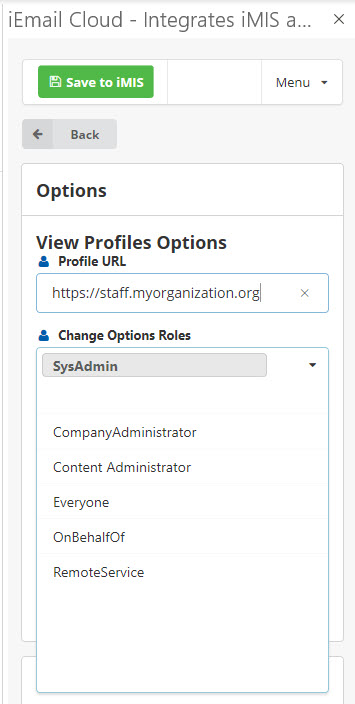
Change Options Roles
Contains a list of the iMIS roles that can view and change the Options in iEmail Cloud. These roles are typically created in the iMIS Staff site under Communities->Security->Roles
NOTE: By default, only an iMIS user that already has the SysAdmin role can view the Options Screen of iEmail Cloud. For all other users, the Options menu item is hidden. This is to control what an organization's users are able to adjust.
Selecting an iMIS role in this field will give those users the ability to change options in iEmail Cloud.
If a user's role is not in this list, the "Options" item will be hidden from the dropdown "Menu".
Add as many or as few roles as necessary. Remove roles by clicking the "x" button next to the role
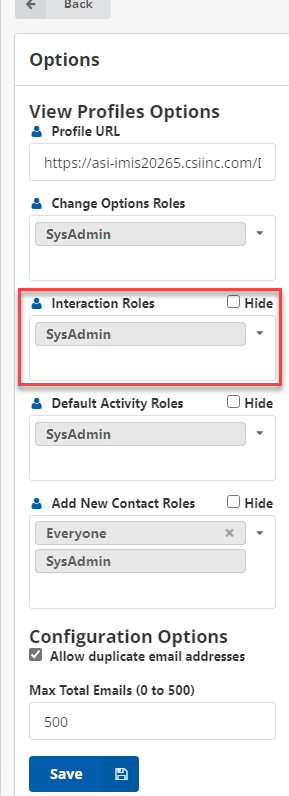
Interaction Roles
Contains the list of iMIS roles that have authority to add Interactions to iMIS. The Hide checkbox will hide the button from showing up no matter what role is in the list. The SAVE button at the bottom will save all changes to Options.
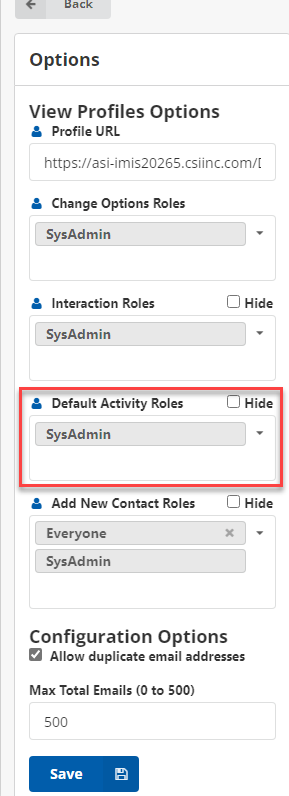
Default Activities Roles
Contains the default list of iMIS roles that have the authority to add email activities to iMIS. The Hide checkbox will hide the button from showing up no matter what role is in the list. The SAVE button at the bottom will save all changes to Options.
This default list is applied to each individual activity type that is setup under "Setup Activity Types". These defaults remain in effect for all Activity Types that have not had their roles set at the individual level (see Activity Type Setup Options further down).
Add as many or as few roles as necessary. Remove roles by clicking the "x" button next to the role
Add New Contact Roles
Contains the list of iMIS roles that have authority to add New Contacts to iMIS. The Hide checkbox will disable the ability to add New Contacts no matter what role is in the list. The SAVE button at the bottom will save all changes to Options.

Allow Duplicate Emails
By checking this box, iEmail Cloud will allow users to add email activities or recent interactions to iMIS records that have duplicate email addresses.
An example might be that Dan Johnson is the main contact for ABC Company but he is also an individual in iMIS. Each iMIS record would have the same email address and thus needs the email to be written to both records.
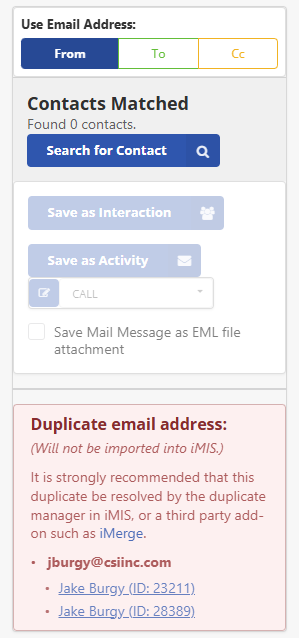
By default, the checkbox is unchecked and a user will see the "Save as Interactions" and "Save as Activities" buttons as disabled. There will also be an error box showing the records that were found to have duplicate emails. The records will be shown as hyperlinks to take you to that user’s profile in iMIS for you to easily correct.
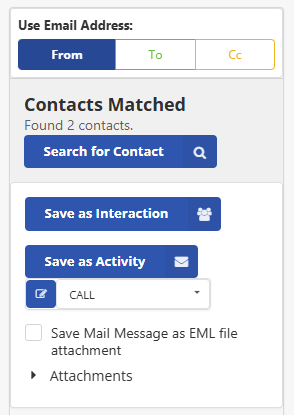
If checked, the option will allow users to create interactions or activities in iMIS by enabling the "Save as Interactions" and "Save as Activities" buttons. The error box will also be changed to a warning box showing the duplicate emails found. The records will be shown as hyperlinks to take you to that user’s profile in iMIS for you to easily correct.
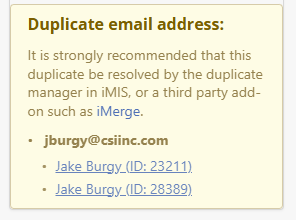
The error box will be below the Save to iMIS section (image on the left), but for the sole purpose of making and keeping documentation beautiful, the screenshots are placed next to one another.
Max Total Emails (0 to 500)
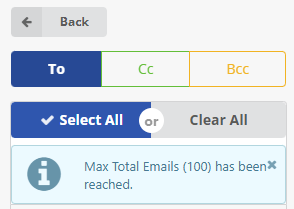
The Max Total Emails limit is the maximum number of emails that will be selected when utilizing the "Select All" button when adding recipients to an outgoing email.
The allowable range is 0 to 500 as 500 is that maximum number or recipients that Outlook currently allows to be added to one email.
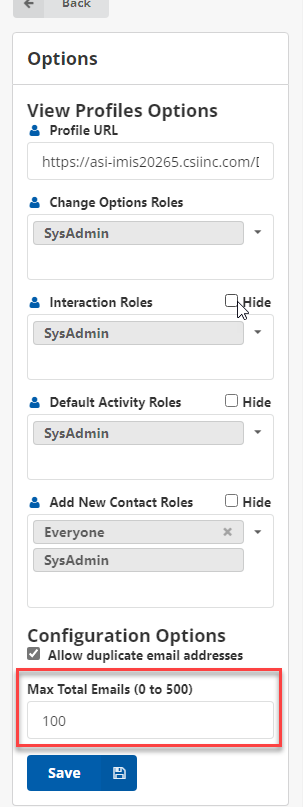
In the example above, the limit has been set to 100 in the Options.
The example below shows the result of clicking the Select All button on the results of a search containing more than 100 results. The Select All process will stop when it reaches the limit defined in the Options.
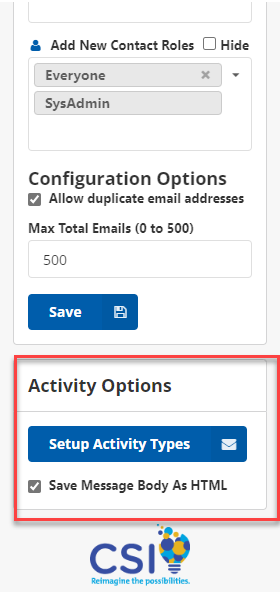
Activity Options
Setup Activity Types
The Setup Activity Types allows administrators to configure how information is written for each activity type selected.
Note: If you are transitioning from iEmail Desktop to iEmail Cloud, then your Activity Setup will transfer to iEmail Cloud automatically.
Activity Types are first selected from a drop-down list:
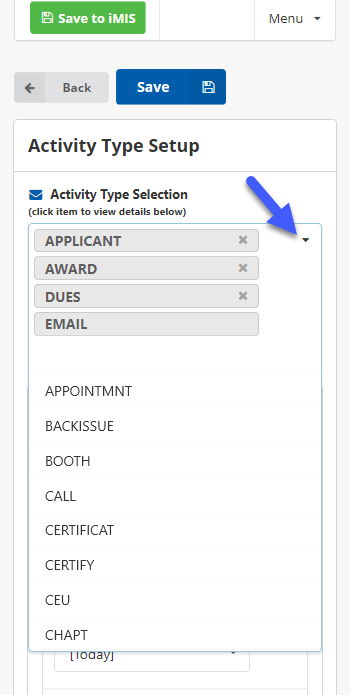
The list of available option are drawn from the Activity Types already contained in iMIS
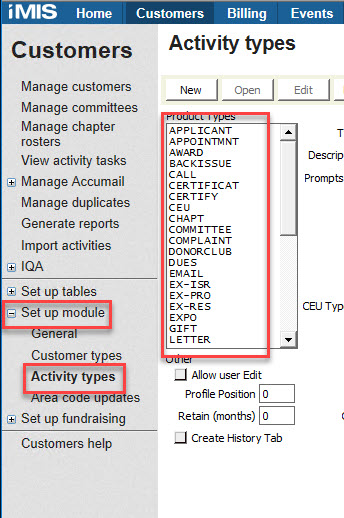
For the iMIS Desktop, the list of available Activities is drawn from the Customer→Set up module→Activity Type section
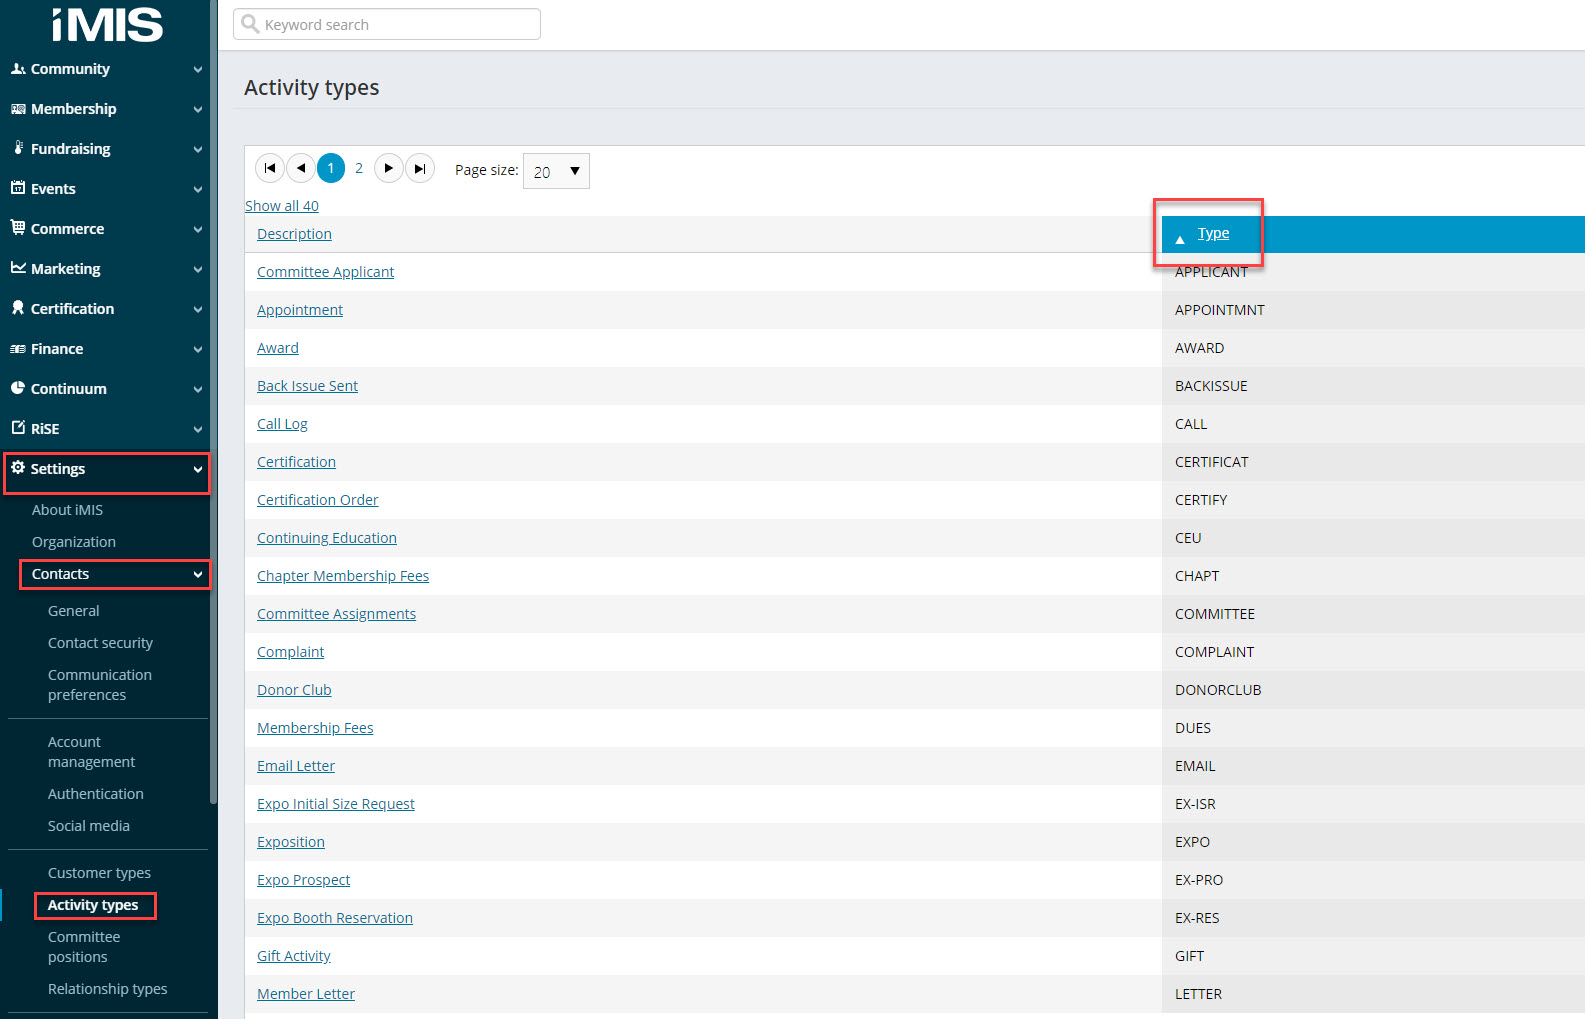
For the iMIS Staff site, the list of available Activities will be the same as the iMIS Desktop. However, if your organization does not use the iMIS Desktop, the list of Activities shown in iEmail Cloud is drawn from the Settings→Contacts→ Activity Type→Type section
NOTE: Using System Default Activity Types is not recommended - this includes, but is not limited to, DUES, MEETING, ORDER, SALES, GIFT, PLEDGE, etc.
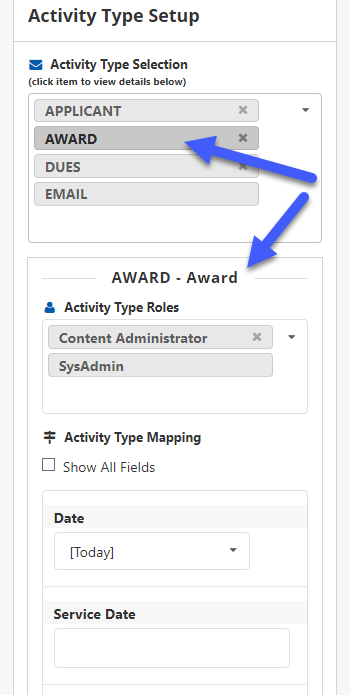
To adjust the fields to be saved to iMIS and/or modify roles for the respective Activity Type, click on each Activity type
Activity Type Roles
For each Activity Type, a role or a set of roles will be displayed in the Activity Type Roles drop-down as seen below.
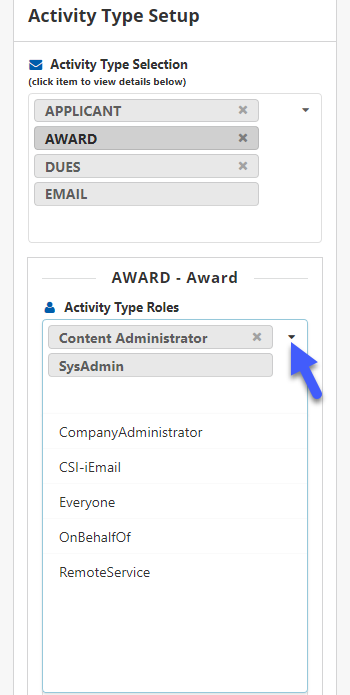
When a new Activity Type is added, the initial list of roles will correspond to the Default Activity Roles as specified previously on the Options page.
The individual Activity Type Roles may be modified as needed to allow users with specific roles the ability to add specific Activity Types. When a user logs into iEmail Cloud, they will only see Activity Types that match their role(s) available for adding. If a user is not associated with any of the roles set up for any of the Activity Types, the Save as Activity button and list of Activity Types will not be visible.
Watch this short video that explains this all:
IEC-SettingUpActivityTypePermissions.mp4
Activity Type Mapping
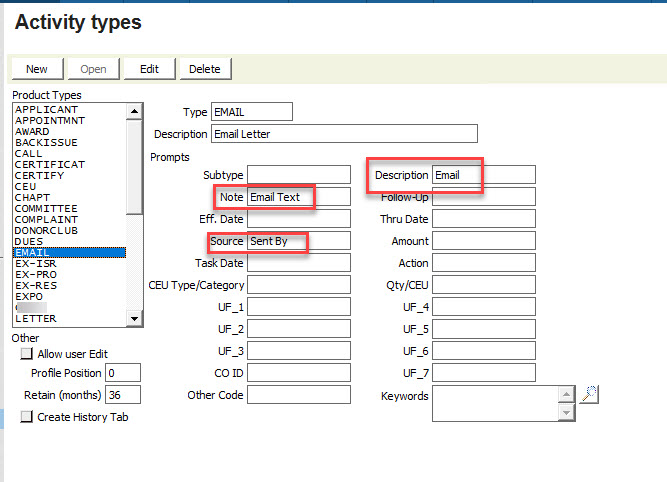
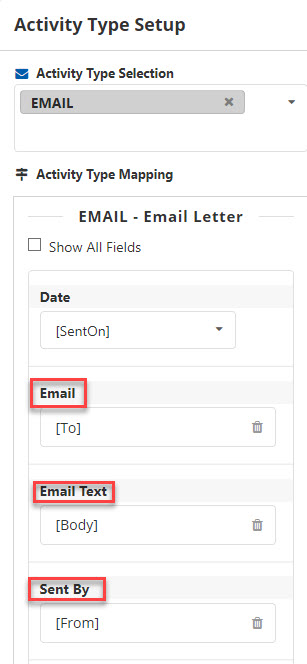
For each Activity Type, the Activity fields from iMIS will be displayed. Each field title (after the Date field) will correspond with what text was added to the Activity Type in iMIS.
For example, if the Description field of the Email Activity type in iMIS was described as 'Email', that is the title of the iEmail Cloud field name
If the Note field of iMIS was described as 'Email Text', that is the title of the iEmail Cloud field name
If the Source field of iMIS was described as 'Sent By', that is the title of the iEmail Cloud field name
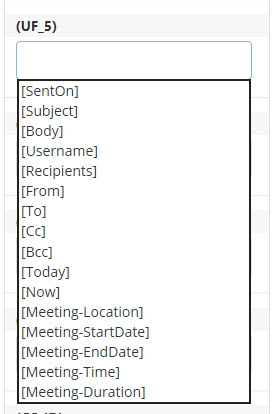
If your iMIS Activity Types have additional fields, click the 'Show All Fields' box in iEmail Cloud. This will then display all the iMIS Activity type field descriptions. Each box will have a predetermined set of choices to complete each time an email is sent.
Depending on the field configuration (text versus date), you will have different options to select.
For example, the UF_5 field is usually a text field. Thus, these choices are available:
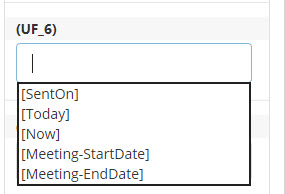
However, the UF_6 field is usually a Date field. Thus, these choices are available:
These are the results of the choices available
[SentOn] | Corresponds to the date the email message was sent on |
[Subject] | Corresponds to the subject line of the email message |
[Body] | Body section (entire message text) of the email message |
[Username] | Corresponds to the logged in user name (from iMIS) |
[Recipients] | Comma separated list of all recipients email addresses |
[From] | Email address who has sent the email message |
[To] | Email addresses the email message was sent to |
[Cc] | Email addresses the email message was copied to |
[Bcc] | Email addresses blind carbon copied |
[Today] | Current date, for example: 4/12/2013 12:00 AM |
[Now] | Current date and time, for example: 4/12/2013 9:30 AM |
Note: The 'Allow user edit' button at the bottom of the screen is never modifiable through iEmail Cloud. This is set in iMIS Set up Module > Activity Types > Allow User Edit (per activity type).
The Transaction Date field can only have two specific determined values:
[SentOn] | Corresponds to the date the email message was sent on |
[Today] | Current date, for example: 4/12/2019 12:00 AM |
Or, the fields may be configured with static values entered in the setup:
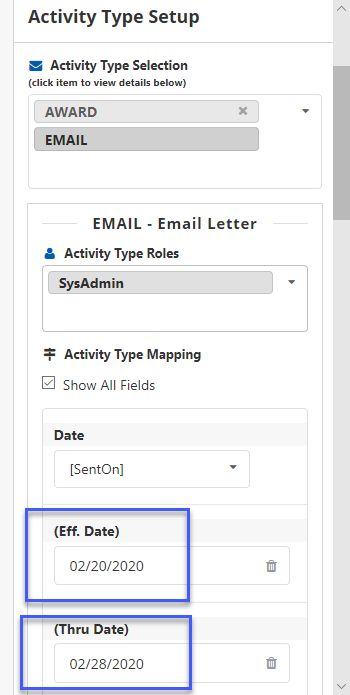
After all Activity Types have been setup as desired, click the Save button to save the configuration:
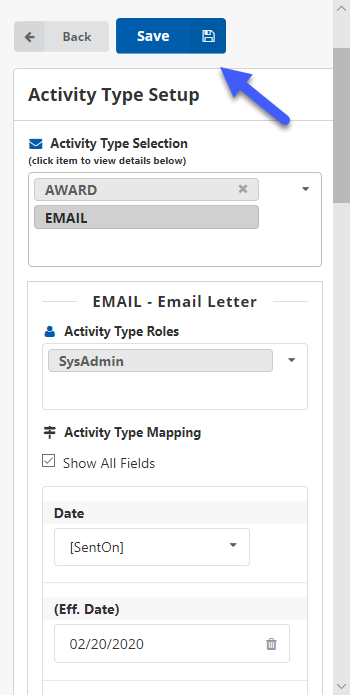
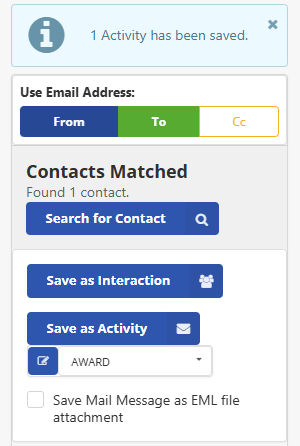
After the configuration has been saved, the Activity Types will be available for selection from the Save to iMIS page:
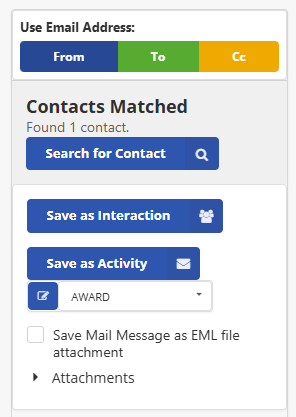
Clicking the drop-down list below the Save as Activity button displays the available selection of Activity Types for this user:
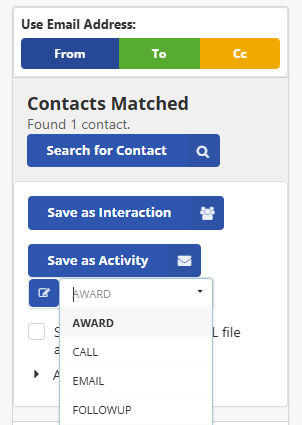
Once the desired Activity Type has been selected, clicking the Save as Activity button will add that activity to iMIS for every contact in the list:
Activity Type Calculated Fields
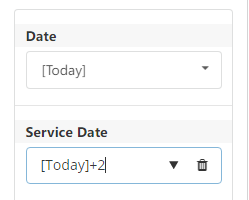
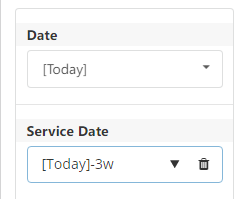
When mapping a date field in Activity Type Setup, you have the option of appending a calculation to the date option you selected.
All of the date options are eligible for appending a calculation.

The calculation must follow this pattern:
[ + | - ] [ <number> ] [ <blank> | d | w | m | y ]
A plus (+) or minus (-) sign indicating adding to or subtracting from
A number indicating the number of date units being added or subtracted
An optional letter indicating the date unit:
d or blank = days
w = weeks
m = months
y = years
This will input a Service Date of two days in the future.
This will input a Service Date of three weeks in the past.
Saving Message Body As HTML
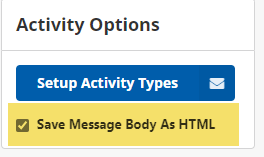
By checking this checkbox, when saving an Activity, iEmail Cloud will save the email with HTML formatting. Leaving this box unchecked, will save the email without HTML formatting in regular text.
Purging Cache
There are times in which the changes in iMIS do not immediately reflect within iEmail Cloud. This is sometime because the data is saved in a cache service and that needs to be refreshed. This process within iEmail Cloud can help you do that without the need to have to go into iMIS staff site to do that.
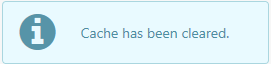
Much like being able to clear your cache in iMIS, you will be able to clear that cache here in iEmail Cloud. Just click on the "Menu" dropdown and then click "About iEmail Cloud".
From here you will see a " Clear Cache" button, once you click it you should see: