Profiles
ICE profiles allows users to edit information on their chapter profile as well as information for their chapter members. 
Create Profiles
To create a new profile, select Profiles > Actions > Create. Enter Name for the profile and Description (used internally only). 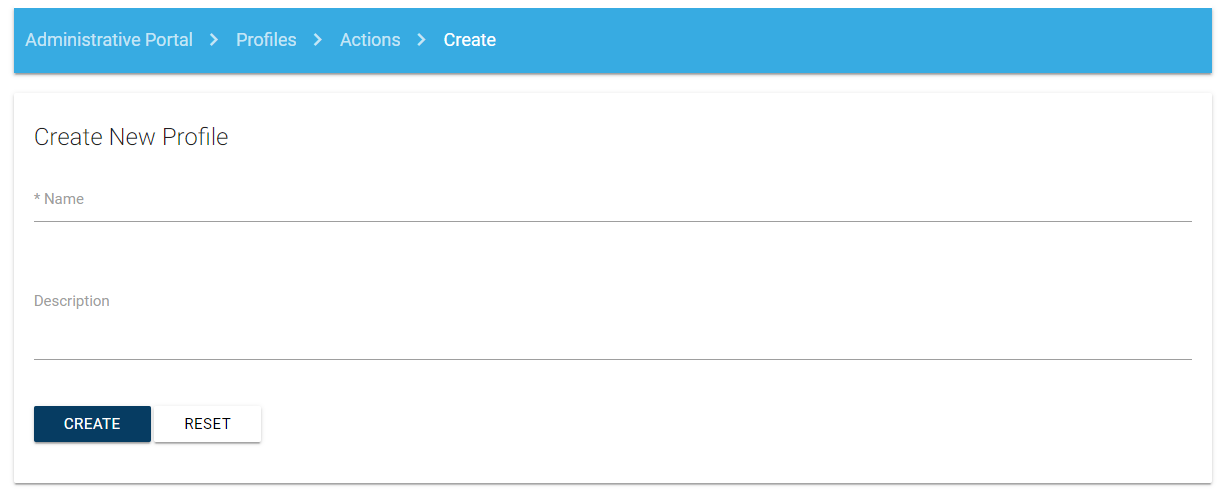
Edit Profiles
To edit a profile, select Profiles > Actions > Edit. Select the profile name from the dropdown list. 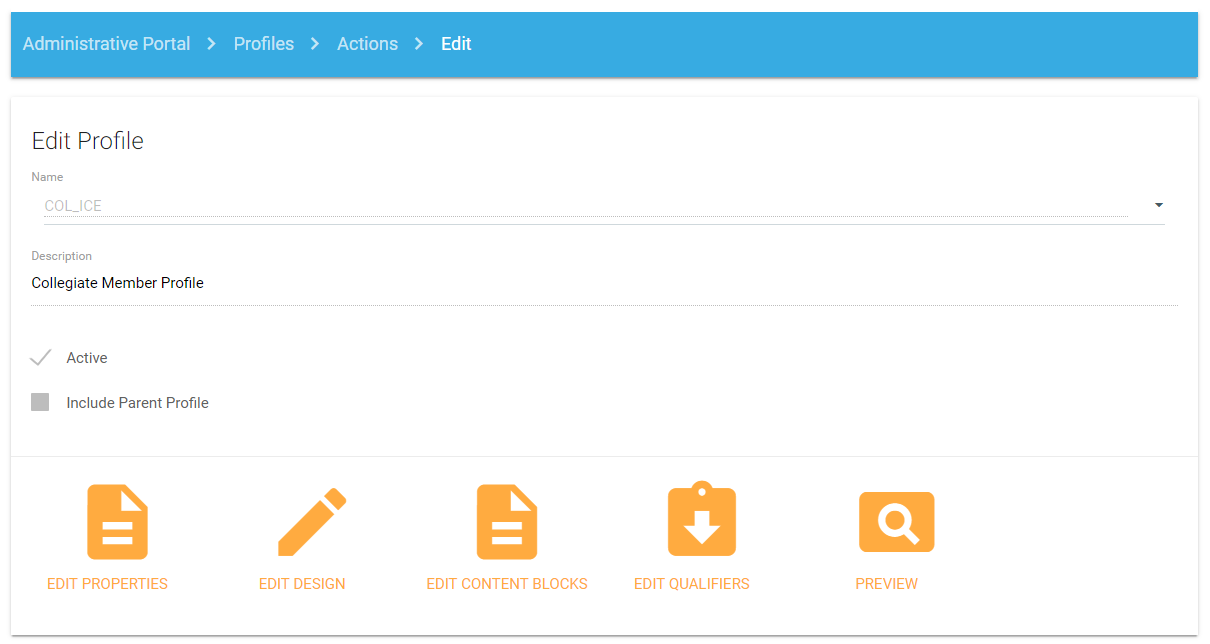
Edit Properties
Select edit properties to update the description and/or mark the profile as active or inactive. 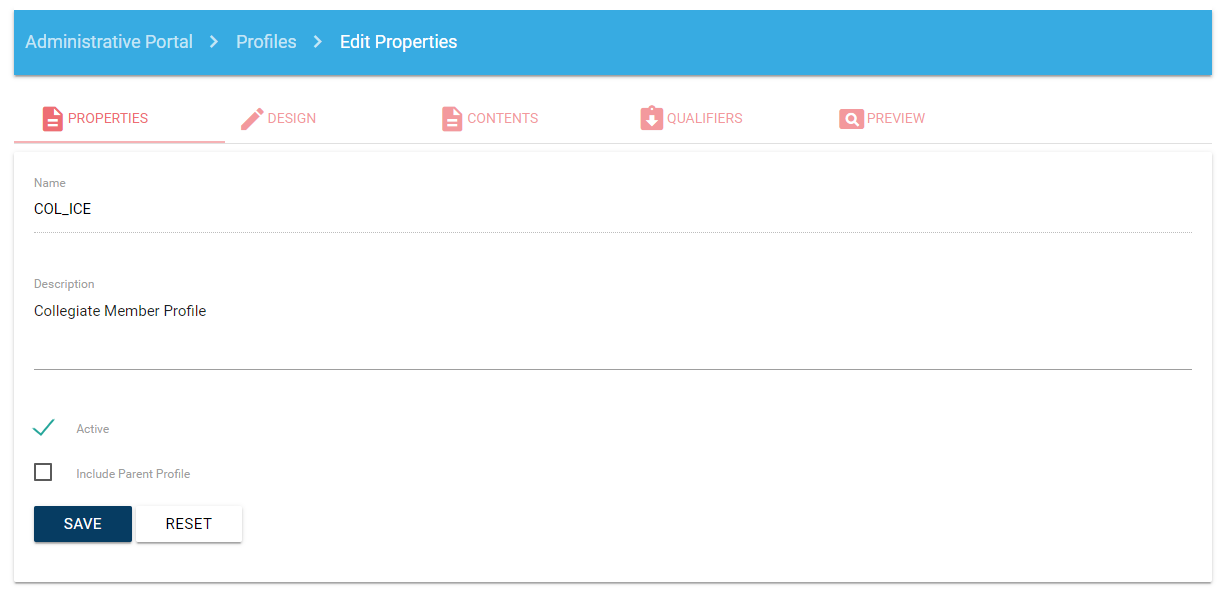
Edit Design
Select Edit Design to:
Add tabs
Name/rename tabs
Order tabs
Add fields to each tab
Design the layout of each tab
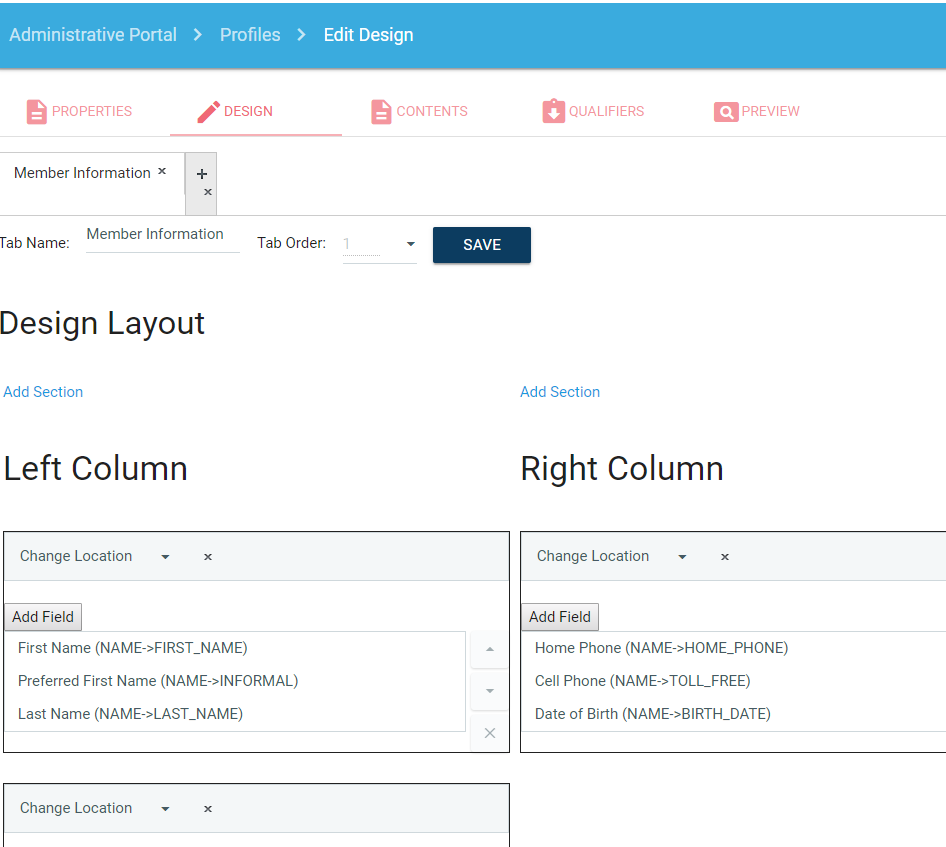
Add Section
Selecting Add Section creates a section on the left or the right side and will allow you to insert fields into each section. As seen below, a modal screen with a drop down list of tables and fields will prompt you what to enter.
Adding Fields
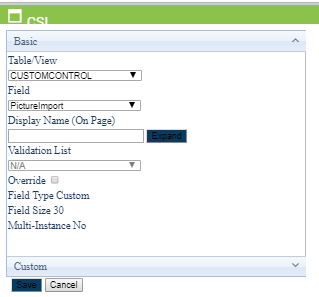
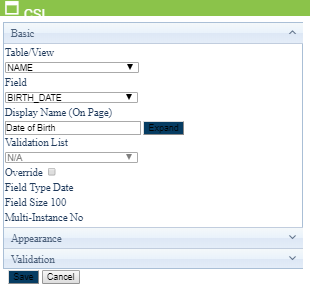
To add a field, select Add Field within the applicable section.
Table/View: select a the table where the field resides in iMIS
Field: select the field to be added
Display Name: field label that will be seen by user
Validation List: allows the Field selected to be a dropdown list of values.
Validation List Override: will allow the user to select an additional list of values to validate the field.
Field Type: data type of field
Field Size: size of data type of field
Appearance: settings for required field and read only
Validation: option to set date range
You can move fields around within their section by using the navigation buttons to the right of each field. You can also remove a field by clicking on the "X" button to the right of each field. To move a Section within a tab, select Change Location link within each section. 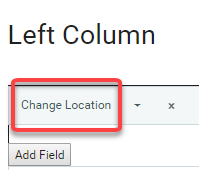
Edit Content Block
For each Profile, you can create content blocks with instructional information for the user. 
Note: Content blocks can also be added on the Edit Design tab by adding a field and selecting the CONTENT_BLOCK table/view.

Edit Qualifiers
For each Profile, you should specify a qualifier for which the profile is applicable to. For example, if you are creating a profile that will show data for those with the member type of "AC", select Add a New Qualifier.
Select "NAME.MEMBER_TYPE" in the Demographic dropdown, then enter the value of "AC" for the member type. Select Insert to save.
Qualifiers work as "AND" relationships for demographics that are different. If the demographic is the same, it will treat the qualifier as an "OR" relationship.
Based on the user or chapter type selected to edit the profile, the qualifiers determine "which" profile to show for editing. For example, you may have a different profile setup for new members versus active collegiate members or alumnae/alumni versus collegiate chapters.
Note: A demographic definition field must exist to be used as a qualifier.
Preview
The Preview button allows the user to view the profile as it is currently designed.
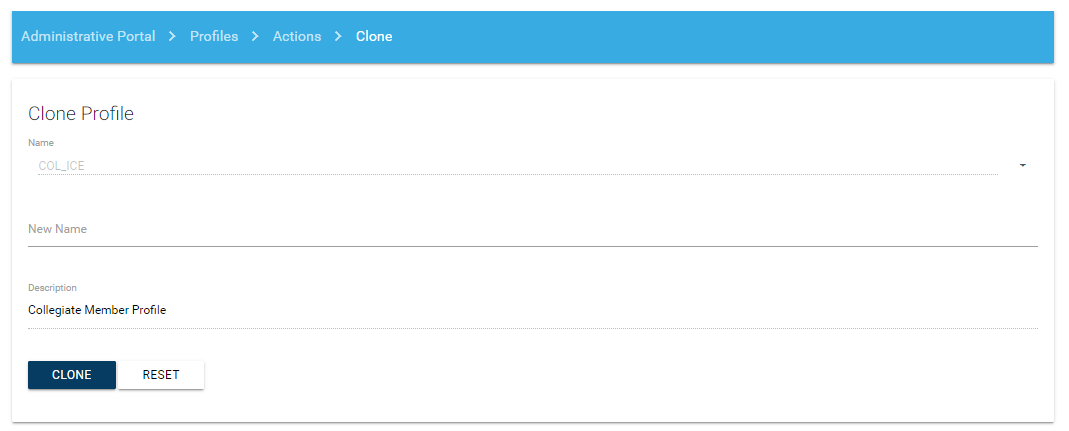
Clone Profiles
Clone Profiles allows the user to select an existing Profile name and clone it with a new profile name.
Add to Sitemap
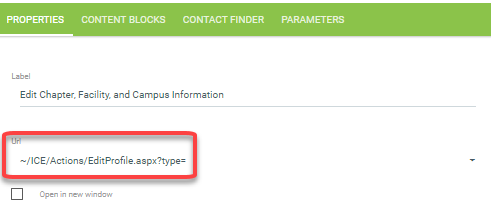
To add a chapter profile to the sitemap for editing, select the ~/ICE/Actions/EditProfile.aspx URL option within the sitemap.
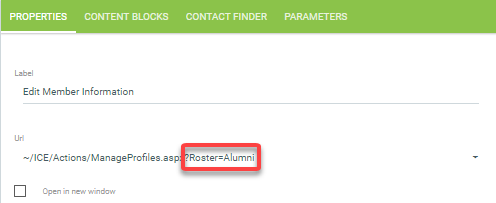
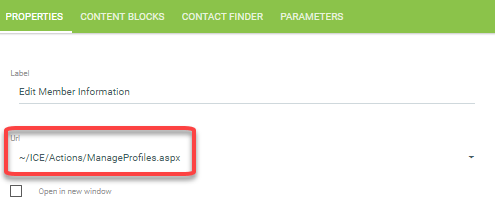
To add a member profile edit page to the sitemap, select the ~/ICE/Actions/ManageProfiles.aspx URL option within the sitemap.
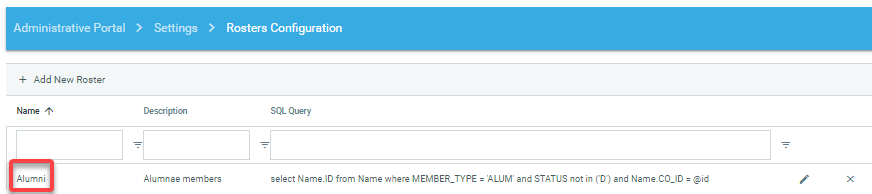
By default, the members that appear on the Edit Profile page are those members that fit under the default roster configuration in ICE (default roster query located under Settings > Membership Configuration). To use a custom roster configuration and modify the list of members shown for edit profile, you can add a parameter to the URL to include the roster configuration code (no spaces). Example:
Roster configuration:
Sitemap: