Forms
Form Definition
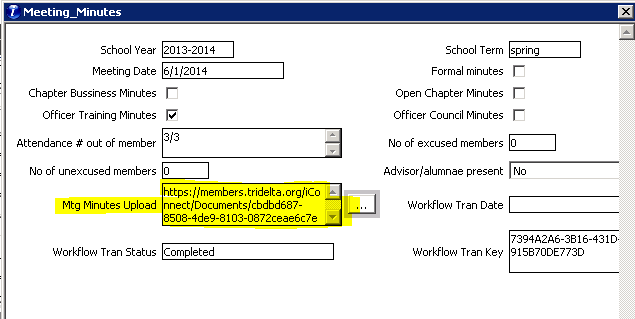
You can create Forms in ICE to collect data for a multi instance user defined table in iMIS. You will map fields in this table to fields on the ICE form as you create it. If any of the fields use a lookup table for validation, this will automatically populate in ICE when the form is created. You can make a new table in iMIS, or use an existing one. In order to use a table for an ICE form, at minimum, these two fields must be added:
WORKFLOWTRAN_KEY – (Char 128)
WORKFLOWTRAN_STATUS – (Char 30)
ICE will update automatically the following demographic fields if they exist in the iMIS table:
FIELD_NAME | FIELD_TYPE | FIELD_LENGTH | PROMPT |
WORKFLOWTRAN_KEY | Char | 128 | Transaction Key |
WORKFLOWTRAN_STATUS | Char | 30 | Status |
WORKFLOWTRAN_DATE | DateTime | 0 | Last Updated |
WORKFLOWTRAN_ORIG_DATE | DateTime | 0 | Original Submit Date |
WORKFLOWTRAN_APPROVAL_STATUS | Char | 30 | Approval Status |
WORKFLOWTRAN_APPROVAL_ON | DateTime | 0 | Approval Date |
WORKFLOWTRAN_APPROVAL_BY | Char | 15 | Approver ID |
WORKFLOWTRAN_KEY: relates to csi_ICE_WorkflowTrans.TRAN_KEY
WORKFLOWTRAN_STATUS: will be 'Submit' when the form is ready to be submitted and will be 'Completed' when the form has been submitted.
WORKFLOWTRAN_DATE: set with date the form has been submitted or last updated
WORKFLOWTRAN_ORIG_DATE: set with date the form was first submitted
WORKFLOWTRAN_APPROVAL fields update with approval information if the form has an approval requirement.
Forms Overview
Manage: To view all of the forms you have created. You can filter or sort the list by any of the columns displayed.
Click on any column header to sort the list by the values in that column.
Use the filters for each column header to limit your results.
Right-click on any form row to Edit, Clone. Delete, or Republish the form.
Actions:
Create: Create a new form.
Edit: Edit the properties of an existing form.
Clone: Clone an existing form. When you clone a form, all of the settings and properties associated with the cloned form will be copied to the new form.
BEST PRACTICE: When cloning a form, you will not be able to edit the form code. Use generic terms in the form code and not academic year or term specific.
Republish: To publish the form for new chapters, select republish. The form will only be published for chapters that do not already have "access" to the form in ICE.
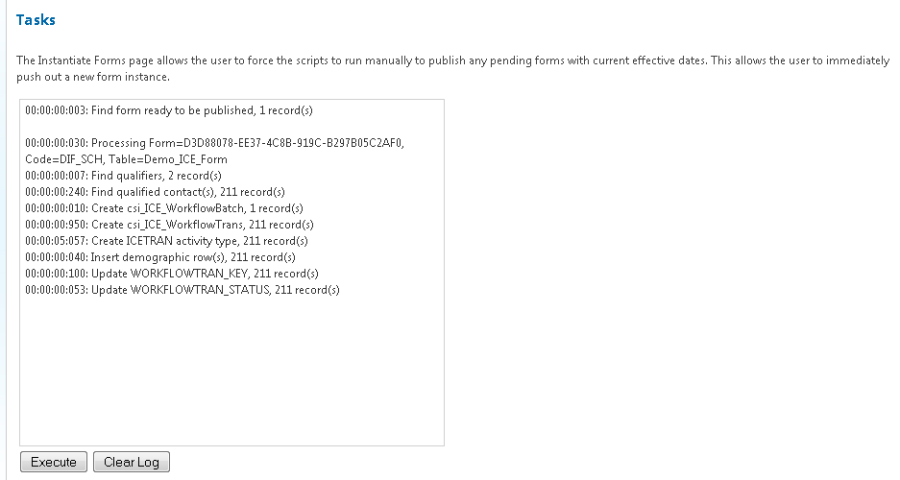
Publish: ICE has a workflow process that will automatically publish schedule and perpetual type forms approximately every 10 minutes. However, you can click the Execute button to immediately publish the form. The window will display the publishing results, letting you know how many form rows were published in your user defined table. Prior to publishing a schedule or perpetual form, confirm the Effective Date has been set. The form will not publish until the Effective Date.
Form Types
There are three form types to select from when creating or cloning a new form:
Schedule
Best used when needing to provide a form for a specific year/term.
A table row is created in iMIS for each applicable record once the form is published.
On Demand
Provides a "blank" form each time selected.
Best used for events that occur multiple times in a year.
Does not create a table row in iMIS.
Perpetual
Best used for forms that need continuous editing by the end user post initial submission.
A table row is created in iMIS for each applicable record once the form is published.
Create a form
The information you will need to create an ICE form is very similar to creating a membership or leadership workflow action. You will define the properties of the form, the design, the instructions (content blocks), the qualifiers (who does the form apply to), and approval requirement.
BEST PRACTICE: When creating a new form, enter an effective date in the future so you can complete all editing prior to the form publishing for users.
Edit Properties
New Form Code: Enter a unique code with a prefix to distinguish the code is for a form. i.e. FRM_DATES
Existing Form Code: To create a new form and utilize the content blocks from an existing form, select a form from the dropdown list.
Title: Enter a title to display on the form.
Description: Enter an optional description for the form.
Internal Note: Enter an optional note for internal use. BEST PRACTICE: Use this field to identify the defaults used in the form, i.e. Year
Key Field Prompt: Enter a label to be displayed as the column header on the form selection step that will appear above the key fields selected.
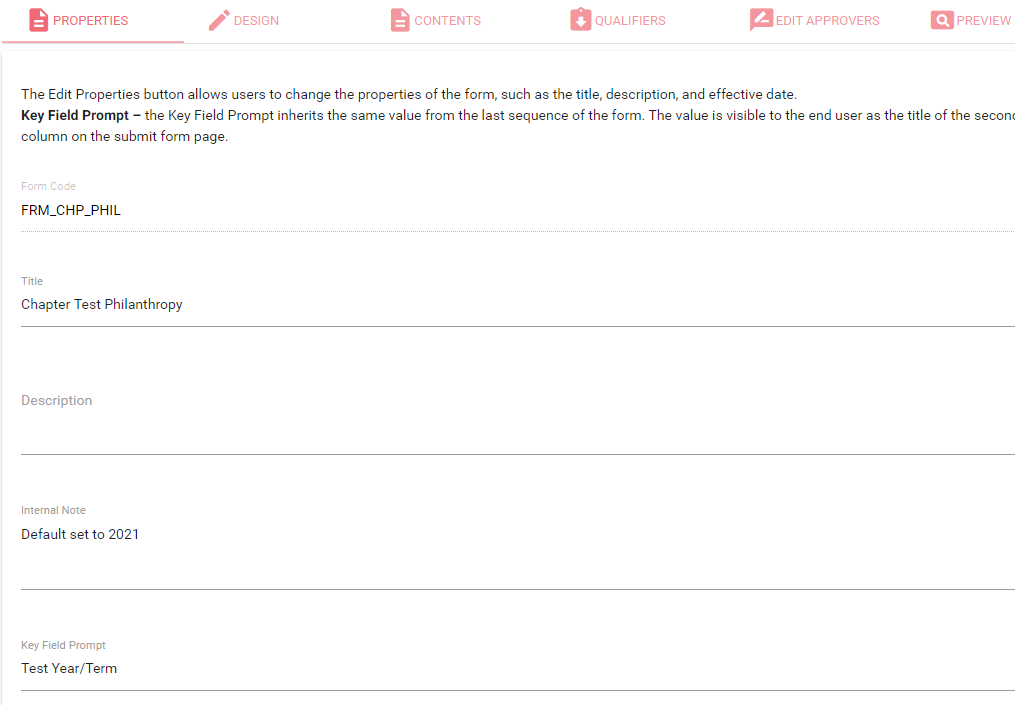
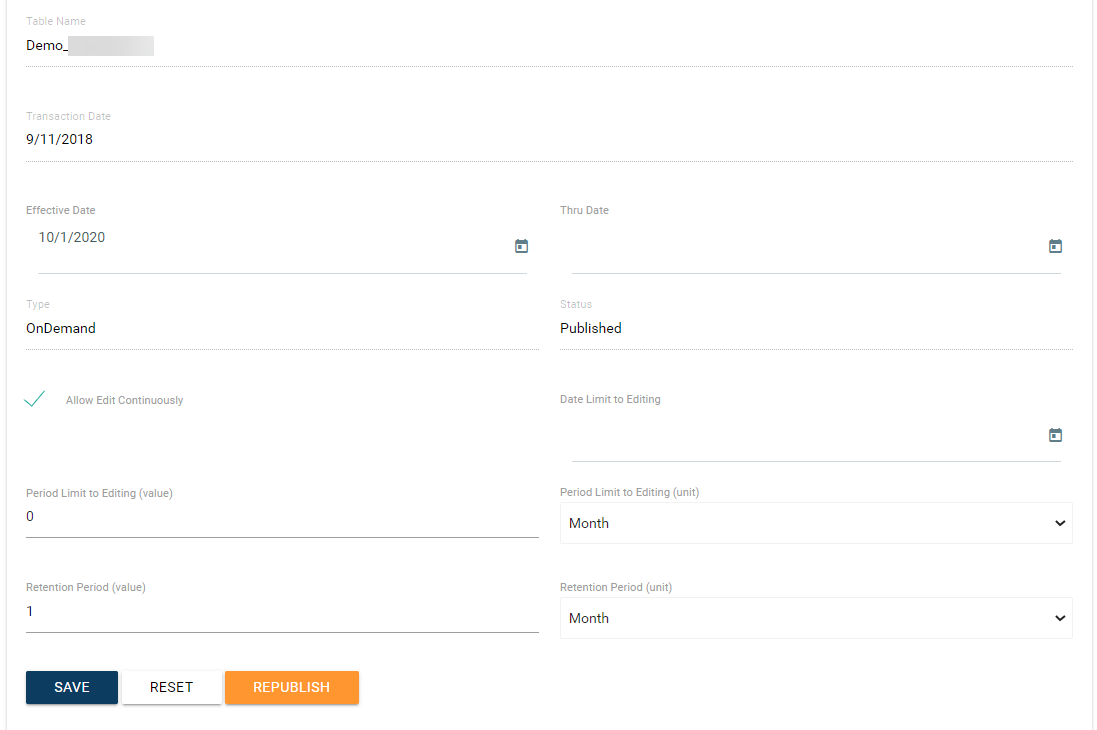
Table Name: Choose the iMIS table that will correspond to the form.
Effective: Set a date when the form should be published. You can leave blank or set for the future to make sure all form editing is complete prior to publishing. VERY IMPORTANT for Scheduled and Perpetual form types to set the Effective Date in the future so that you can update your default values prior to publishing.
Thru Date: Set a date when the form should be removed from the user's view in ICE. The form will be "archived" in ICE and not available for the user to select but the data will remain as normal in iMIS.
Type: Choose the form type: Schedule, On Demand, or Perpetual.
Allow Edit Continuously: Check this box if you would like a Schedule or On Demand form to have the ability to be edited after submittal.
Date Limit to Editing (new feature in 5.1!): this option allows you to specify a date when editing should no longer be available. Only applicable to forms that can be edited after submission.
Period Limit to Editing (new feature in 5.1!): this option allows you to specify a number of days/months/years when editing should no longer be available from date of submission. Only applicable to forms that can be edited after submission.
Retention Period: Enter a time period for when an On Demand form should be "archived." When the retention period passes, a submitted On Demand form will no longer be viewable by the user in ICE.
Example for Date Limiting for Editing Perpetual or Continuously Editable Forms:
In the below example, the form is set to not allow editing after 2 days from submission date

Day of submission
At 1 day
At 2 days
At 3 days
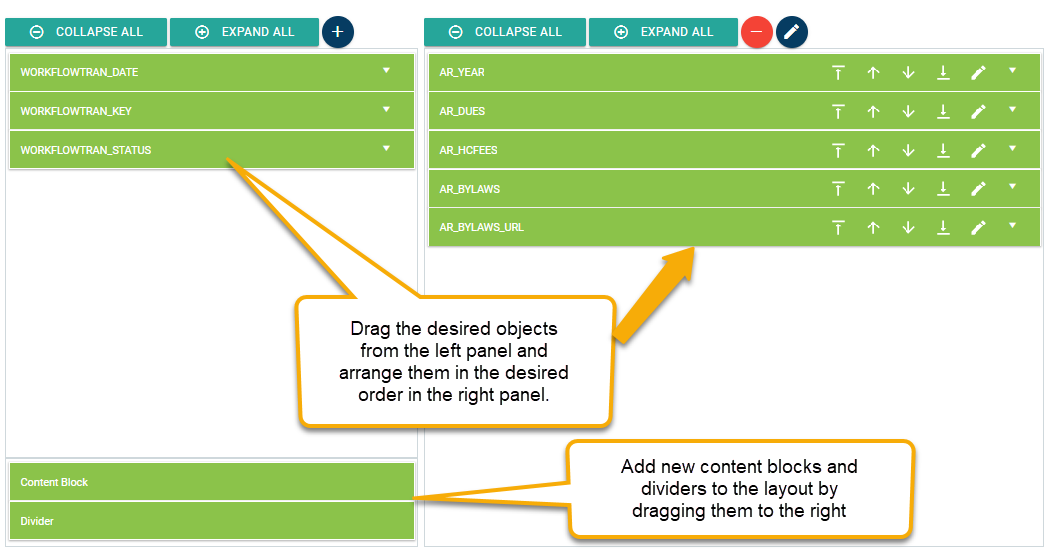
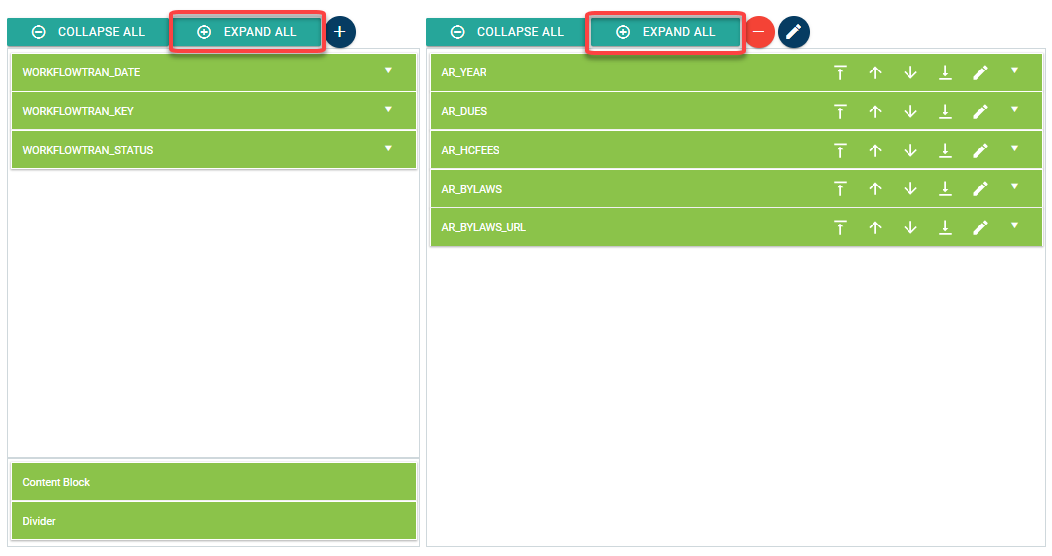
Edit Design
Add fields, content blocks or dividers to the form on the Edit Design tab
Double-click on selected fields, or select the pencil icon or click Expand All, in the Edit Design tab to open the properties window for each field:
Define the properties for your fields as needed:
Prompt: Change the field label from the predefined iMIS field label
Default Value: Set a default value for the field (if the field uses a validation table, enter the code from the table)
Decimal Digits: Set the number of decimal places
Rows: Set the height of the field window
Columns: Set the length of the field window
Min Value: Set the minimum values for number fields
Max Value: Set the maximum values for number fields
Date Range Validation (new feature in 5.1!): If a date field, you can specify the possible days before today or after that the date field should allow.
0/0 would require the date be today
0/30 would require the date to be today or within 30 days from today
30/30 would require the date to be today or 30 days in the past or future
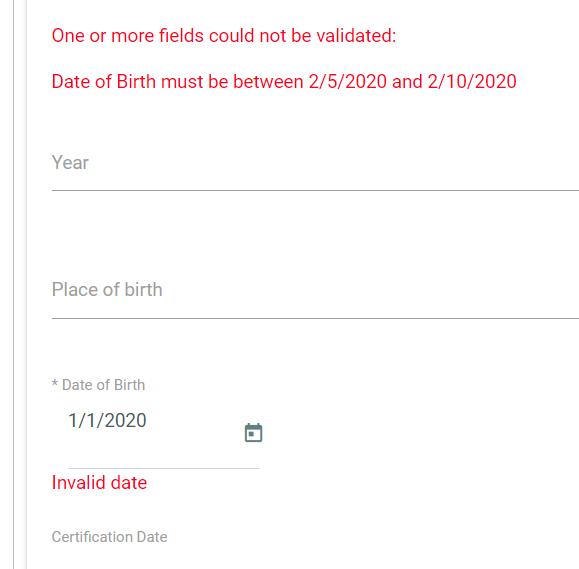
In this example, we specified 2/3 for the date range validation.

When completing the form, if we enter a date that is outside this range, we are presented with a message
Is Required: Make this field required
Is Key Field: Make this a key field that will appear on the form selection page for the user (multiple fields can be set to be key fields) i.e. academic year and/or term are common key fields
Is Visible: Uncheck if you do NOT want the user to see the field. Ideal when adding a default value that you do not want visible by the user but you want the value to be in the iMIS table.
Is Read Only: Make the field read only. Ideal when adding a default value that should not be changed by the user.
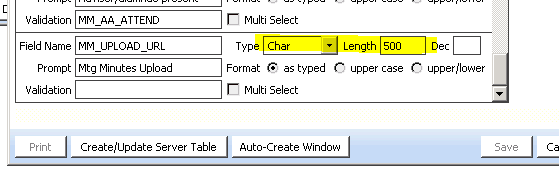
Is File Upload Field: Select if the field should be used for uploading a file
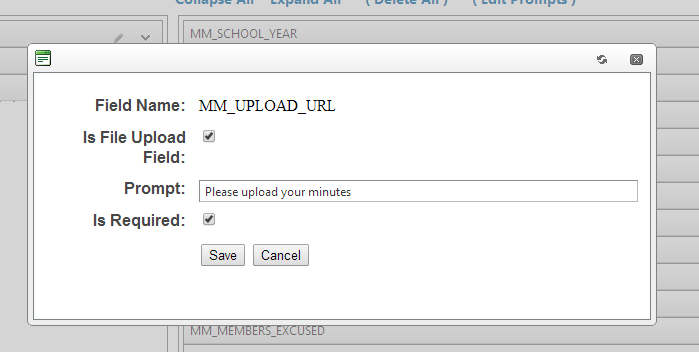
Note: For file upload fields, the field in iMIS must be a Char field with length of 500 to store the URL.
Use RegEx Validation to restrict the values allowed in the field. This should include a formula to identify the preferred format of the data. Examples of RegEx code include:
*U.S. Zip Code{*}: ^\d\{5\}(?:\[-\s\]\d\{4\})?$
12345
12345-6789
12345 1234
\\ *Canadian and U.S. Zip Code:* ^\d\{5\}-\d\{4\}|\d\{5\}|\[A-Z\]\d\[A-Z\] \d\[A-Z\]\d$
LDU 9Z0
07430
60175-1234
\\ *Phone Number:* ^(\+\d{1,2}\s)?(\d{3})?[\s.-]\d{3}[\s.-]\d{4}$
123-456-7890
(123) 456-7890
123 456 7890
123.456.7890
+91 (123) 456-7890
The RegEx Error Message will display at the bottom of form page when a user attempts to submit a form with values that are not allowed by RegEx Validation
The RegEx Text will display next to the field when the attempts to enter a value not allowed by RegEx Validation
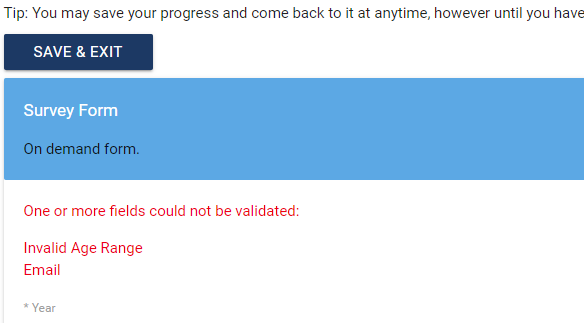
Form Validation
(new feature in 5.1!) The message that appears when a form is incomplete, i.e. required fields not completed, appears at the top of the form. This makes it easy for the user to see since the screen will refresh and they will be sent to the top of the form.
To test:
Select a form with required fields or fields with validation.
Attempt to submit the form without completing the required fields.
Note the message at the top of the form notating the missing components.
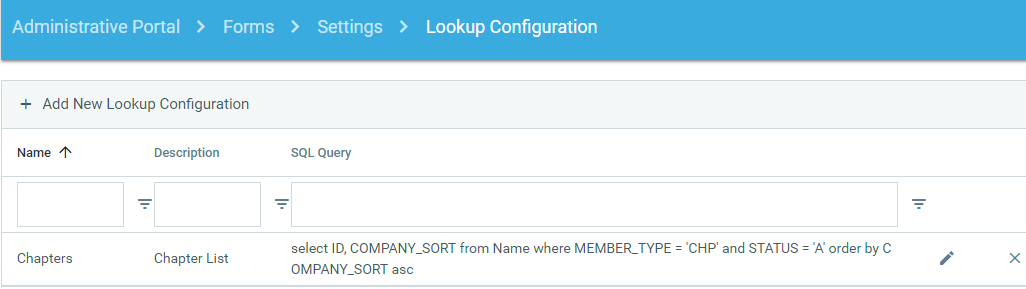
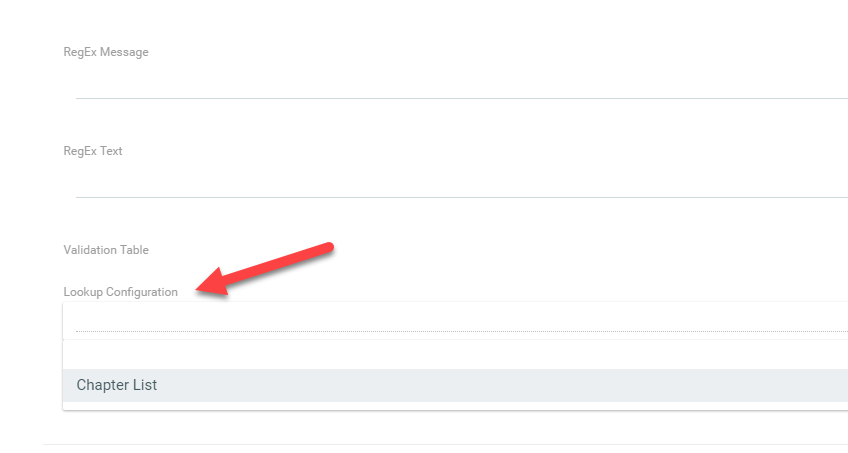
Lookup Validation Lists
Ability to use dynamic SQL to produce options in a drop down list within an ICE form.
Within ICE Admin, go to Forms > Settings > Lookup Configuration
To create a drop down list, select add New Lookup Configuration
Give the configuration a name to be used for selection when setting up the form field
Enter a description for internal purposes (optional)
Insert a SQL query that will produce the results that you want to appear in the drop down list.
If your query produces more than one field, the first field will be considered the code field and the second will be the description field. The description field will be the field to appear for selection in the form. The code will be written to the field in iMIS when the form is submitted.
If the list should be unique to the chapter, add a parameter for Chapter ID = @contactid (same process for reports). Example SQL to produce list of member names:
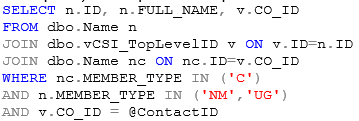
You can also use @UserID to represent the current authenticated user ID.
Select Validate to confirm the results are as expected.
Select Insert
Go to Edit the Form where you would like to add the drop down list
Go to Edit Design
Select the Field to edit
Select the configuration from the drop down list.
Select the Preview tab to confirm the drop down list appears as expected. Note that the list will not produce in the Preview screen when it requires the chapter ID parameter.
Edit Content Blocks
Edit content blocks associated with the form using the Edit Content Blocks tab. You will see the default content blocks associated with each of the five steps in the form submission process, as well as the "rules" area. Any additional content blocks you added to the form during editing will be listed as well: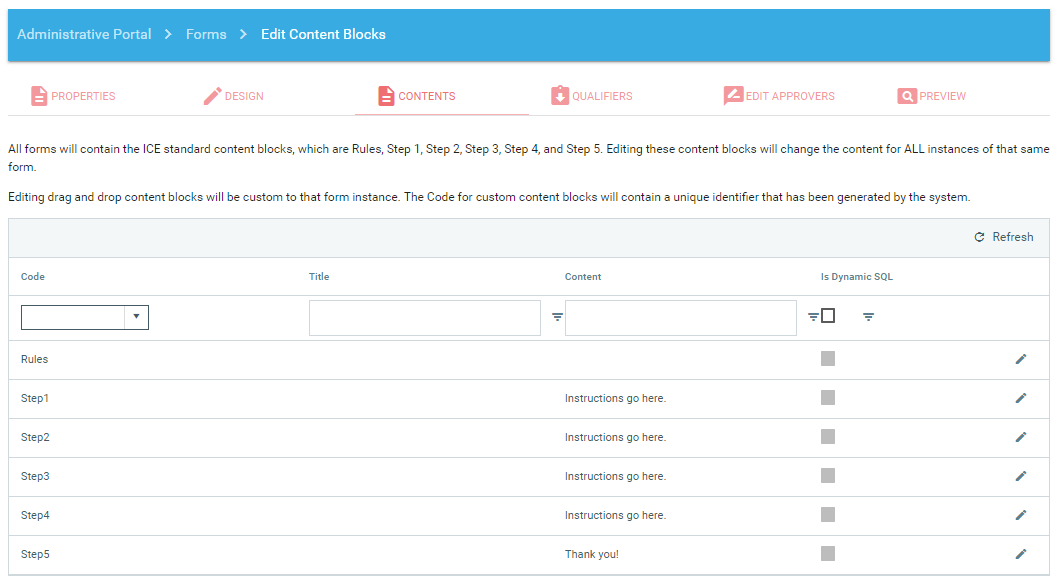
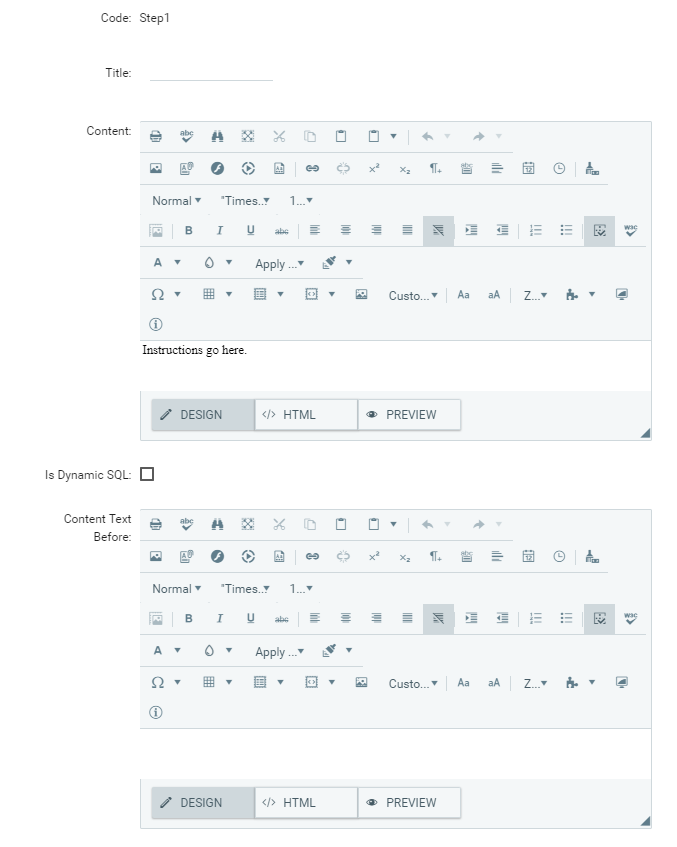
Click the Edit button next to the content block you wish to edit.
Populate the Title and Content areas and click Update to save your changes.
Note: In cases where you are using multiple manage members or manage leaders pages that utilize the same content blocks, you can copy, rename and edit the content blocks for the additional page.
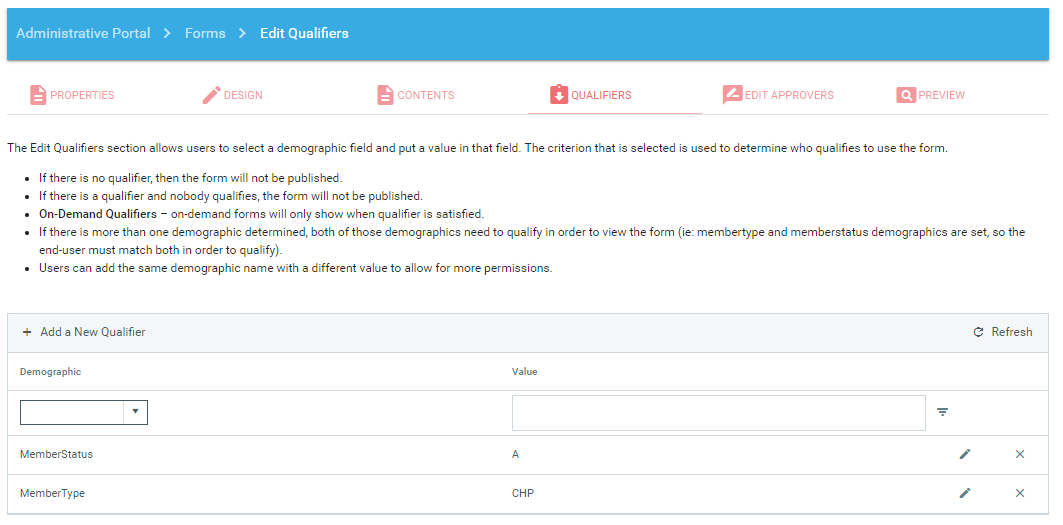
Edit Qualifiers
Qualifiers are used to identify what record types in iMIS will have a row created to capture the form data.
Click Add a New Qualifier
Choose the desired Demographic from the drop down menu, i.e. MemberType.
Qualifiers of the same demographic type will be treated as "OR" relationships and those with different demographic types will be treated as "AND" relationships.
Enter the desired Value, i.e. CHP (collegiate chapter member type)
Click Insert to save
Repeat as needed to add more qualifiers
Warning
If you change the qualifiers for a perpetual or scheduled form, make sure to republish the form so the rows in iMIS will be created for the new records that now qualify for the form.
Edit Approvers
An Approver Group defines who must review the form, during the workflow process, before it is submitted. If you do not set any Approver Groups then the approval step will not be required for the form.
Common setup for approval process: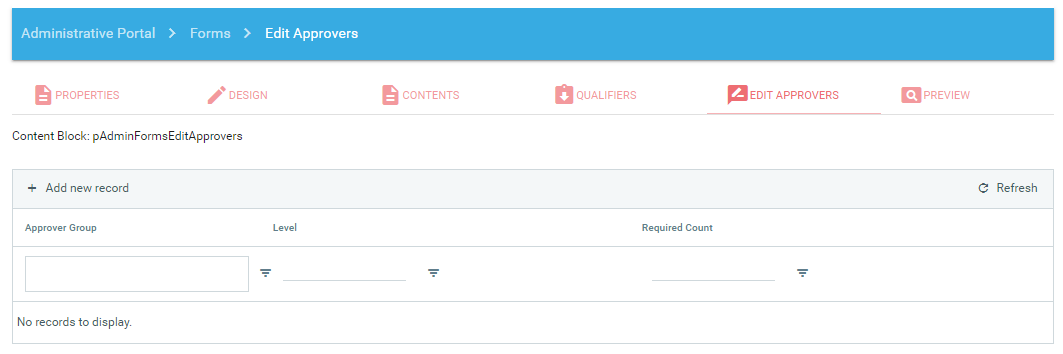
Preview
Finally, you can see what your form will look like for the user on the Preview tab. You can also enter values and submit the form to test any validation you may have added. (Nothing will be written to iMIS.)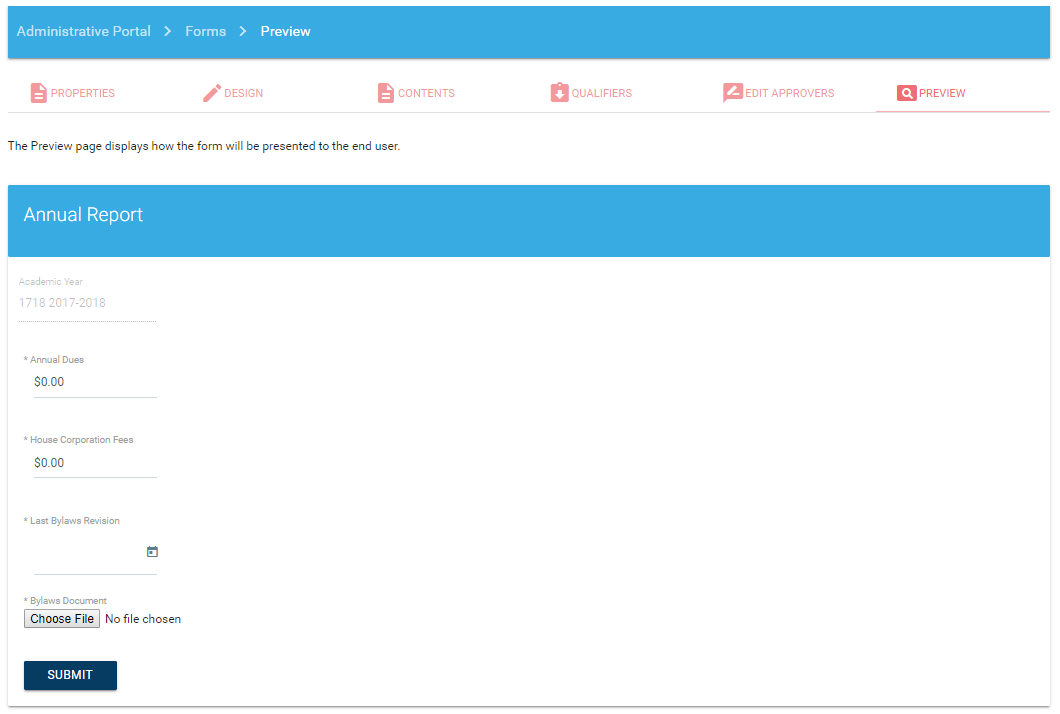
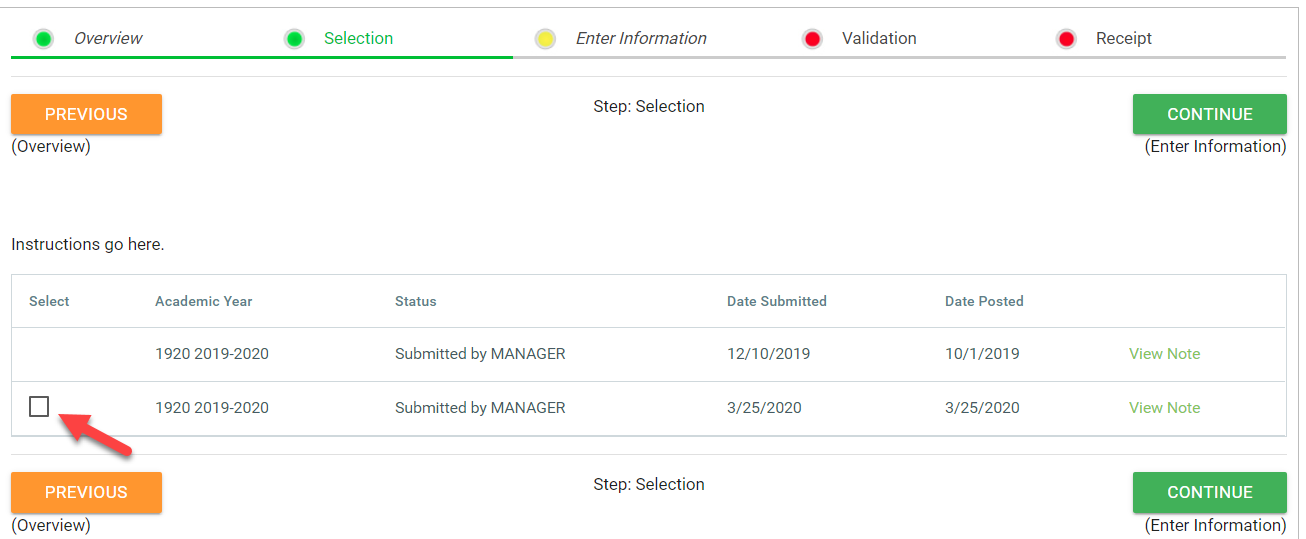
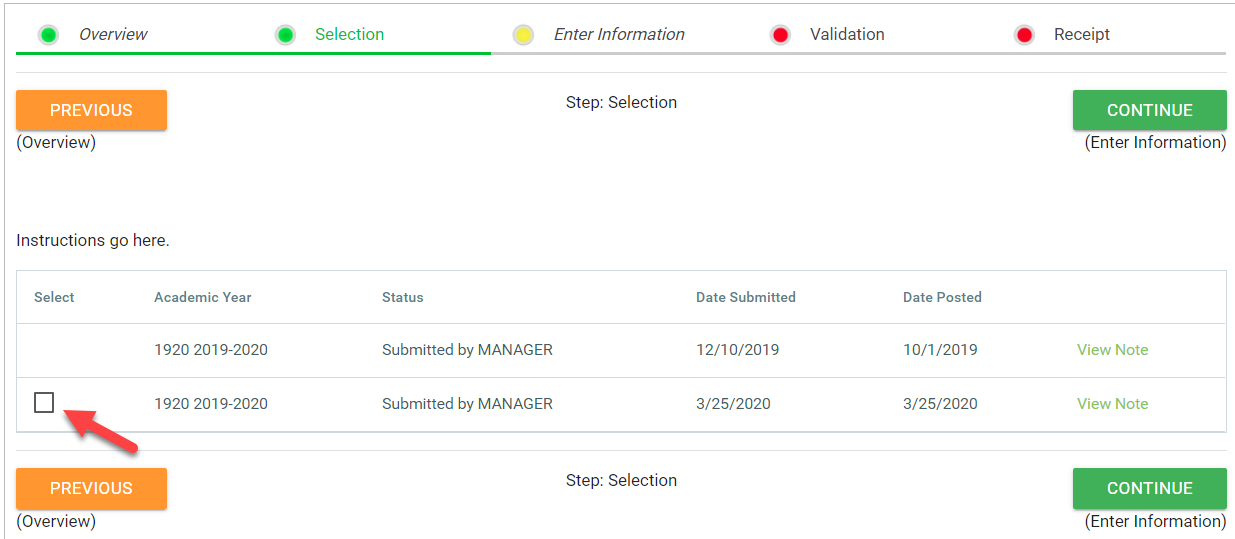
Form Status
When a form is submitted and the user returns to the form submission page quickly, they are presented with a message showing that the form is being processed. The message for all forms was showing a "Pending Approval." Since all forms may not have an approval component, the message is confusing to the user.
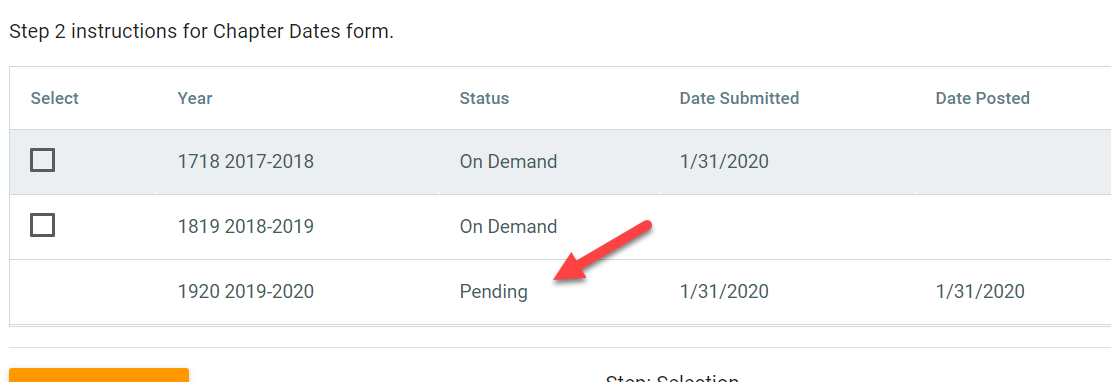
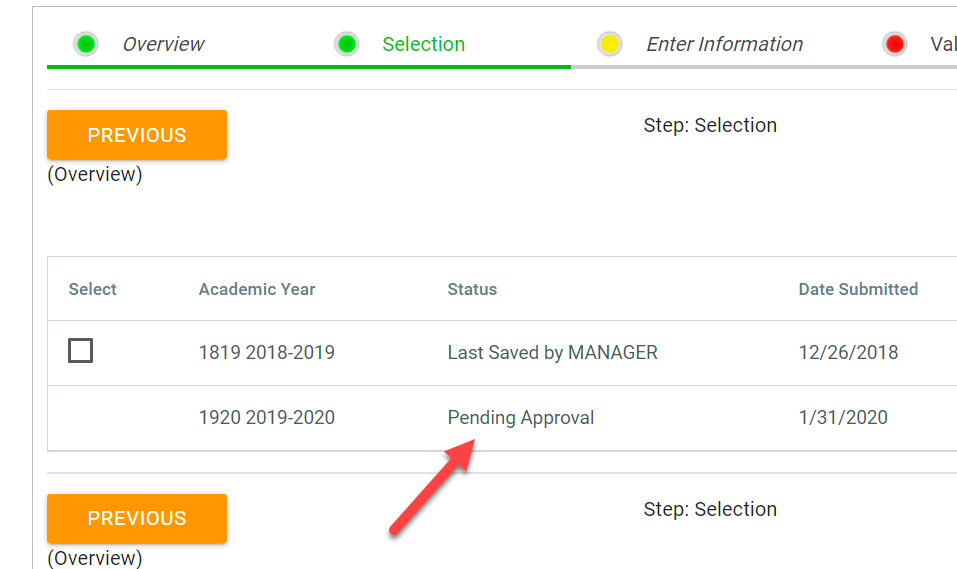
(new feature in 5.1!) The message has been updated to show "Pending" for forms that do NOT have approval requirement while the system is processing the submission. The message will show "Pending Approval" if the form has an approval requirement until it is processed in the Manage Approvals area.
Example of form without approval requirement
Example of a form with approval requirement
Tasks » Publish
"Schedule" and "Perpetual" forms must be published. A SQL stored procedure performs the publishing part, including creating new demographic rows. Forms will publish on the effective date but the publish task can be selected if you would like the form published immediately (effective date must be in the past). 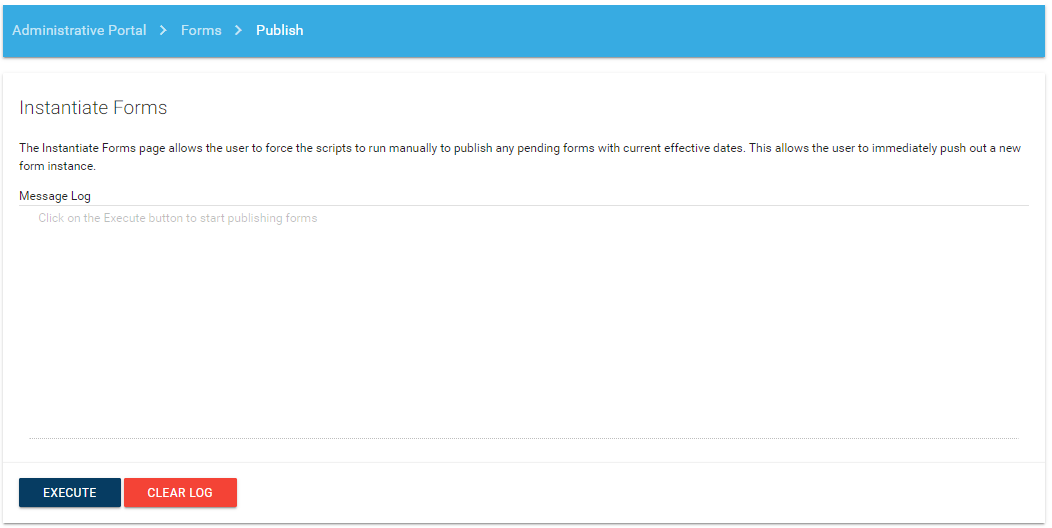
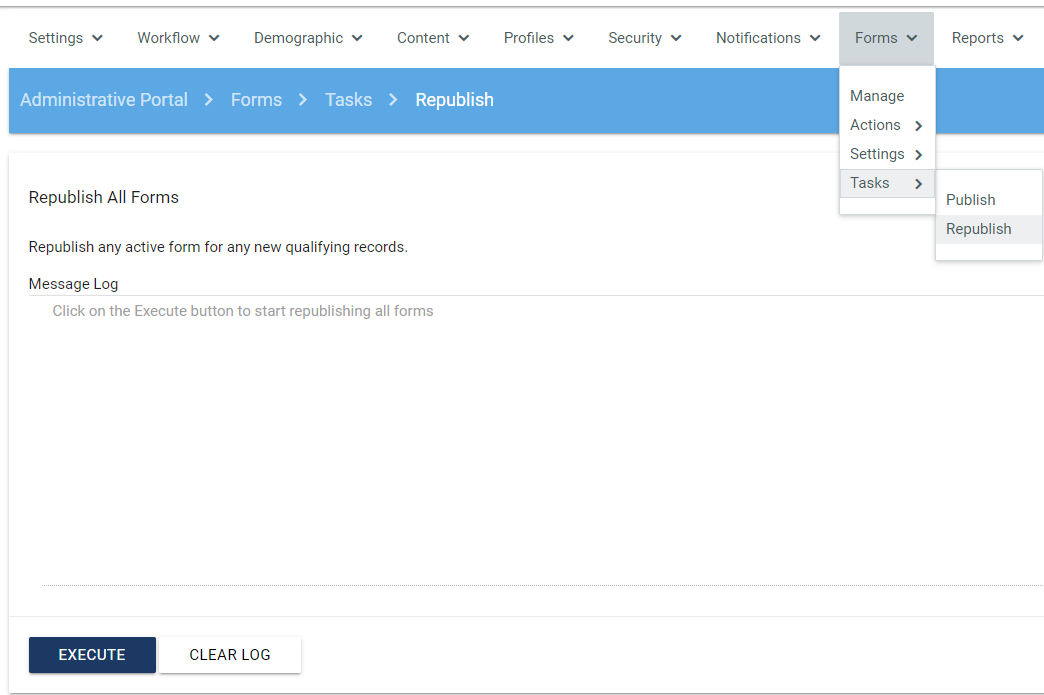
Republish All Forms
This feature allows the ICE Admin to republish all active forms to any new chapters that now meet the qualifiers. Republishing a form will only produce rows for new chapters that now meet the qualifiers. Republish does NOT create duplicate forms for a chapter that already has a published instance of the form you selected.
See new menu option in ICE Admin under Forms > Tasks > Republish
Note
The Publish option has been moved under the Forms > Tasks menu.
Adding forms to sitemap
Go to the Sitemaps menu option and choose the appropriate sitemap
Add or edit a menu item where the form should be located.
Edit the applicable properties on the right side:
URL: This is the URL for the form. The URL for the form is determined by the Form Code.
Example form code: FRM_DATES
Example URL: ~/ICE/Actions/SubmitForm.aspx?formcode=FRM_DATES 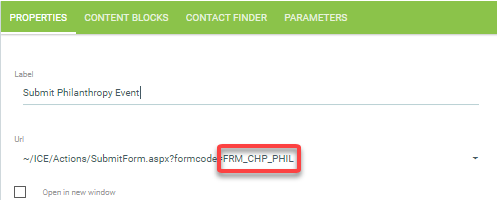
Sitemap Parameters
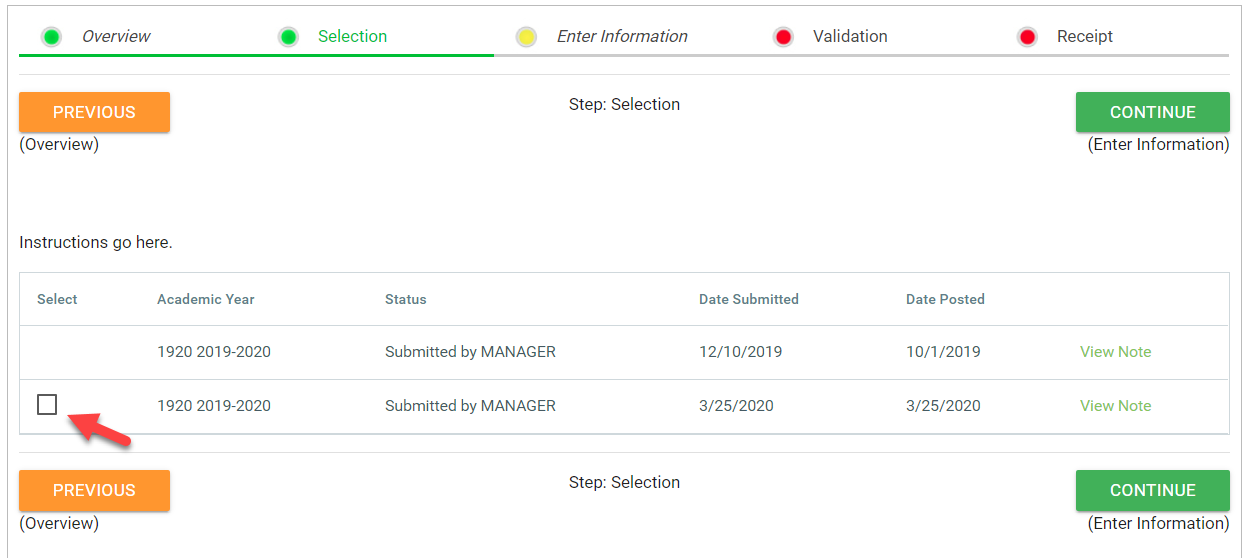
5 Steps Process
You can override the default labels of each step when submitting a form by adding your preferred labels here: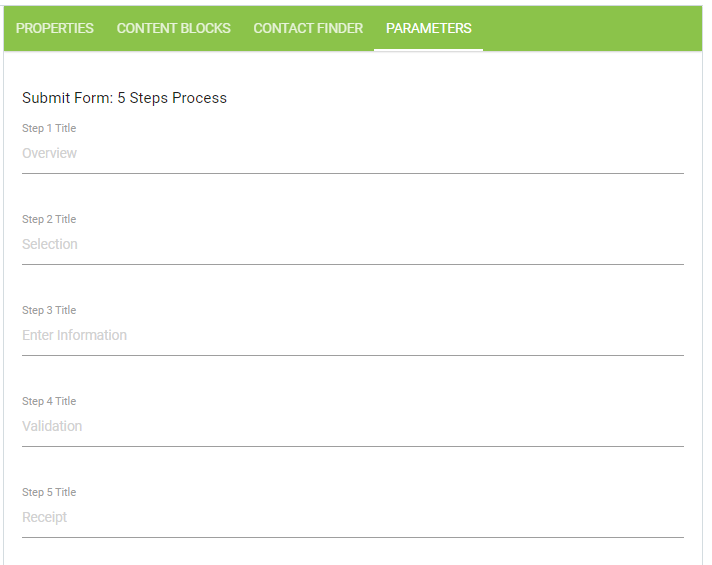
Skip Step Options
You can select to Skip some of the 5 steps when a user submits a form.
Skip Step 1: Overview - When the user selects the form from the sitemap, they will be routed to "step 2" to select the form for submission.
Skip Step 5: Receipt - When the user selects continue after completing the form, the validation step will show the data entered and signature will not be required.

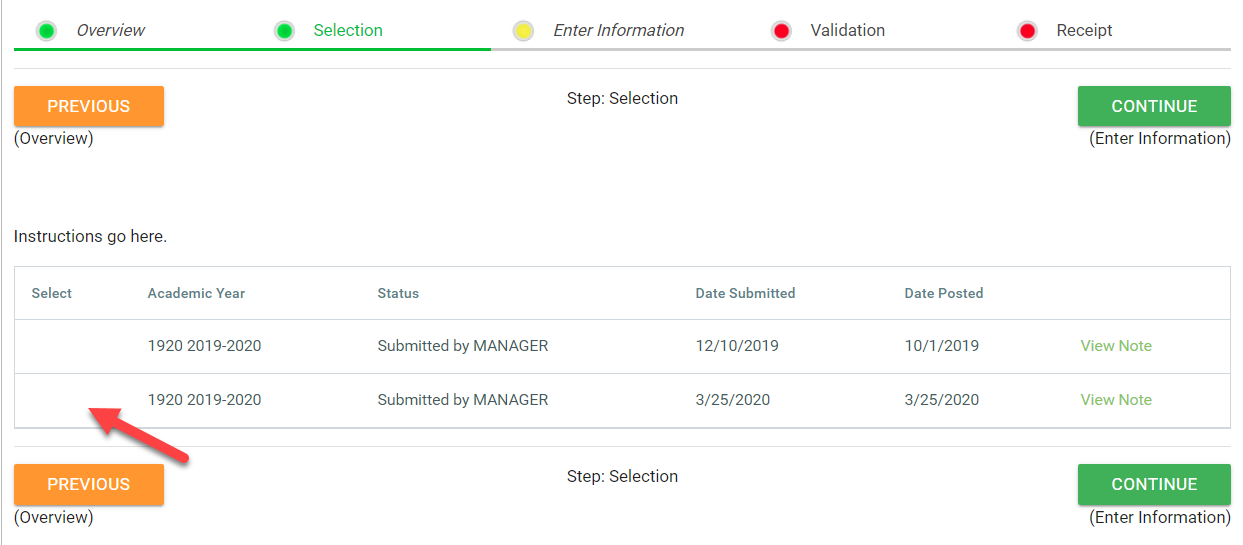
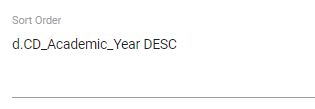
Sort Order
You can specify how the forms should be sorted on the selection step when a chapter is submitting a form. This is most beneficial for On Demand forms where there may be many previously submitted forms.
In ICE Admin, go to edit Sitemap where the form is located
Select the Parameters tab
Sort Order is new parameter
A demographic field from the form or a workflow transaction field can be used as the sort method
You can add ASC (ascending) or DESC (descending) after the field name to sort per your preference.
When saved, the system will produce an alias for the field if you did not specify one. (i.e. d for demographic field, w for workflow field)
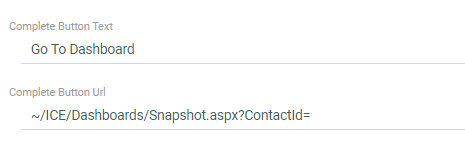
Complete Button
You can specify the Text of the "finish" button that by default shows "Go To Task Center". You can also specify the URL that a user should be routed to when the complete button is selected.