Registration iPart
Installation of the iPart
Download the Registration iPart Here
You must be signed in to CSI Cloud Dashboard (cloud.csiinc.com) to be able to download the iPart.
The iPart will yield a 404 error if the event it is being used with is not set to Active.
Open the Proper Folder
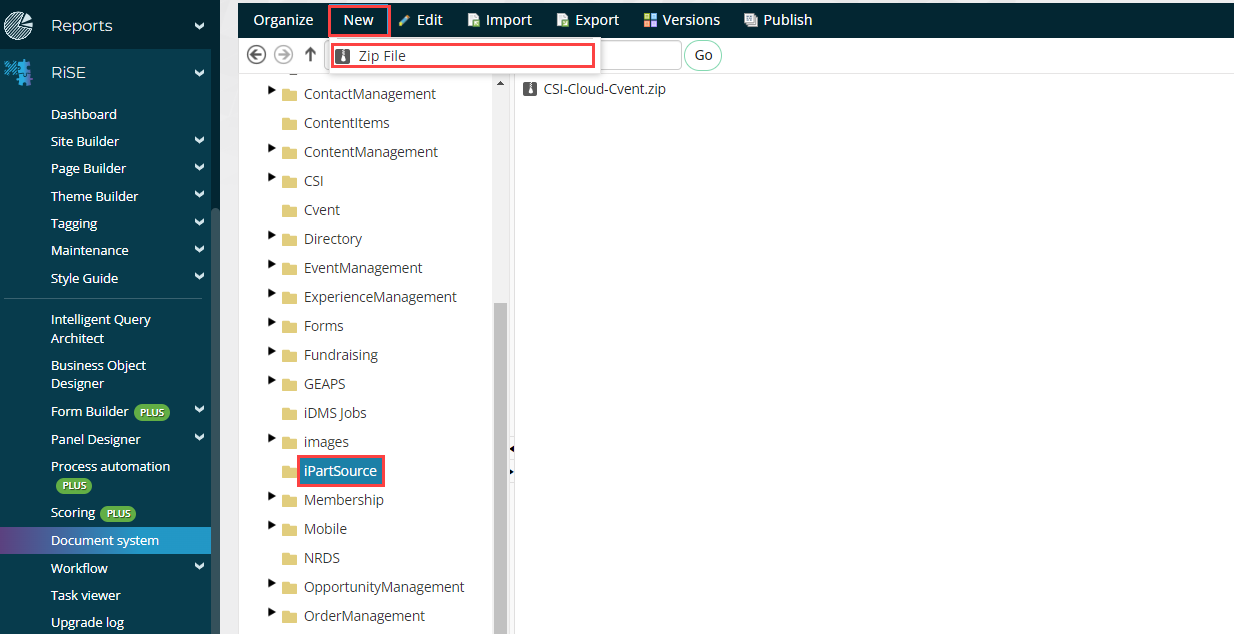
Navigate to the menu item RiSE > Document System and select the proper folder.
In iMIS 2017 - Select the ContentItems folder
In iMIS EMS - Select the iPartSource folder (if the folder does not exist, you must create it)
Select New > Folder and name it iPartSource.
Note that if you do not see the folder option, you may need to refresh. Optionally, you can make the folder have Zip Files only.


Upload the iPart File
Click on the menu item New > Zip File to open the Document System window.
Browse and select the iPart Zip file and click Upload.
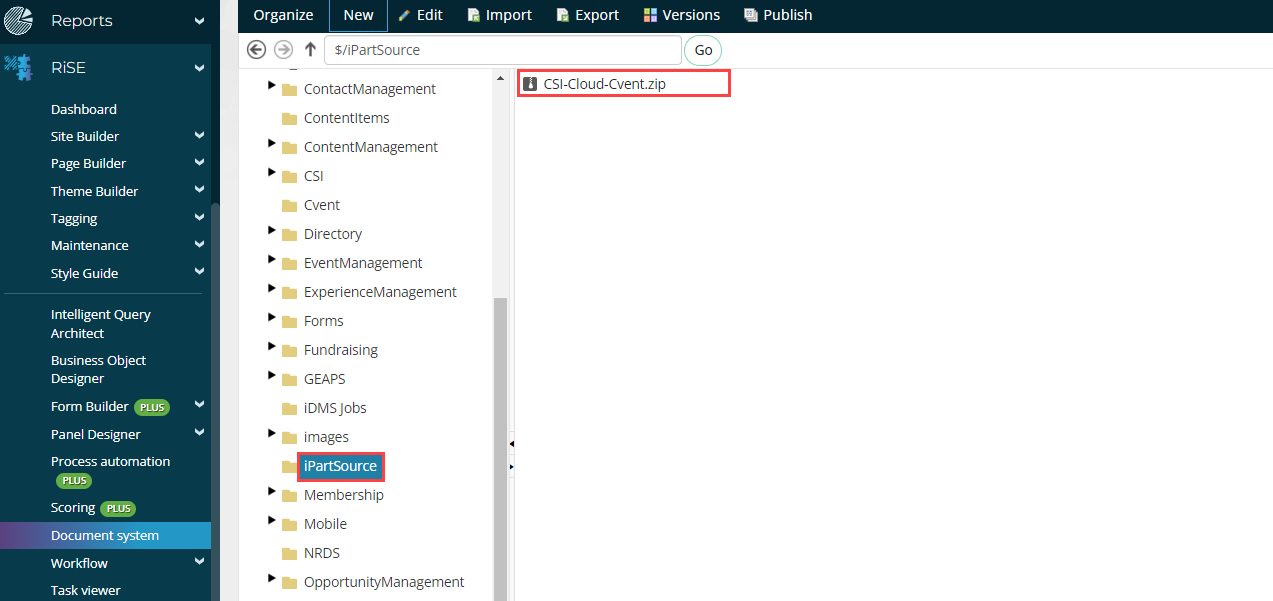
Confirm iPart file is uploaded
Confirm the ContentItems/iPartSource folder now contains the uploaded iPart ZIP file.
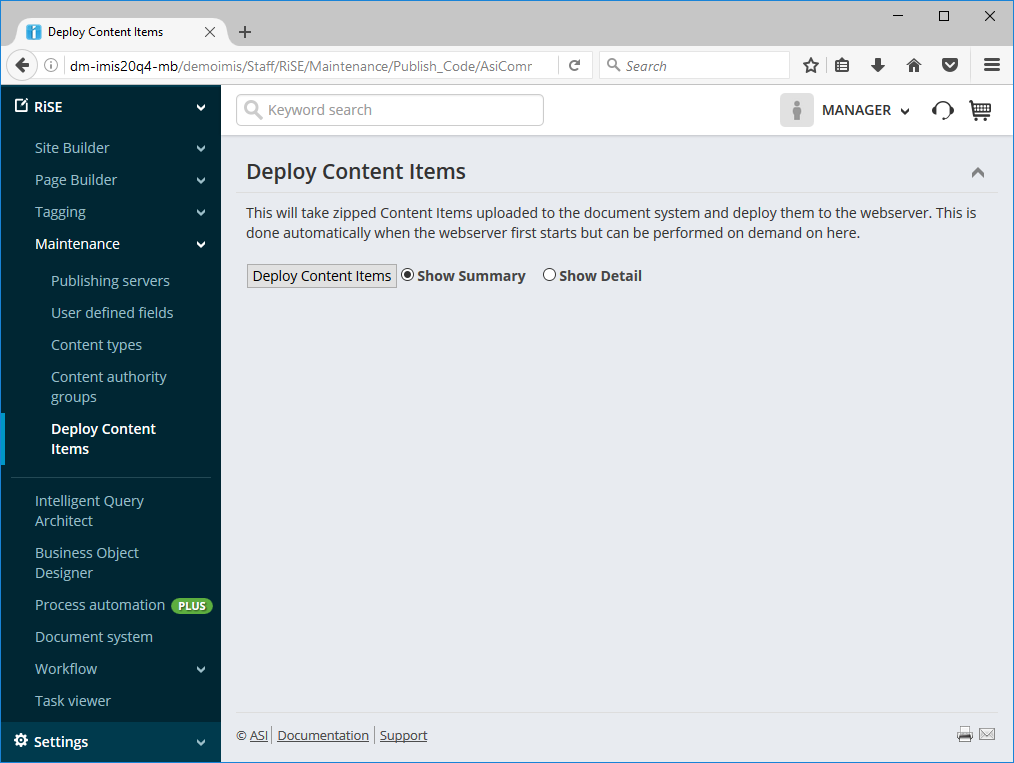
Deploy Content Items
This step is only required for iMIS 2017 users.
Navigate to the menu item RiSE > Maintenance > Deploy Content Items
If the Deploy Content Items menu item is not available, edit the sitemap and allow the menu to be visible.
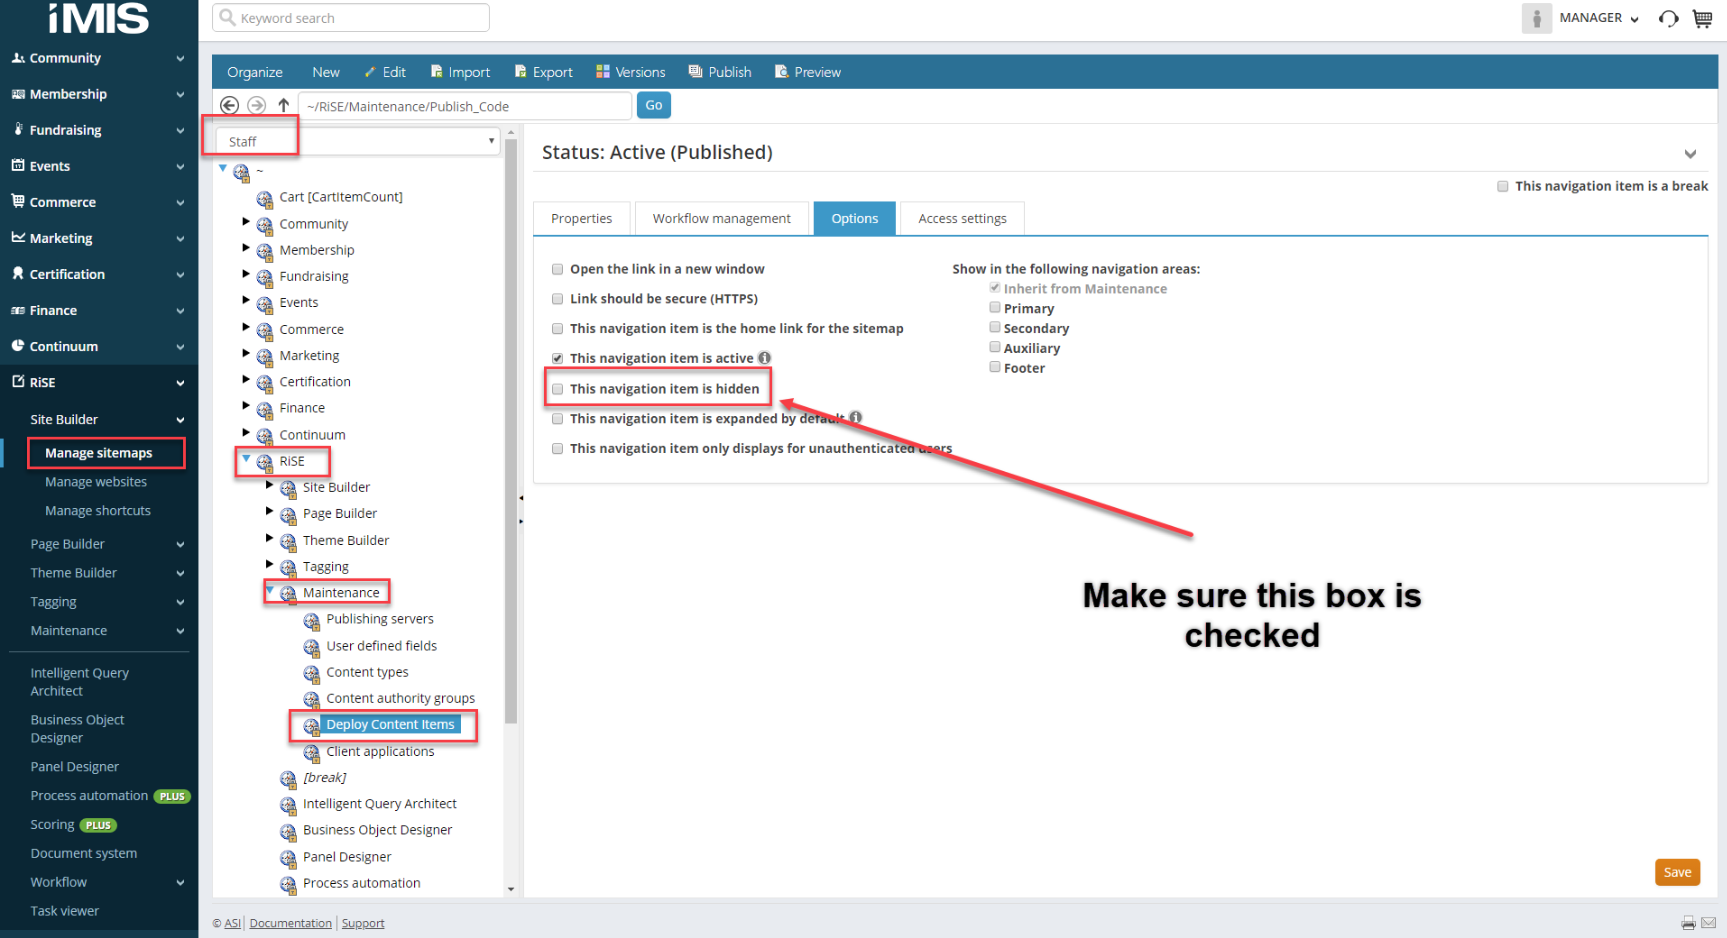
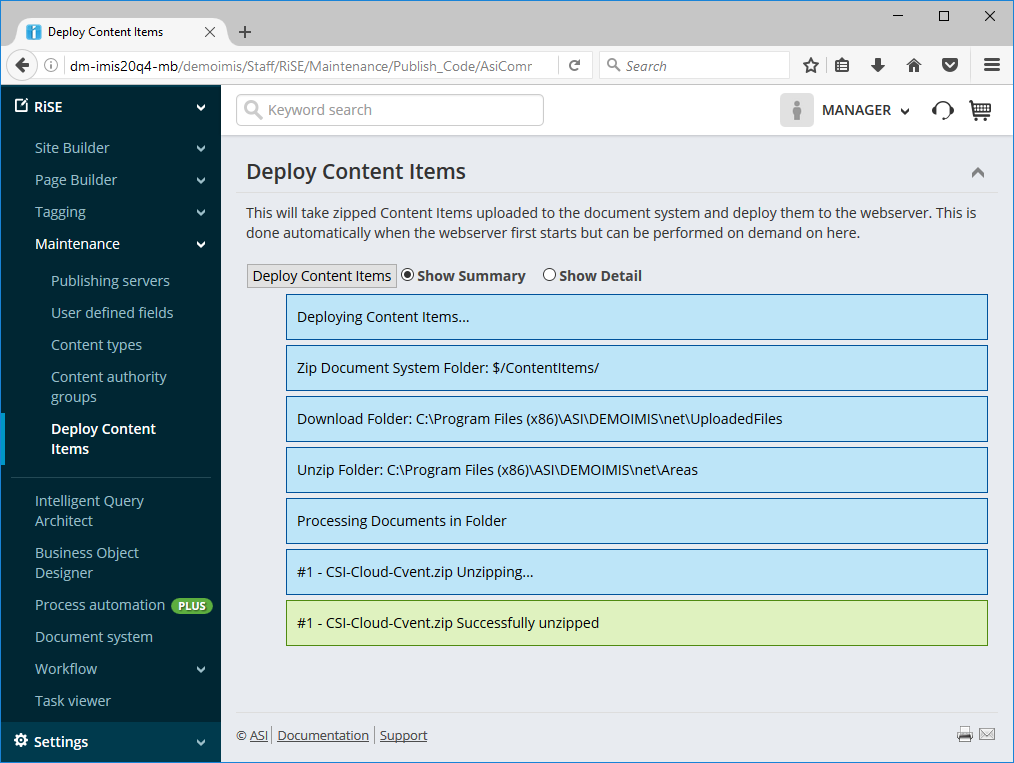
Deploy the content items.
Confirm the deployment. Review the output messages and validate the iPart has been successfully unzipped. Please note where the folder where the files were unzipped.
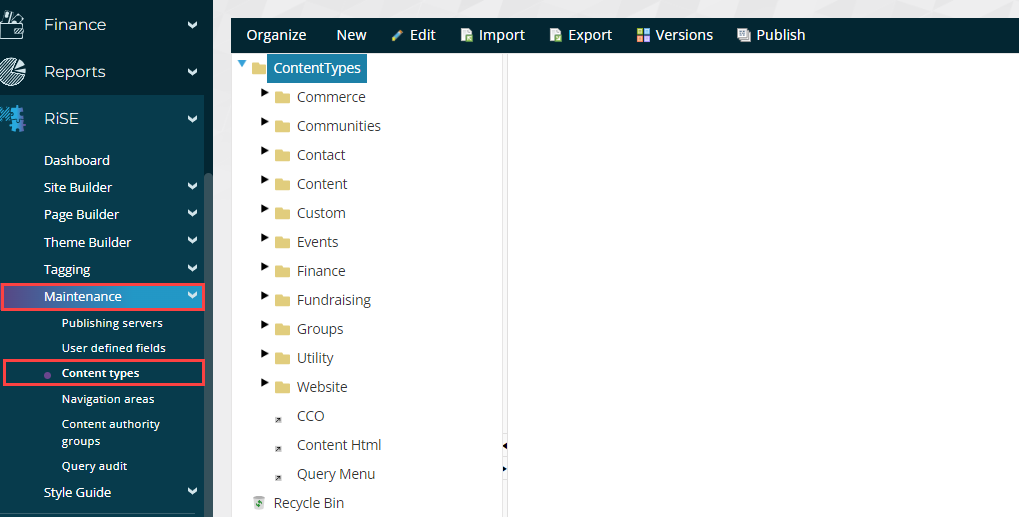
Open The Content Types Page
Navigate to the menu item RiSE > Maintenance > Content Types
Open The Content Types Window
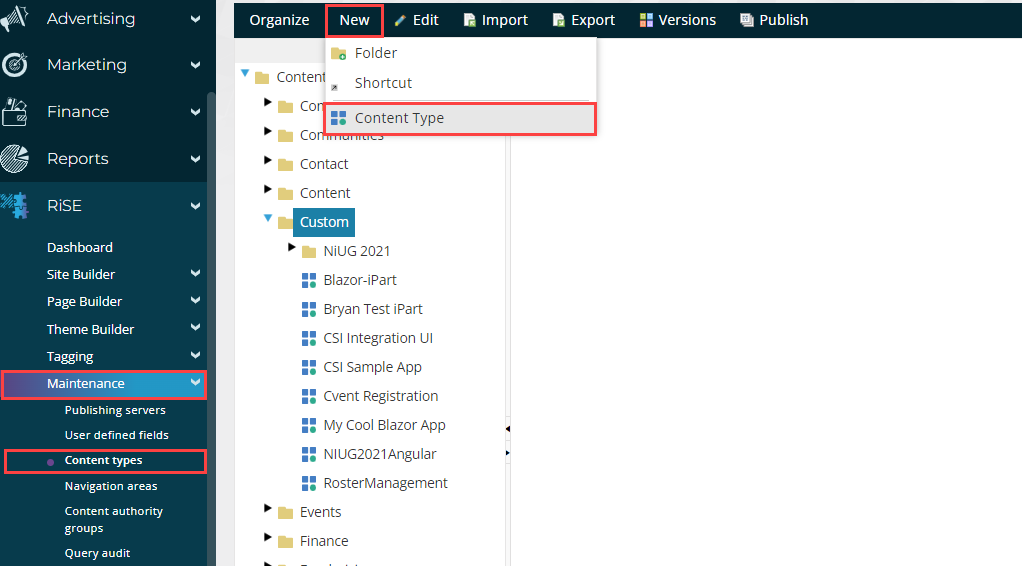
Under RiSE> Maintenance > Content types, navigate to where you would like the iPart to reside. Click on the menu item New > Content Type to open the Content Types window.
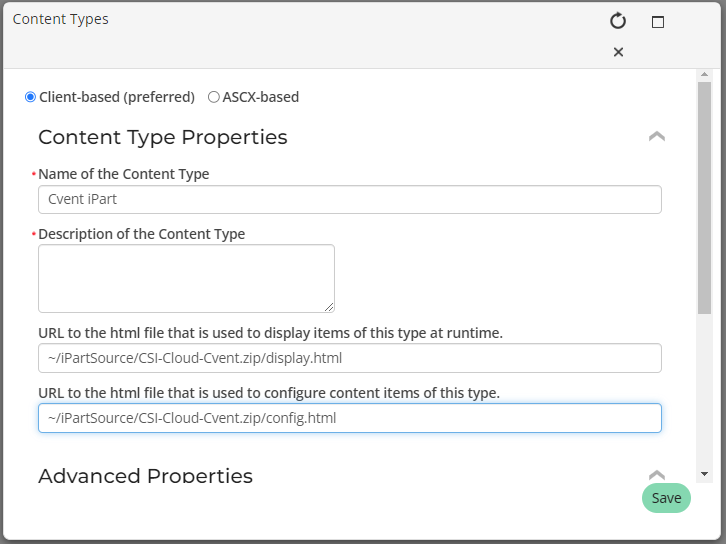
Enter iPart Content Type and Properties
Click on the Client-based (preferred) option.
Fill out the name, description (optional), and URL fields.
For iMIS EMS:
Path to the display.html file, for example ~/iPartSource/CSI-Cloud-Cvent.zip/display.html
Path to the config.html file, for example ~/iPartSource/CSI-Cloud-Cvent.zip/config.html
For iMIS 2017:
Path to the display.html file, for example ~/areas/CSI-Cloud-Cvent/display.html *URL to the html file that is used to configure content items of this type.**
Path to the config.html file, for example ~/areas/CSI-Cloud-Cvent/config.html
In iMIS EMS, this URL is where the zip file can be found. This is likely the listed link, as an iPartSource folder should have been created.
In iMIS 2017, this URL is where the zip file was unzipped. It should also likely be the listed URL.
Click save.
Configuration of the iPart
Place the iPart on a Page
The iPart must first be on a page to be configured.
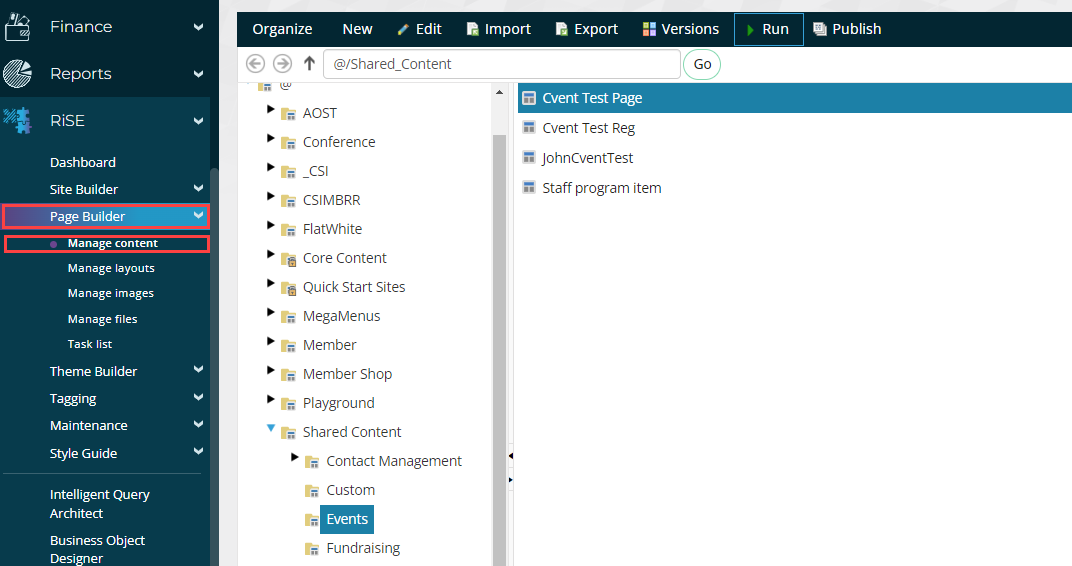
Navigate to the page you want the link to Cvent’s registration page to be on via RiSE > Page Builder > Manage content. Double click the page to open.
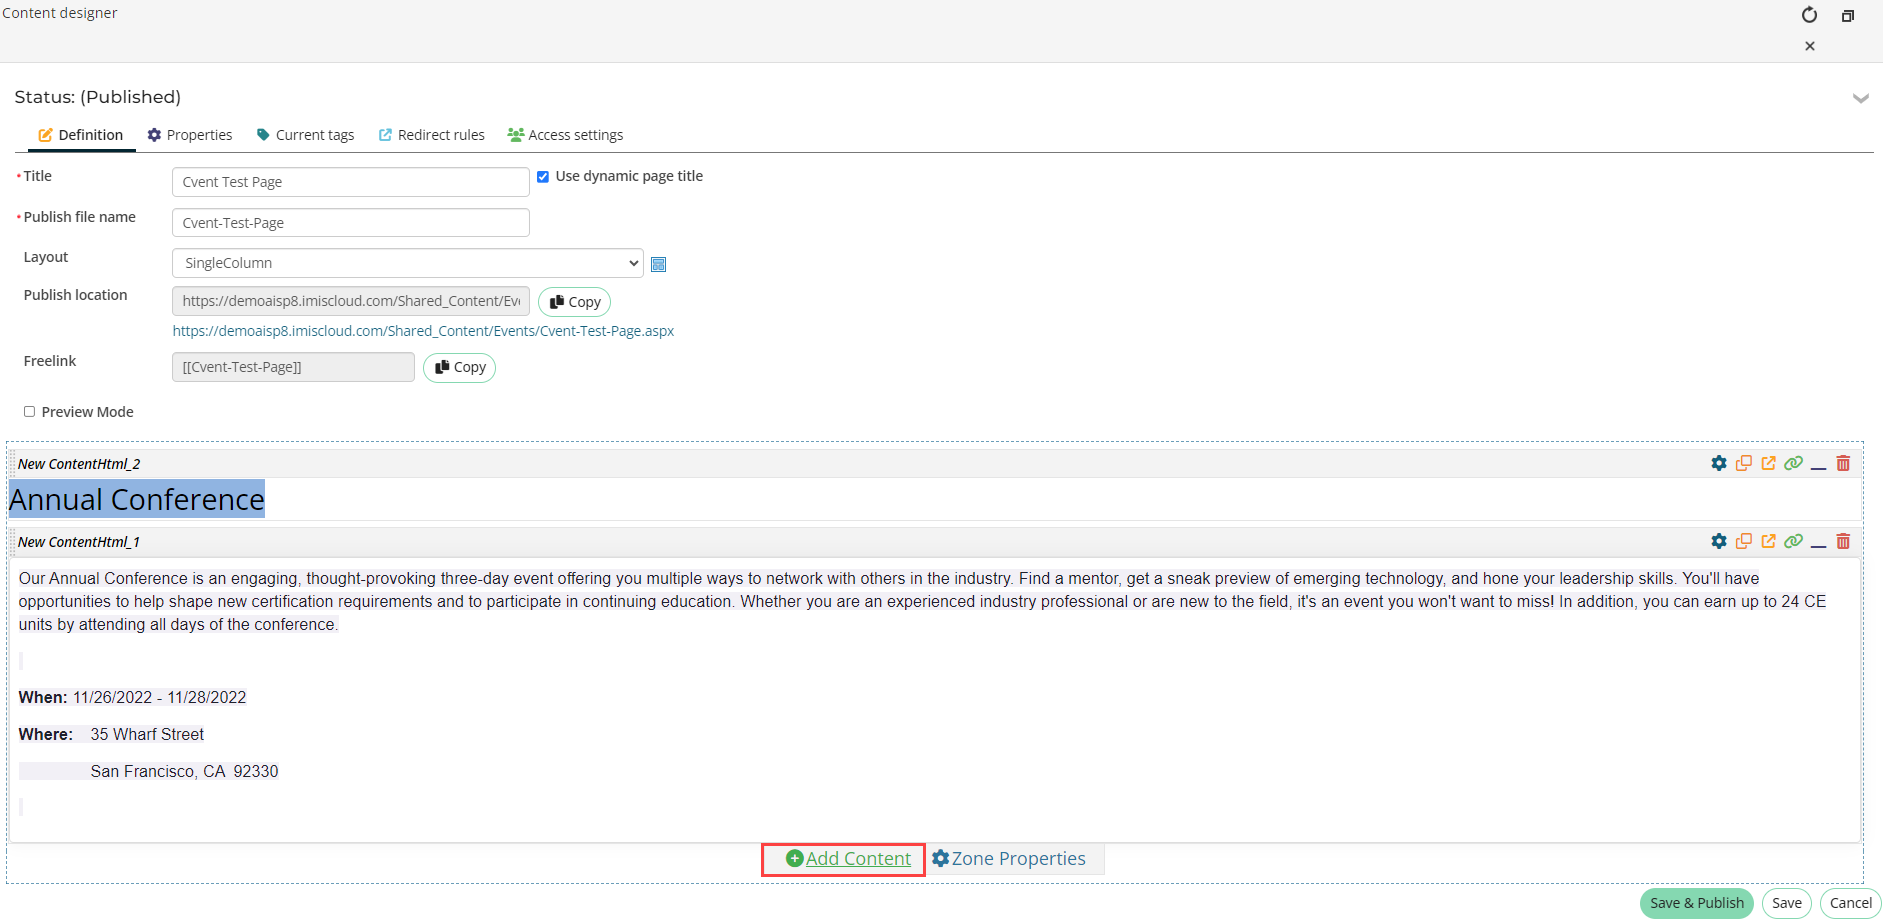
Scroll to the bottom of the Content designer and click on Add Content.
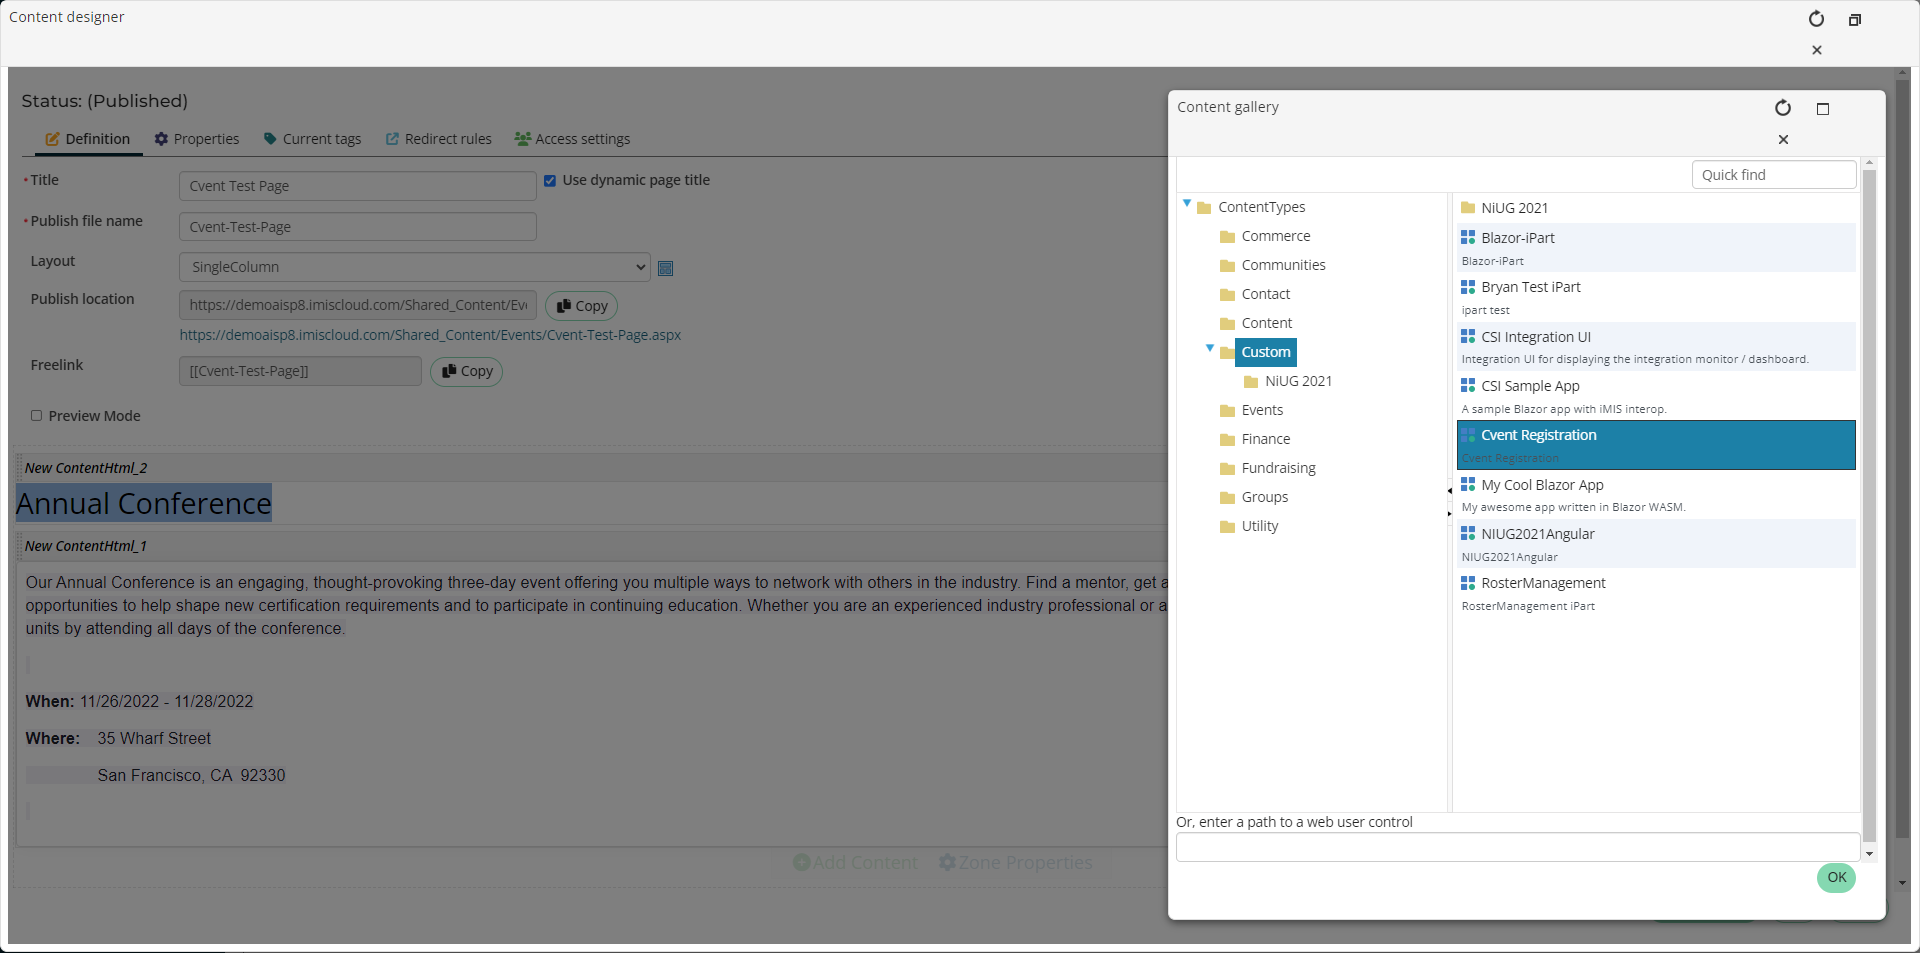
Select the iPart from the directory. Then select OK.
Open the Configuration Window
The configuration window should automatically open. If it did not, click on the gear icon.
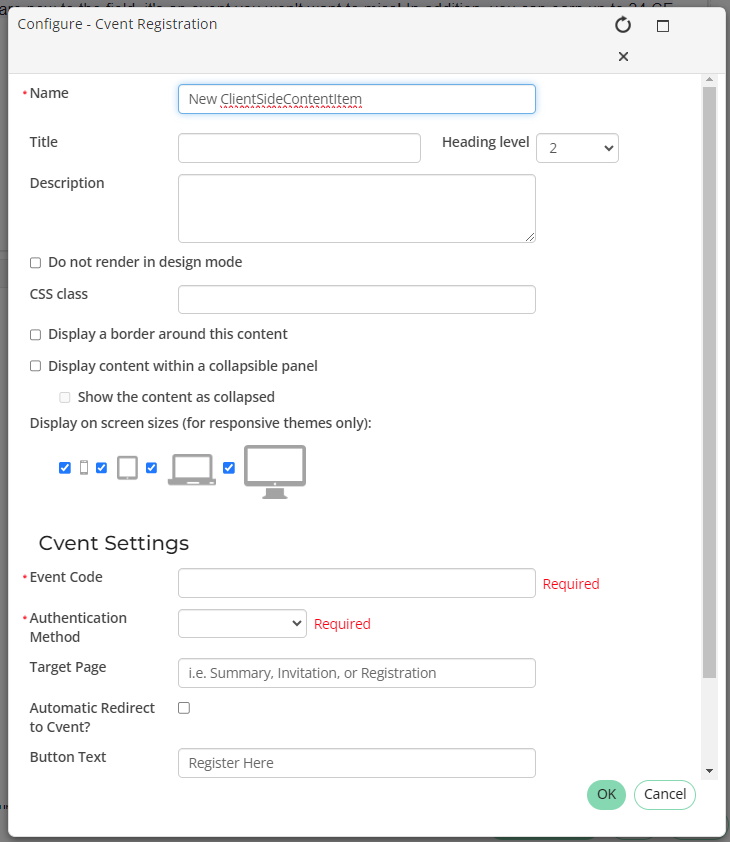
Configure the iPart
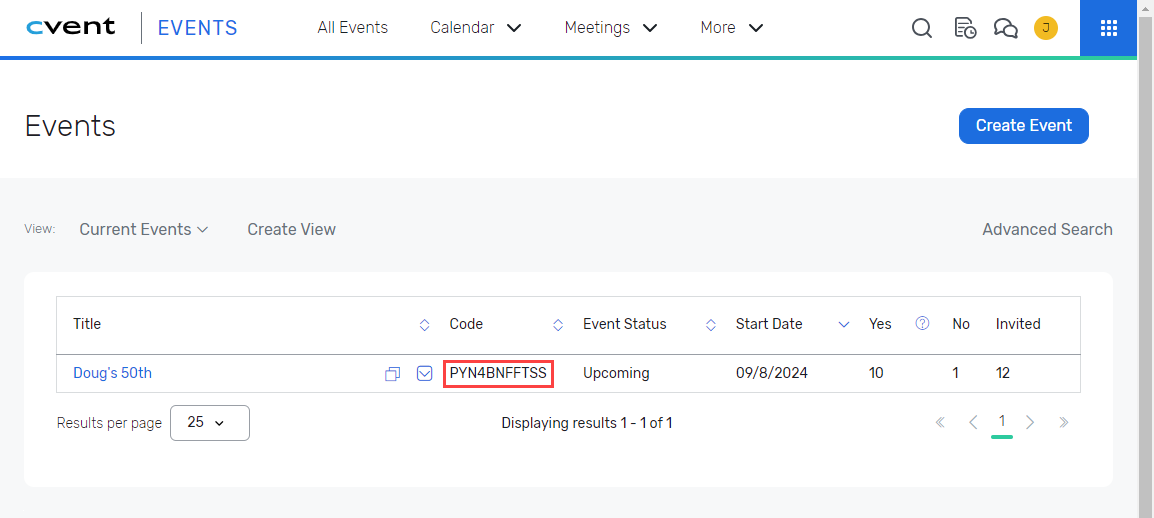
Event Code - The specific code for a Cvent Event, for example: 2GNQVNC5PWB
If you have already integrated Cvent and iMIS via CSI cloud, this link will display the possible event codes.
In Cvent, the event codes can be found under the Events page.
The event must be set to active for the iPart to work properly.
Authentication Method - How the potential registrants will be authenticated using the IQA
Credentials - Requires users to authenticate with their iMIS web login and password (preferred method)
Email Address - Allow users to authenticate by entering their email address
Automatic Redirect to Cvent - This will redirect the user to Cvent (they will not have to hit "Register" button.
Target Page: This will set the landing page in when redirected to Cvent (Summary, Invitation, Registration)
There are two properties used for the Registration Prompt:
Button Text - Text value to display for the registration button. The default value is: "Register Here"
Button CSS Class - Cascading Style Sheets class value set on the registration button. The default value is: "TextButton"